EasyManua.ls Logo

Tradesman DP12LW - User Manual

Tradesman DP12LW
22 pages
Print Icon
To Next Page IconTo Next Page
Loading...
OWNER’S MANUA
L
TRADESMAN
®
12” DRILL PRESS WITH LASER GUIDE
Model # DP12LW
Item #52759
CAUTION – FOR YOUR OWN SAFETY
READ YOUR OWNER’S MANUAL THROUGH COMPLETELY AND CAREFULLY BEFORE
ATTEMPTING TO SET-UP OR OPERATE YOUR NEW POWER TOOL.
ALL OPERATORS OF THIS EQUIPMENT SHOULD READ AND UNDERSTAND ALL SAFETY
RULES PRINTED ON THE MACHINE AND THIS OWNERS MANUAL BEFORE USE.
Your new Power Tool is a well built, carefully inspected versatile machine, capable of giving
you many years of dependable service. Your power tool comes complete in one carton with
a minimum of first assembly and setup required by you. When unpacking , be sure to check
all packages and packing material for loose parts before discarding.
NOTICE:
On the nameplate of your machine you will find the serial number and MFG date code of
your unit. Please record these numbers on this manual cover for future service reference.
SERIAL #
MFG. DATE # PURCHASE DATE: .
POWER TOOL SPECIALISTS, INC E.WINDSOR,CT 06088 PRINTED IN CHINA
www.tradesman-rexon.com
1-800-243-5114

Questions and Answers

  • S
    sarahmacdonaldAug 15, 2025
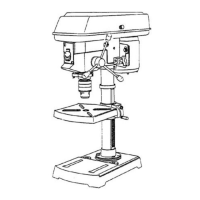
    Why is my Tradesman DP12LW Power Tool making a noisy operation?
    • R
      Roy BoyleAug 16, 2025
      If your Tradesman Power Tool is operating noisily, several factors could be the cause. It might be due to incorrect belt tension, which requires adjustment. Alternatively, the spindle could be dry and in need of lubrication. A loose spindle or motor pulley could also be the source of the noise; in this case, check the tightness of the retaining nut on the spindle pulley and tighten the set screw in the motor pulley.
  • F
    Frederick WilsonAug 18, 2025
    What to do if my Tradesman Power Tool drill bit burn?
    • F
      fjonesAug 18, 2025
      A drill bit burn in your Tradesman Power Tool can occur due to several reasons. You may be using an incorrect speed, so try changing it. The chip might not be coming out of the hole, so remember to retract the drill frequently to clear chips. The drill bit could also be dull, meaning it needs resharpening. Additionally, you might be feeding too slowly, so ensure you feed fast enough to allow the drill to cut. Finally, the drill might not be lubricated, so make sure to lubricate it.
  • M
    Mrs. Erika RodriguezAug 21, 2025
    How to fix excessive drill bit runout or wobble in Tradesman DP12LW?
    • C
      Cynthia ColonAug 21, 2025
      Excessive drill bit runout or wobble in your Tradesman Power Tool can stem from a few issues. The drill bit might be bent, so try using a straight one. Worn bearings could also be the cause, requiring replacement. Ensure the drill bit is properly installed in the chuck. If the chuck itself isn't properly installed, it should be reinstalled correctly.
  • M
    Mary ComptonAug 25, 2025
    Why is drilled hole not round with Tradesman DP12LW?
    • T
      Tracy LangAug 25, 2025
      If your Tradesman Power Tool is producing drilled holes that aren't round, it could be because the hand grain in the wood or lengths of cutting flutes and/or angles are not equal, so you should resharpen the drill bit correctly. Another possibility is that you are using a bent drill bit, which should be replaced.
  • C
    Christopher MartinAug 27, 2025
    What to do if drill bit binds in workpiece of Tradesman DP12LW?
    • H
      Heidi VasquezAug 28, 2025
      If the drill bit binds in the workpiece with your Tradesman Power Tool, it could be due to the workpiece pinching the drill bit, or excessive feed pressure, so you should support or clamp the workpiece. Another cause may be improper belt tension, which requires adjustment.
  • A
    Angela MullenAug 30, 2025
    Why is workpiece torn loose from hand using Tradesman DP12LW Power Tool?
    • K
      Kyle KennedyAug 30, 2025
      If the workpiece is torn loose from your hand while using the Tradesman Power Tool, it is likely not supported or clamped properly. To resolve this, ensure you support or clamp the workpiece securely.
  • M
    Miss Elizabeth GrantSep 2, 2025
    How to prevent wood splinters on underside using Tradesman DP12LW?
    • G
      Gregory CookSep 2, 2025
      Wood splintering on the underside while using your Tradesman Power Tool is likely due to the absence of backup material under the workpiece. To prevent this, use backup material.
  • R
    Renee OliverSep 5, 2025
    What to do if the laser guide will not turn on Tradesman DP12LW?
    • B
      Brian MoralesSep 6, 2025
      If the laser guide on your Tradesman Power Tool won't turn on, the batteries might be dead, so replace them with new AAA batteries. Alternatively, the battery contacts may need adjustment; tap the outside of the bottom and side of the laser housing lightly with the butt end of a screwdriver.
  • C
    Christopher Vaughn Jr.Sep 8, 2025
    Why chuck will not stay attached to spindle of Tradesman DP12LW Power Tool?
    • D
      Daniel BeckSep 8, 2025
      If the chuck won't stay attached to the spindle of your Tradesman Power Tool and falls off during installation, it's probably due to dirt, grease, or oil on the tapered inside surface of the chuck or on the spindle’s tapered surface. Clean the tapered surfaces of the spindle and chuck hole using a non-petroleum cleaning solvent to remove all dirt, grease, and oil.
  • M
    Mary RhodesSep 12, 2025
    How to adjust quill return speed on Tradesman DP12LW Power Tool?
    • F
      fdixonSep 12, 2025
      If the quill on your Tradesman Power Tool returns too slowly or too fast, the spring likely has improper tension, so you should adjust the spring tension.

Summary

Product Specifications

Warranty

Power Tool Safety

Read and Understand Manual

Emphasizes reading the entire manual before operating the tool.

Keep Guards in Place

Ensures guards are in place and functional for safe operation.

Use in Safe Environments

Advises against using tools in damp, wet, or poorly lit locations.

Avoid Flammable Environments

Prohibits using power tools in areas with flammable liquids or gases.

Keep Work Area Clean

Stresses maintaining a clean and uncluttered work area to prevent accidents.

Keep Children Away

Ensures children are kept at a safe distance from the work area.

Do Not Force the Tool

Advises using the tool as designed for better performance and safety.

Use the Right Tool

Recommends using the correct tool or attachment for the job.

Wear Proper Apparel

Guides on appropriate clothing and footwear to avoid entanglement.

Wear Face;Dust Mask

Recommends wearing masks when drilling operations produce dust.

Disconnect Tools Before Servicing

Instructs to disconnect power before maintenance or accessory changes.

Prevent Unintentional Starting

Ensures the switch is off before plugging in the tool.

Use Recommended Accessories

Warns against using improper accessories that may cause injury.

Remove Keys and Wrenches

Advises removing all adjusting keys and wrenches before operation.

Never Leave Tool Unattended

Instructs to turn off and wait for the tool to stop before leaving it.

Never Stand on the Tool

Warns against standing on the tool to prevent injury.

Do Not Overreach

Emphasizes maintaining proper footing and balance during use.

Maintain Tools With Care

Recommends keeping tools sharp, clean, and lubricated for safety.

Check for Damaged Parts

Advocates checking for and repairing/replacing damaged parts before use.

Childproof Workshop

Suggests securing the workshop to prevent unauthorized use by children.

Operate Sober

Prohibits operating the tool under the influence of drugs or alcohol.

Manage Hazardous Dust

Recommends ventilation and dust removal for hazardous materials.

Always Wear Eye Protection

Mandates wearing safety goggles that comply with ANSI Z87.1.

Drill Press Safety

Bolt Drill Press Securely

Requires the drill press to be securely bolted to a workbench for stability.

Use in Dry Indoor Conditions

Specifies the tool is for indoor use only in dry conditions.

Wear Eye and Hearing Protection

Recommends eye protection and ear protection for dusty operations.

Avoid Loose Clothing and Jewelry

Warns against wearing loose items that can get caught in moving parts.

Do Not Drill Small Materials

Advises against drilling materials too small to be held securely.

Keep Hands Clear of Drill Bit

Stresses keeping hands away from the drill bit path during operation.

Use Correct Drill Bit Length

Limits drill bit length to prevent bending or breaking.

Avoid Specific Accessories

Prohibits the use of wire wheels, router bits, and other specific attachments.

Support Large Workpieces

Ensures large workpieces are fully supported at table height.

Always Use Clamps or Vise

Mandates using clamps or a vise for all operations, never freehand.

Check Workpiece for Foreign Objects

Ensures the workpiece is free of nails or other foreign objects.

Clamp or Brace Workpiece

Recommends clamping or bracing the workpiece to prevent rotation.

Secure Overhanging Workpieces

Advises securing or supporting workpieces that overhang the table.

Secure Work With Clamps;Vise

Emphasizes using clamps or a vise for secure work holding.

Fasten Drill Press Vise to Table

Instructs to always fasten the drill press vise securely to the table.

Ensure Clamps and Locks are Tight

Confirms all clamps and locks are tightened before drilling.

Lock Head and Table Support

Ensures the head and table support are securely locked before operation.

Clear Table Before Operation

Removes all objects from the table before turning on the drill press.

Jog Motor to Check Wobble

Suggests jogging the motor to check for bit wobble or vibration.

Allow Spindle to Reach Full Speed

Advocates letting the spindle reach full speed before starting to drill.

Do Not Set Up While Running

Prohibits performing setup work on the table while the drill press is running.

Use Recommended Speed

Stresses using the correct speed for the workpiece material and accessory.

Drill Large Holes Safely

Advises clamping workpieces firmly when drilling large diameter holes.

Wait for Spindle to Stop

Ensures the spindle has completely stopped before touching the workpiece.

Prevent Accidental Starting

Always turn off and unplug before making adjustments or changing accessories.

Keep Guards in Place

Reiterates keeping all guards in place and in working order.

Use Self-Ejecting Chuck Key

Specifies using only the self-ejecting type chuck key.

Electrical Requirements and Safety

Grounding Instructions

Provides a path of least resistance for electric current and reduces risk of shock.

Guidelines for Extension Cords

Ensures safe and efficient use of extension cords for power tools.

Pre Assembly

Accessories and Attachments

Guidance on using recommended accessories and attachments for safe operation.

Tools Required for Assembly

Lists necessary tools for assembling the drill press.

Carton Contents

Details the parts included in the drill press packaging.

Know Your Drill Press

Drill Press Glossary

Assembly

Column Support to Base

Instructions for attaching the column support to the drill press base.

Table to Column Assembly

Steps for assembling the table to the column assembly.

Installing Feed Handles

Procedure for installing the feed handles onto the drill press.

Installing the Chuck

Detailed steps for installing the drill press chuck.

Installing the Head

Instructions for safely lifting and attaching the drill press head to the column.

Mounting Drill Press to Work Surface

Guidance on securely mounting the drill press to a workbench for stability.

Adjustments

Spindle;Quill

How to adjust the spindle/quill for play and smooth movement.

Quill Return Spring

Adjusting the quill return spring tension for proper operation.

Belt Tension

Procedure for adjusting the belt tension for optimal speed and performance.

Laser Guide Adjustments

Instructions for adjusting the laser guide system and its lines.

Operation

Speeds and Belt Placement

Guide to the 12 speeds and proper belt placement for changing speeds.

On;Off Switch

Instructions for operating the drill press's keyed ON/OFF switch.

Installing Drill Bit in Chuck

Steps for correctly installing a drill bit into the chuck.

Drilling to a Specific Depth

Methods for drilling blind holes to a predetermined depth.

Removing Chuck

Procedure for safely removing the drill press chuck.

Basic Operation Instructions

Essential guidelines for safe and effective drill press operation.

Positioning the Table and Workpiece

How to position the table and workpiece for safe drilling.

Holding a Drilling Location in Metal

Using a centerpunch and laser for precise hole location in metal.

Tilting the Table

Instructions for tilting the drill press table for bevel operations.

Feeding

Proper technique for feeding the drill bit during operation.

Maintenance

Changing the Laser Guide Batteries

Steps for replacing the batteries in the laser guide attachment.

Troubleshooting

Part List

Tradesman DP12LW Specifications

General IconGeneral
BrandTradesman
ModelDP12LW
CategoryPower Tool
LanguageEnglish