13
Table 4 - Evaporator data
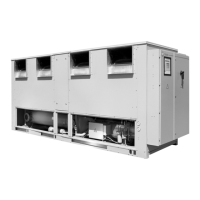
RTRA model 107 108 108 HE 109 109 HE 110 110 HE
Evaporator model 587 587 ES71 ES81 ES101 ES101 ES121
Water storage capacity l 95 95 145 143 118 118 106
Minimum water flow l/s 4,5 4,5 5,3 6,1 7,6 7,6 9,1
Maximum water flow l/s 13,5 13,5 15,8 18,1 22,6 22,6 27,2
Water connection Ø Inch 3 3 5 5 5 5 5
Flange PN 16 PN 16 PN 16 PN 16 PN 16 PN 16 PN 16
DN 80 DN 125
Specific connection and schematic wiring diagrams are
shipped with the unit. Some piping and control schemes,
particularly those using a single water pump for both chilled
and hot water, must be analyzed to determine how and/or
if a flow sensing device will provide desired operation.
Follow the manufacturer’s recommendations for selection
and installation procedures. General guidelines for flow
switch installation are outlined below :
1. Mount the switch upright, with a minimum of 5 pipe
diameters of straight horizontal run on each side. Do
not install close to elbows, orifices or valves.
Note : The arrow on the switch must point in the direc-
tion of flow.
2. To prevent switch fluttering, remove all air from the
water system.
Note : The UCM-CLD provides a 6 second time delay
after a «loss-of-flow» diagnostic before shutting the unit
down. Contact a qualified service representative if nui-
sance machine shutdowns persist.
3. Adjust the switch to open when water flow falls below
nominal. Refer to table 4 for minimum flow recom-
mendations. Flow switch contacts are closed on proof
of water flow.
Figure 9 - Evaporator water pressure drop
 Loading...