16
Trevi Spa User Guidea
Installation of a manual spa cover
Step 1: Preparation
▪ For installation, the following is required: drill with a star bit,
measuring tape and a pencil.
Note: See content of the parts at the end.
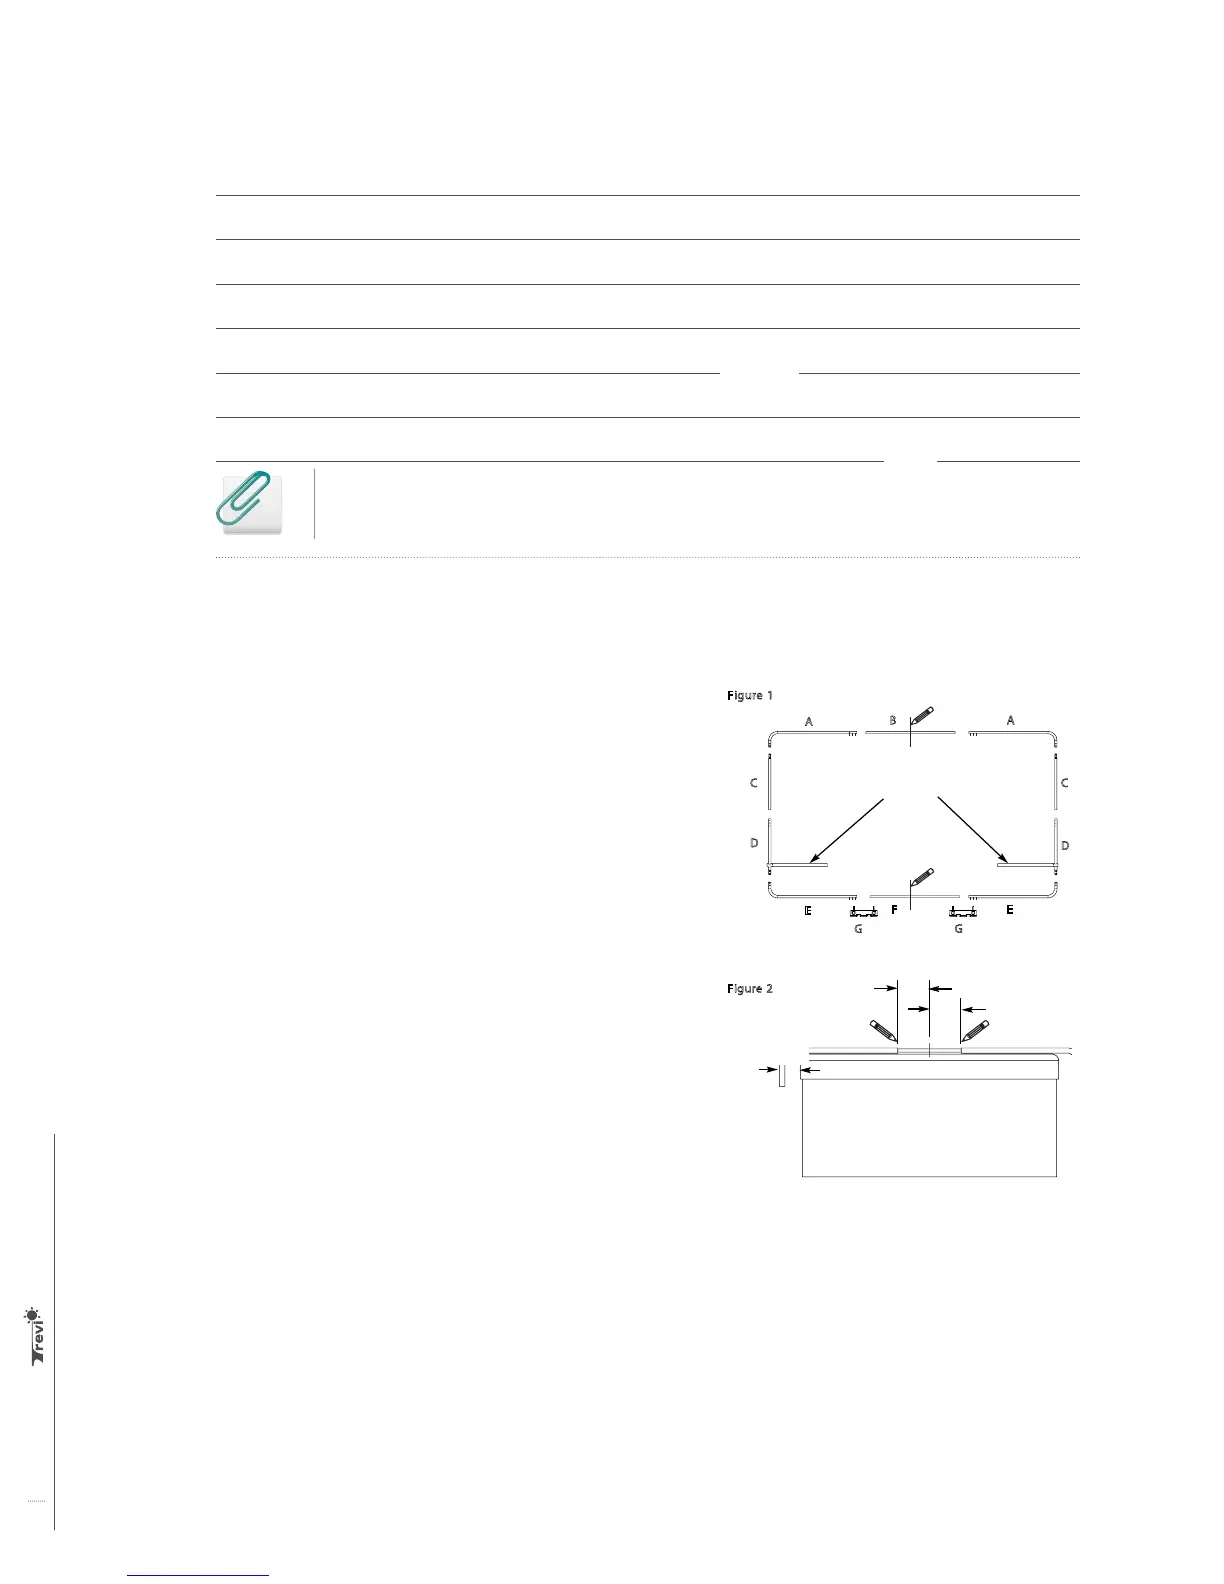
▪ Place the frame parts to the ground next to your spa to form
a rectangle (Figure 1). Mark the center of (B) and (F) with a
pencil. Insert a strap on each side in sections (D).
Step 2: Assembly of the upper section
▪ Insert the ends of (B) in (A). Place this section of the
framework thus formed on the central stitching of the cover.
Adjust the parts (A) so that they are approximately 6.5 cm
(2 1/2") from the sides of the cover. Center (B) in (A) using a
tape measure and the center mark. Make a pencil mark at the
junction of (A) and (B) (Figure 2).
▪ Place the upper section on the ground and align the pencil
marks made at the ends of (B) and (A). Be sure that the short
sides of (A) are level to the other. Connect the different parts
of the upper section of the frame using 3/4'' long self-drilling
screws (3 at each end). The screw heads should be inside
the frame.
▪ Insert the tapered end (C) in (A). Connect (A) and (C) with the
5/16" x 1 5/8" long screws and nuts (2 per side). The nuts must
be facing towards the ground.
Figure 1
A
C
D
D
C
B
F
A
E
E
=
Figure 4
Jupe
du spa
G
50 cm
20”
4 vis
E
D
G
Courroies
Figure 2
6.5 cm
2 1/2”
=
=
Figure 4
Jupe
du spa
G
50 cm
20”
4 vis
E
D
G
Courroies
Figure 1
Figure 2
Figure 3
Strap
4 screws
skirt spa
 Loading...