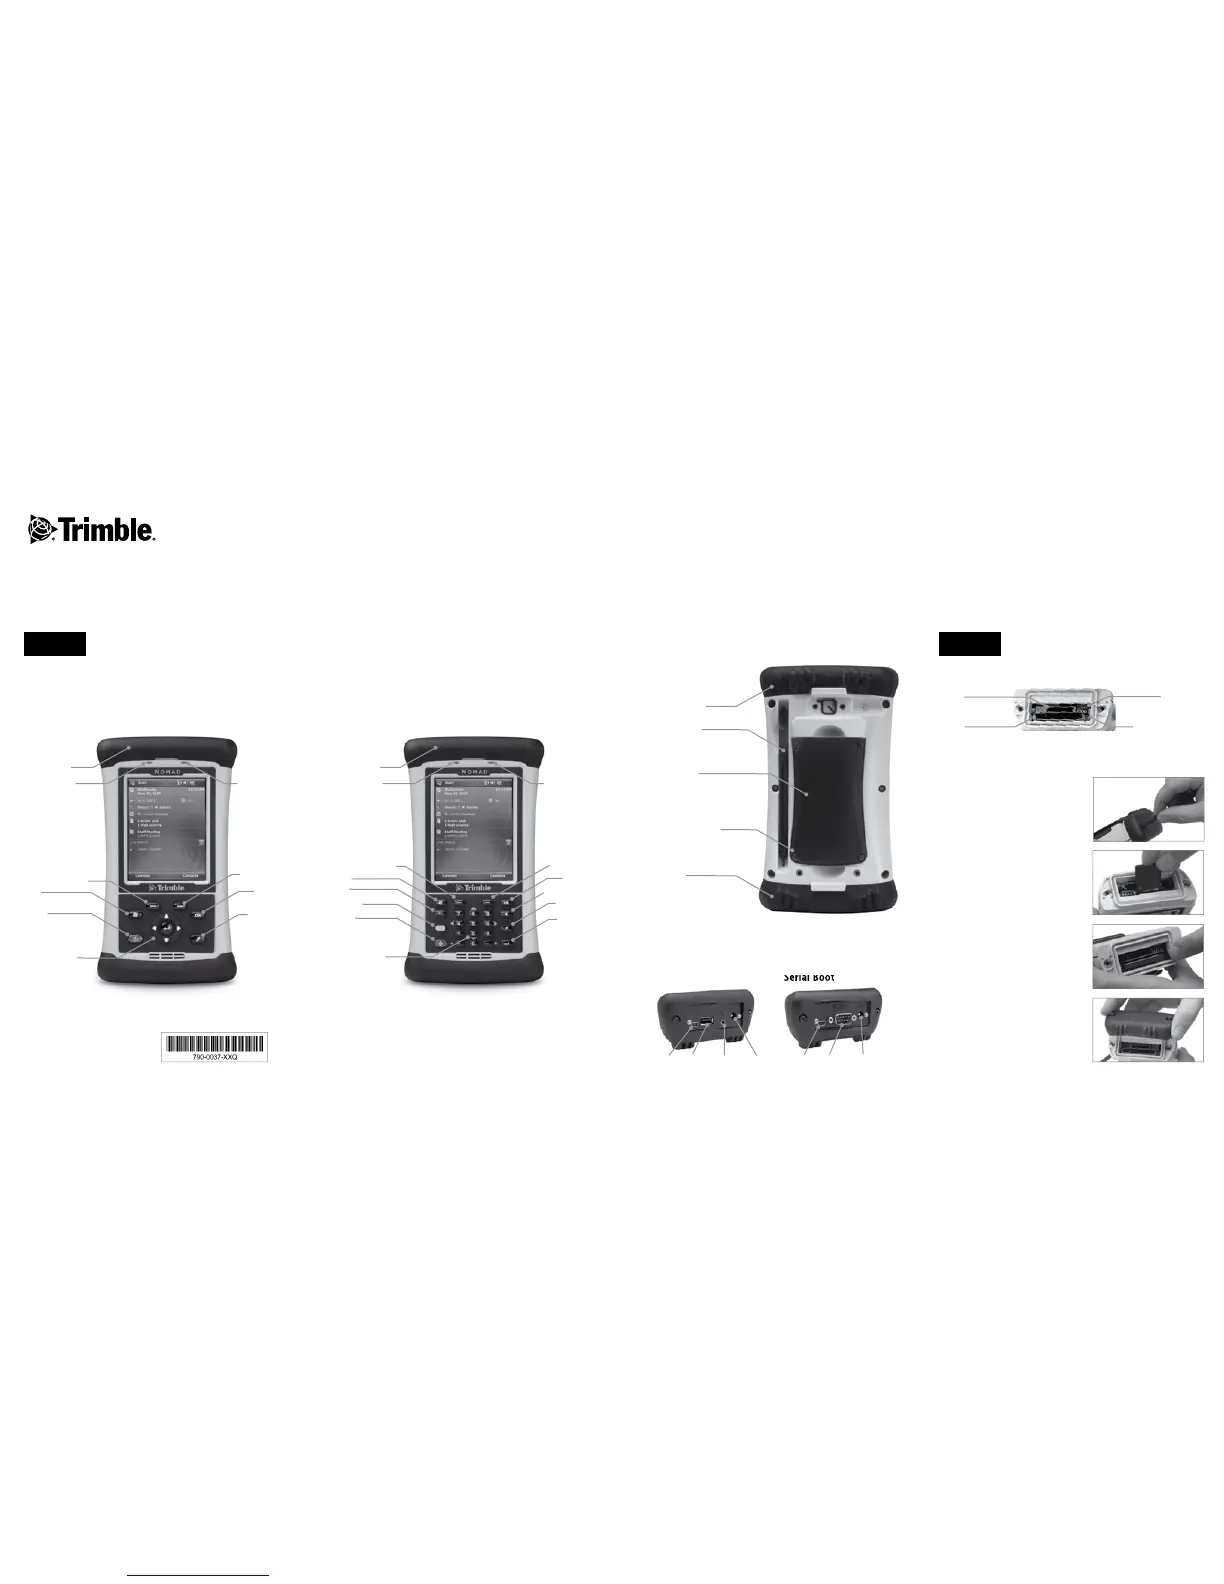
STEP 6
2. Insert the card gently into the
slot. DO NOT force the card into
the slot. Both CF and SD cards
should be inserted with the front
of the card towards the front of
the unit.
1. Use the Philips screwdriver
end of the stylus to loosen the
quarter-turn screws and remove
the Expansion Cap.
STEP 5
Orientation
Front View PDA Keypad
Navigation pad
with ”Enter” key
Under the Expansion cap are the expansion slots. Units with no integrated scanner or
camera will have one Type II CompactFlash (CF) slot and one Secure Digital (SD) slot.
Units with a scanner and/or camera will have one SD slot. To access the slots:
4. Reattach the Expansion Cap
with the stylus, making sure the
quarter-turn screws are seated.
3. To remove a CF card, press on
the eject button. To remove an
SD card, gently press on the top
of the card to release it from the
SD slot.
Your unit will have either a PDA-style keypad or a numeric keypad.
Front View Numeric Data Keypad
Back View
Your unit will have either a USB I/O Boot or a Serial I/O Boot
USB Boot
Number pad and
navigation keys
I/O Boot
Expansion Cap
Serial Boot
Expansion Cap
Notifi cation LED
Application Soft Key*
Start*
Power
Battery LED
Application
Soft Key*
OK*
Today*
Expansion Cap
Notifi cation LED Battery LED
Application Soft Key*
Start*
Power
Tab*
Shift Key*
Application
Soft Key*
OK*
Backspace*
Today*
Enter*
Stylus Holder
Battery Door
Battery Door screws
Mini-USB USBHost Audio Jack External Power Mini-USB Serial External Power
Accessing and using the expansion ports.
SD Slot
CF Slot CF Card Ejector button
8-Pin Custom
(for developers)
© 2007, Trimble Navigation Limited. All rights reserved.
790-0037-XXQ Rev A
* denotes assignable keys
Tr i m b l e N o m a d Orientation Guide