23
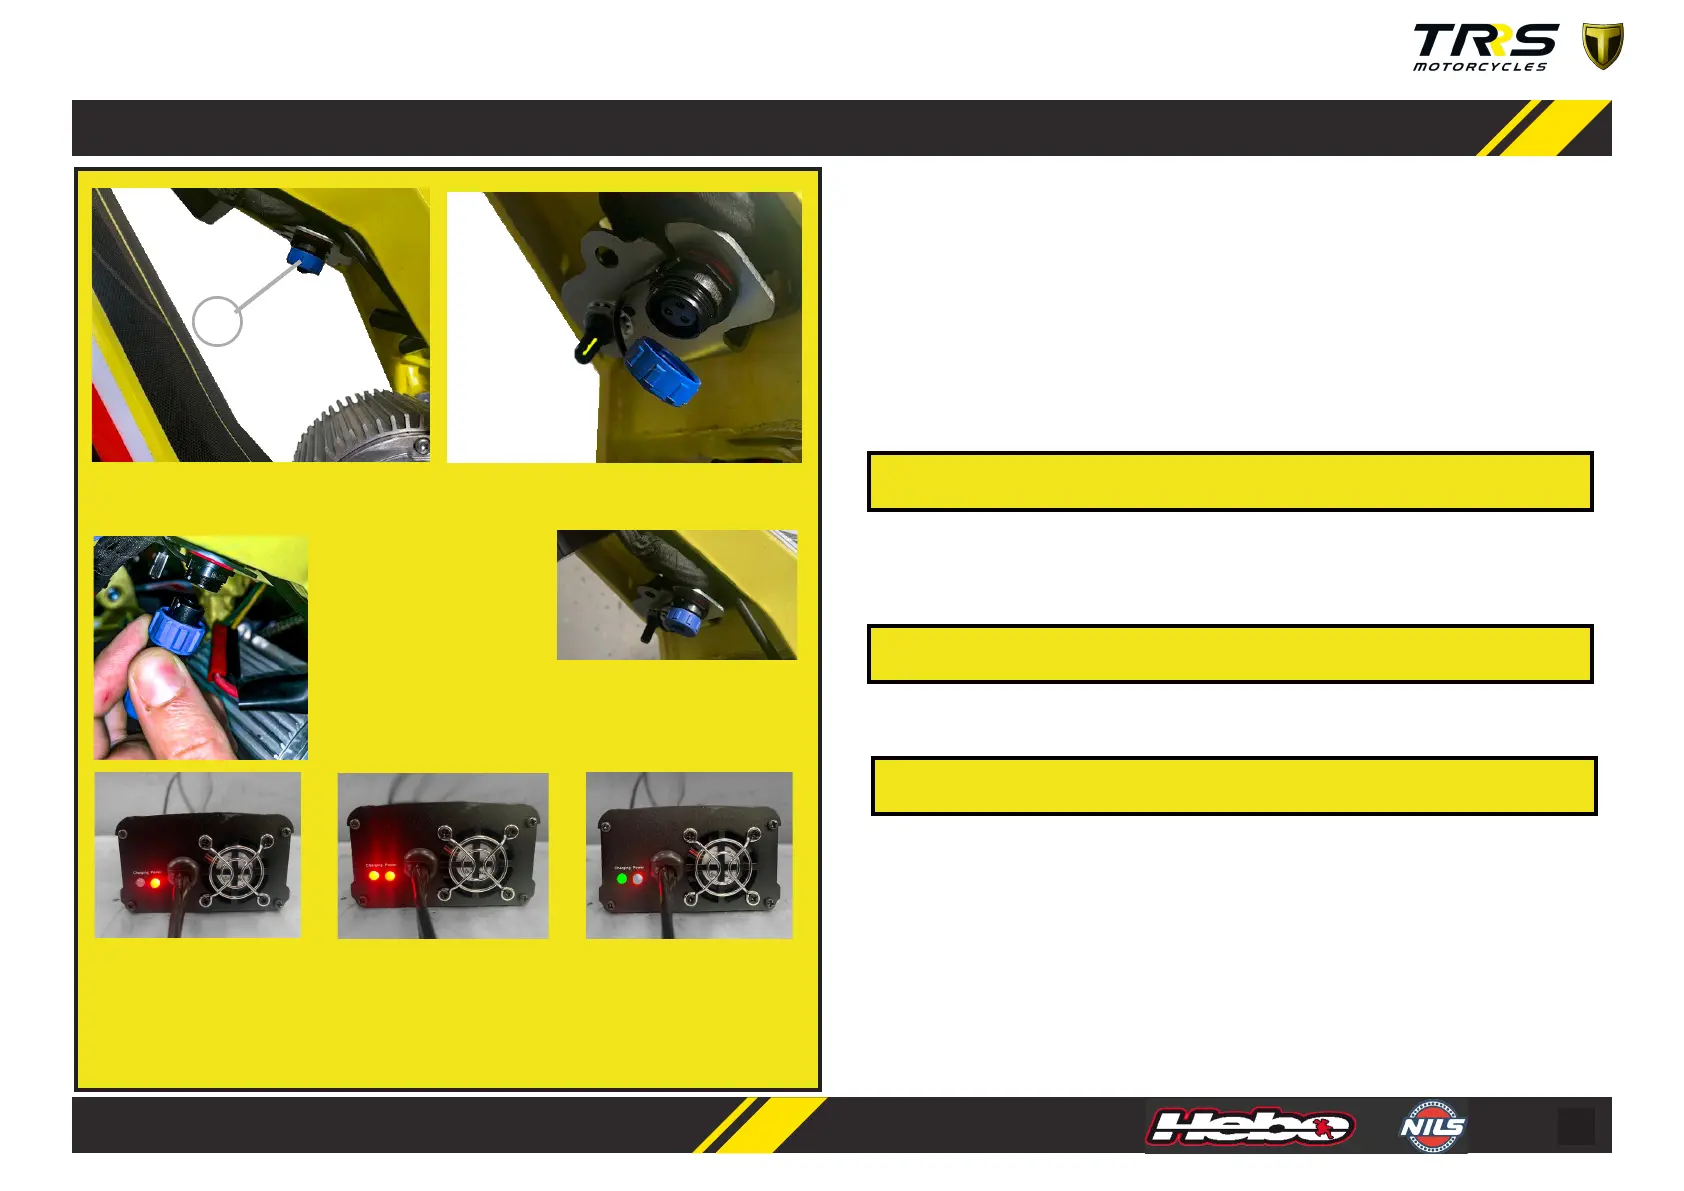
When the baery is complete (the indicator LED iS GREEN), then unplug the charger
from the wall socket, then from the baery by twisng the lock ring and pulling the
connector out of charging port.
A
Normally takes ve hours to charge your baeries from a fully discharged condion.
Never overcharge. Remove the charger aer 5 hours maximum. It’s recommended
that you fully charge the baery before & aer every ride and that baeries are
never le in a discharge state for an extended length of me.
Under the seat , you will nd the charger connector. Remove the connector cap.
¡CAUTION!
Don’t block the fan on the charger while charging the baery. This can cause the
charger to overheat.
The baery charger supplied with this baery is for INDOOR use only.
Avoid any contact with water or other uids while charging the baery. If the bat-
tery, charger or any connecons become wet, immediately unplug the charger and
thoroughly dry all components prior to charging the baery.
¡CAUTION!
¡CAUTION !
• Right LED, power:
o Red color: On.
•Le LED, Charge:
o OFF: Whitout baery.
• Right LED, power:
o Red color: On.
•Le LED, Charge:
o Red color: The charge is
charging the baery.
• Right LED, power:
o Red color: On.
•Le LED, Charge:
o Green color: The baery
es fully charged
Align the connector pins
and connect the charger to
the baery by plugging the
connector into the charger
receptacle. Twist the lock
ring to secure the charger
lead to the bike.
Remember to put again the blue
tap on, when the baery is fully
charged.