40
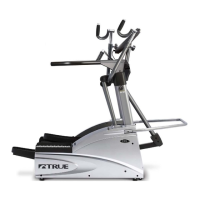
HANDLE FITTINGS (IF APPLICABLE)
Inspect the cable and fi ttings where handles are attached to the end of the cable. The fi ttings originally supplied with your
machine are load rated snap-links and quick-links. Be sure the hex nut on the quick link is fully tightened. Be sure that the
snap-link opens and closes easily and is fully engaged when closed. Replace if either are damaged.
Hex
Nut
Quick
Link
Snap
Link
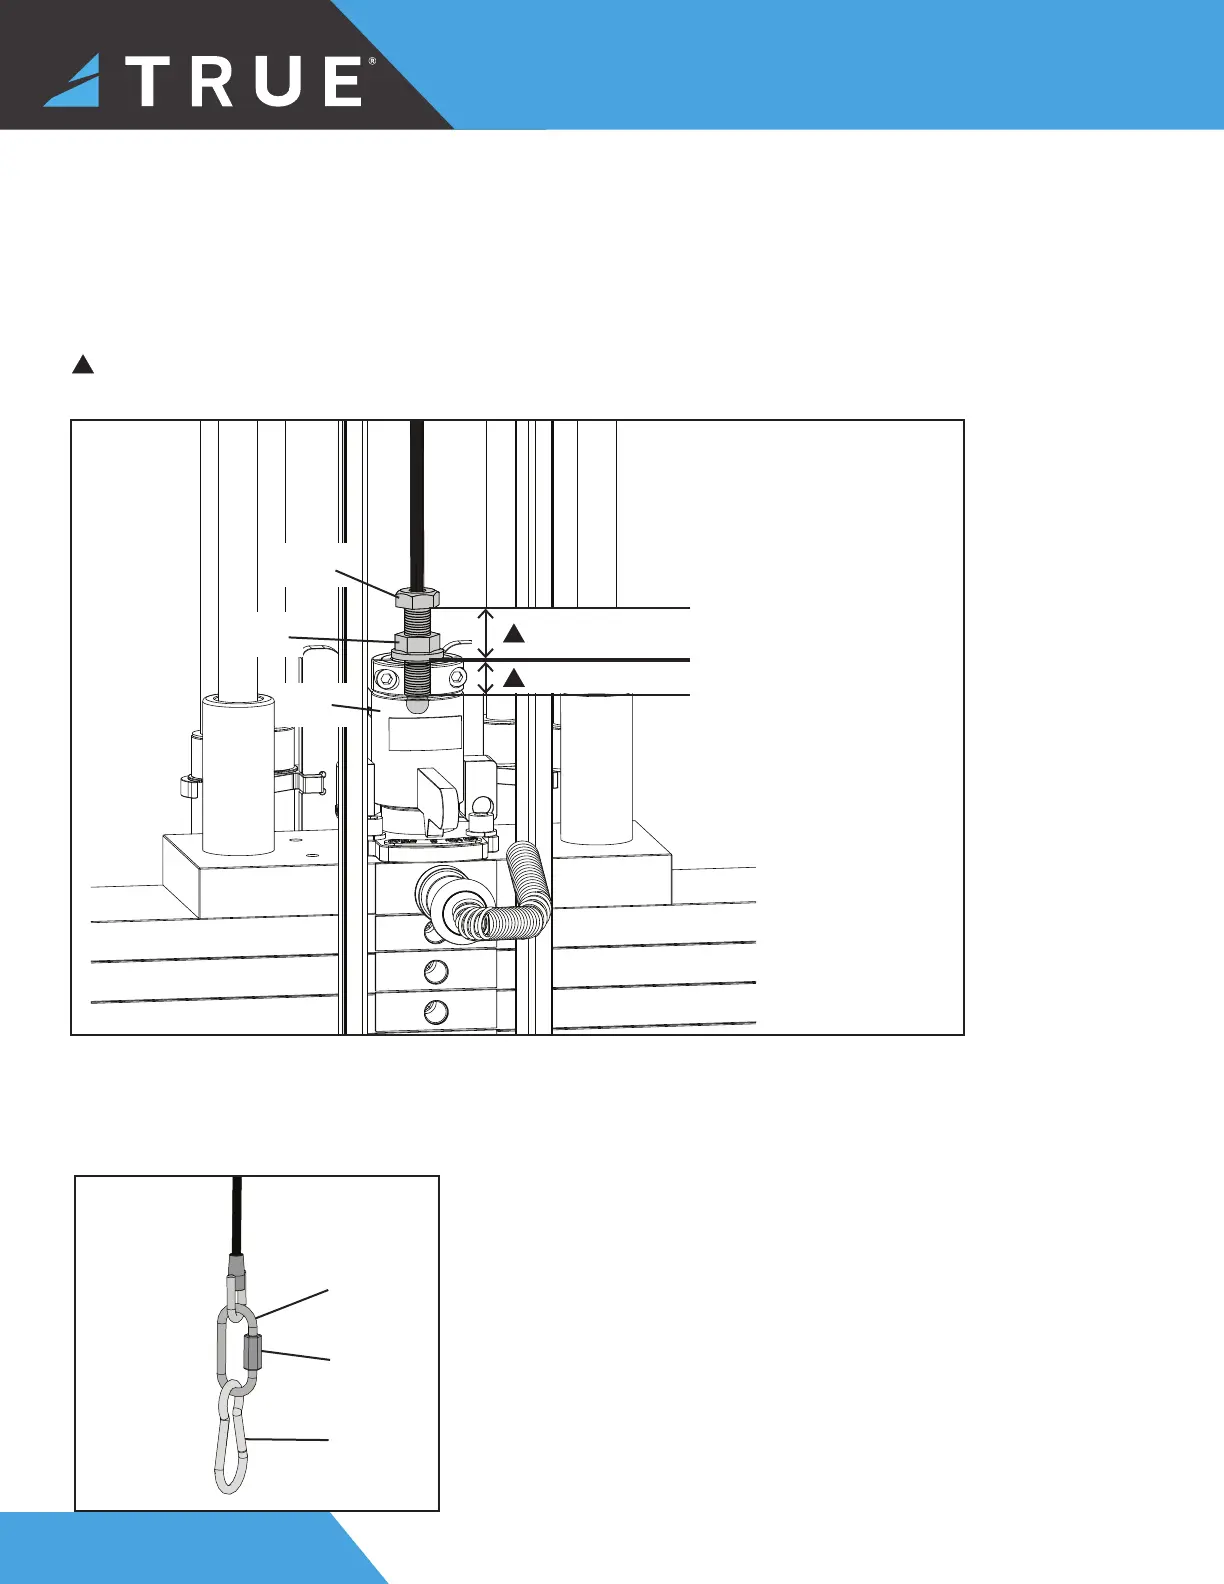
CABLE TENSION (IF APPLICABLE)
Ensure that the cables are adjusted to remove any slack using the threaded end fi ttings. These are normally located at
the weight stack connection. Depending upon the machine, there may be multiple threaded fi tting on multiple cables. You
can determine if there is too much slack by performing the exercise. As you start to move a load arm or handle, the weight
stack should lift immediately. If not, the cable tension needs to be adjusted.
To adjust the cable tension, loosen the cable nut that is located on the cable bolt connected to the top plate. Tighten the
cable bolt until the top plate is barely lifted off of the fi rst weight plate and then re-tighten the cable nut.
!
CAUTION: A minimum of ¹⁄" (12.7mm) of the threaded portion of the cable bolt must be threaded into the top plate.
Maximum height from bottom of nut to bolt head is 1¹⁄" (31.75mm). Make sure locking nut is tight.
Top
Plate
Cable
Bolt
Cable
Nut
¹⁄๙" (12.7mm) minimum
1¹⁄๛" (31.75mm) maximum
!
!