Menu
Press the “Menu/OK” button to enter the menu.
1. Camera settings
2. Alarm settings
3. VOX function settings
4. General settings
Press “Move up” and “Move down” to move from
one option to another and press “MENU/OK” to
conrm your selection. Press “Back” to return.
1.
3.
2.
4.
Pairing*
In the Menu, conrm the “Camera” option for pairing. Conrm “Register” by pre-
ssing “Menu/Ok”. Then, hold the button at the back of the camera until the pairing
is complete
.
*Note: The parent and baby units are paired by default and do not need to be paired
again. Choose this option if you want to perform a new pairing of the units, e.g., when
the signal is constantly being lost.
Alarm
Conrm “Alarm” in the menu. Press “Move down” to move between the values and
press “Move up” to change the value as required.
VOX
This enables and/or disables the VOX function, sets its sensitivity and turns vi-
brations on and o. If the VOX mode is enabled, during live view the screen is
turned o aft
er a moment of silence and the sound transmission is reduced to
save battery.
Settings
Enter the “Settings” to set the language, time and date, temperature units, wave
length, and screen backlight. “Settings” also includes information about the sys-
tem and current Firmware.
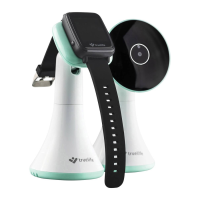
Contents of packaging
- Parent unit + power adapter
- Baby unit + power adapter
- Charging stand
- Manual
Manufacturer’s liability
A warranty for manufacturing defects is provided for TrueLife products. In case
of such defects, elem6 s.r.o. is obligated to repair or replace the defective part or
product with a comparable part or product at its own discretion. Transfer, change
or any other unauthorized handling of the product are not covered by this wa
-
rranty. This includes situations that the product is lost or damaged due to a de-
fect, negligence or other product faults. The warranty does not apply to damage
f
ollowing fr
om use, accident or usual wear. Company elem6 s.r.o. does not accept
any liability for any accidents, injuries, death, loss or other claims related to or fo
-
llowing from the use of this product. Under no circumstances shall elem6
s.r.o. be
held responsible for incidental or consequential damage related to or following
from the use of this product or any of its parts. Returning or replacement of spare
parts and/or the product may be subject to transportation, handling, replace
-
ment and/or completion fees.
Typing and printing errors are reserved.
SAFE USE OF THE DEVICE:
1. Read the attached safety instructions carefully.
2. In order to correct use the product, make sure to read the latest version of the
manual – available for download at www.truelife.eu.
3. Typing and printing errors are reserved.
Manufacturer:
elem6 s.r.o., Braškovská 15, 16100 Prague 6,
Czech Republic
DE HANDBUCH
Beschreibung der Elterneinheit
1. LCD-Display
2. Lautstärke erhöhen / Bewegung Auf /VOX EIN/AUS
3. Lautstärke senken / Bewegung Ab / Taste Push to Talk
4. MENÜ-Taste / OK / Melodien EIN/AUS
5. Taste EIN / Rückkehr / Zeitanzeige
6. Drahtlose Speisung
7. Lautsprecher
8. Mikrophon
Beschreibung
der Kindereinheit
1. Lichtsensor
2. Kameraobjektiv
3. LED-Anzeige EIN/AUS
4. Infrarote LED-Leuchte
5. Lautsprecher
6. Paarungstaste
7. Mikrophon
8. Speisungseingang
9. Sensor der Temperaturmessung
1
2
3
4
8
7
6
5
Beschreibung des Auadeständers
1. Drahtloser Stecker für das Auaden der Elterneinheit
2. Speisungseingang
Installation
1. Den Adapter an den Speisungseingang der Babyeinheit und anschließend an
das Netz anschließen.
2. Die Elterneinheit auf den Ladeständer legen und den Ständer an die Speisung
anschließen.
3. Am Display der Elterneinheit erscheint das Auadeicon, was bedeutet, dass die
Batterie aufgeladen wird.
4. Die Babyeinheit können Sie an die Wand hängen oder auf eine von Ihnen ge
-
wählte Stelle in geeignetem Abstand vom Baby legen.
5.
Das Kopfstück der Kamera ist positionierbar, richten Sie sie in die gewünschte
Richtung aus.
6. Die Einrichtungen paaren – mehr siehe im Kapitel „Paaren“.
EN MANUAL
Parent unit description
1. LCD screen
2. Increase volume / Move up/ Turn on/o VOX
3. Decrease volume / Move down / Push to Talk button
4. MENU / OK / Turn lullabies on/o
5. Turn on / Back / View time
6. Wireless charging
7. Speaker
8. Microphone
Baby unit description
1. Light sensor
2. Camera lens
3. LED indicator of whether
the device is On or O
4. Infrar
ed LED light
5. Speaker
6. Pairing button
7. Microphone
8. Charging input
9. Temperature sensor
1
2
3
4
8
7
6
5
Charging stand description
1. Wireless connector for charging of the parent unit
2. Charging input
Installation
1. Connect the adapter to the charging input of the baby unit and connect it
to a socket.
2. Place the parent unit to the charging stand and connect the stand to a socket.
3. The screen of the parent unit will show a charging icon, meaning that the
battery is charging.
4. You can hang the baby unit on the wall or place it somewhere near the baby.
5. The camera head is adjustable, you can turn it in whichever direction you want.
6. Pair the devices – see the “Pairing” section.
Screen
1. Signal strength indicator
2. Temperature in the baby’s room*
3. Lullaby signalization
4. VOX mode indicator
5. Active alarm indicator
6. Battery status
7. Indicator of active Push to Talk
(microphone)
8. Date and time
*Note: The thermometer in the baby
unit is not certied and the displayed
temperature is only indicative.
13:10
03:03 PM 18/01
26.5°C
Display
1. Anzeige der Signalstärke
2. Temperatur im Raum, in dem sich das
Baby bendet*
3. Anzeige der aktivierten Melodie
4. Anzeige der Betriebsart VOX
5. Anzeige des aktiven Alarms
6. Batteriestand
7. Anzeige der Funktion Push to Talk
(Mikrophon) aktiv
8. Datum und Uhrzeit
*Hinweis: Der Thermometer der
Babyeinheit ist nicht zertiziert und
Temperaturangaben dienen zur
Orientierung.
13:10
03:03 PM 18/01
26.5°C
Menü
Für den Eintritt ins Menü die Taste „Menü/OK“
betätigen.
1. Kamera einstellen
2. Alarm einstellen
3. Funktion VOX einstellen
4. Allgemeine Einstellungen
Für die Bewegung zwischen einzelnen
Möglichkeiten des Menüs die Tasten „Bewegung
Auf“ und „Bewegung Ab“ betätigen, die Taste
„MENÜ/OK“ betätigen, um die Wahl zu bestätigen.
Für die Rückkehr die Taste „Zurück“ betätigen.
1.
3.
2.
4.
Paarung*
Im Menü die Wahl „Kamera“ für das Paaren bestätigen. Die Wahl „Register“ Tas-
te „Menü/OK“ bestätigen. Anschließend die Taste auf der Rückseite der Kamera
betätigen und halten, bis die P
aarung erfolgt.
*Hinweis: Die Eltern- und Babyeinheit sind bereits werkseitig gepaart, es ist also nicht
nötig, sie erneut zu paaren. Wählen Sie dieses Angebot im Falle, dass Sie die Einheiten
erneut paaren möchten, z. B. bei einem langfristigen Signalausfall.
Alarm
Im Menü die Wahl „Alarm“ bestätigen. Durch Betätigung der Taste „Bewegung
Ab“ bewegen Sie sich zwischen den Werten und mit der Taste „Bewegung Auf“
verändern Sie den Wert nach Bedarf.
VOX
Dient zur Aktivierung und Inaktivierung der Funktion VOX, Empndlichkeitsein-
stellung VOX und Einschalten/Abschalten der Vibrationen. Bei aktivierter Betrieb-
sart VOX wird bei direkter Ansicht nach einer kurzer Zeit der Stille das Display
abgeschalt
et und die T
onübertragung wird eingeschränkt, um die Batterie zu
sparen.
Einstellungen
Um Sprache, Uhrzeit und Datum, Einheit der Temperaturmessung, Wellenlänge
und Hinterleuchten des Displays einzustellen, die Wahl „Einstellungen“ bestäti-
gen. Systeminformationen und Informationen über die aktuelle Firmware nden
Sie ebenfalls in den
„Einstellungen“
.
Inhalt der Verpackung
- Elterneinheit + Netzteil
- Babyeinheit + Netzteil
- Auadeständer
- Handbuch
Haftung des Herstellers
Auf die Produkte TrueLife bezieht sich Garantie auf Produktionsmängel. Die
Gesellschaft elem6 s.r.o. ist im Falle derartiger Mängel, die der Garantie unterlie-
gen verpichtet, das mangelhafte Bauteil instand zu setzen bzw. das mangelhaf-
te Bauteil bzw. das Produkt gegen ein vergleichbares Bauteil bzw. Produkt nach
eigenem Er
messen auszutauschen. Eine Übertr
agung, Veränderung bzw. eine
sonstige unberechtigte Handhabung des Produkts werden als Überschreitung
des Umfangs dieser Garantie betrachtet. Und das auch im Falle, dass im Falle
eines Streits, einer Fahrlässigkeit bzw. eines Produktfehlers das Produkt verlo
-
ren geht bzw. beschädigt wird. Garantie bezieht sich nicht auf Beschädigungen
infolge der Benutzung
, üblichen Abnutzung bzw. eines Unfalls. Die Gesellschaft
elem6 s.r.o. übernimmt keine Haftung für beliebige Unfälle, Verletzungen, Tode
-
sfälle, Verluste bzw. sonstige Forderungen, die mit der Benutzung dieses Pro-
dukts zusammenhängen bzw. sich daraus ergeben. Die Gesellschaft elem6 s.r.o.
tr
ägt auf keinen Fall
Verantwortung für Zufalls- bzw. Folgeschäden, die mit der
Benutzung dieses Produkts bzw. eines von dessen Bauteilen zusammenhängen,
bzw. sich daraus ergeben. Die Rückgabe bzw. der Austausch der Ersatzteile und/
bzw. Produkte kann Gebühren für die Fracht, Handhabung, den Austausch und/
bzw. die Ergänzung unterliegen.
Druckfehler und Änderungen der Informationen sind vorbehalten.
SICHERHEIT BEI DER ARBEIT MIT DER EINRICHTUNG:
1. Lesen Sie aufmerksam die hinzugefügten Sicherheitsanweisungen.
2. Für richtigen Umgang mit dem Produkt lesen Sie die letzte Version des Han-
dbuchs, die zum Herunterladen von der Webseite www.truelife.eu zur Verfü-
gung steht.
3. Druckf
ehler und Änderungen der I
nformationen sind vorbehalten.
Hersteller:
elem6 s.r.o., Braškovská 15, 16100 Prague 6,
Czech Republic
CZ MANUÁL
Popis rodičovské jednotky
1. LCD displej
2. Zvýšit hlasitost / Pohyb nahoru / Vypnout/Zapnout VOX
3. Snížit hlasitost / Pohyb dolů / Tlačítko Push to Talk
4. Tlačítko MENU / OK / Zapnout/Vypnout melodie
5. Tlačítko Zapnout / Návrat / Zobrazení času
6. Bezdrátové napájení
7. Reproduktor
8. Mikrofon
Popis dětské jednotky
1. Senzor světla
2. Objektiv kamery
3. LED Indikátor Zapnutí/
Vypnutí
4. Infrač
ervené LED světlo
5. Reproduktor
6. Tlačítko párování
7. Mikrofon
8. Vstup napájení
9. Senzor měření teploty
1
2
3
4
8
7
6
5
Popis nabíjecího stojanu
1. Bezdrátový konektor k nabíjení rodičovské jednotky
2. Vstup napájení
Instalace
1. Zapojte adaptér do vstupu pro napájení dětské jednotky a zapojte ho do sítě.
2. Položte rodičovskou jednotku na nabíjecí stojan a zapojte ho do napájení.
3. Na displeji rodičovské jednotky se objeví ikona nabíjení, což znamená, že se
baterie začala nabíjet.
4. Dětskou jednotku můžete pověsit na stěnu nebo položit na vámi zvolené místo
ve vhodné vzdálenosti od dítěte.
5. Hlava kamery je polohovatelná, namiřte ji směrem, který vám vyhovuje.
6. Spárujte zařízení – více v kapitole „Párování“.
Displej
1. Indikátor síly signálu
2. Teplota v dětském pokoji*
3. Indikátor zapnutí melodie
4. Indikátor režimu VOX
5. Indikátor aktivního alarmu
6. Stav baterie
7. Indikátor funkce Push to Talk
(mikrofon) aktivní
8. Datum a čas
*Po
známka: Teploměr dětské jednotky
není certikovaný, údaje o teplotě jsou
pouze orientační.
13:10
03:03 PM 18/01
26.5°C
Menu
Ke vstupu do Menu stiskněte tlačítko „Menu/OK“.
1. Nastavení kamery
2. Nastavení alarmu
3. Nastavení funkce VOX
4. Všeobecná nastavení
K pohybu mezi jednotlivými možnostmi Menu
používejte tlačítka „Pohyb nahoru“ a „Pohyb dolů“,
k potvrzení výběru použijte tlačítko „MENU/OK“.
K návratu stiskněte tlačítko „Návrat“.
1.
3.
2.
4.
Párování*
Pro párování v menu potvrďte volbu „Kamera“. Potvrďte volbu „Register“ tlačítko
„Menu/OK“. Následně podržte tlačítko na zadní straně kamery, dokud neproběh-
ne spárování.
*P
oznámk
a: Rodičovská a dětská jednotka jsou už spárované z výroby, není třeba je
tedy párovat znovu. Tuto volbu vyberte, pokud chcete jednotky znovu spárovat, např.
při dlouhodobé ztrátě signálu.
Alarm
V menu potvrďte volbu „Alarm“. Stisknutím tlačítka „Pohyb dolů“ se pohybujte
mezi hodnotami a tlačítkem „Pohyb nahoru“ změňte hodnotu podle potřeby.
VOX
Slouží k aktivaci a deaktivaci funkce VOX, nastavení citlivosti VOX a zapnutí/vy-
pnutí vibrací. Pokud je režim VOX aktivní, dojde při živém náhledu po krátké chvíli
ticha k vypnutí displeje a k omezení př
enosu zvuku za účelem úspory baterie.
Nastavení
Nastavení jazyka, času a data, jednotky měření teploty, vlnové délky a podsvícení
displeje potvrďte volbou „Nastavení“. Systémové informace a informace o aktuál-
ním Firmwaru najdete také v „Nastavení“.
Obsah balení
- Rodičovská jednotka + síťový adaptér
- Dětská jednotka + síťový adaptér
- Nabíjecí stojan
- Manuál
Odpovědnost výrobce
Na výrobky TrueLife se vztahuje záruka na výrobní vady. Povinností společnosti
elem6 s.r.o. je v případě závad ze záruky opravit nebo vyměnit vadnou součástku
nebo výrobek za srovnatelnou součástku nebo výrobek dle vlastního uvážení.
Převod, změna nebo jiná neoprávněná manipulace s výrobkem znamená překro
-
čení rozsahu této záruky, a to i v případě, že v důsledku závady, nedbalosti nebo
jiné ch
yby v
ýrobku dojde k jeho poškození nebo ztrátě. Záruka se nevztahuje na
poškození vzniklá z nevhodného používání, nehody nebo běžného opotřebení
výrobku. Společnost elem6 s.r.o. nepřebírá odpovědnost za jakékoli nehody, zra
-
nění, smrt, ztrátu nebo jiné události, které souvisí s používáním tohoto přístro-
je. Společnost elem6 s.r.o. v žádném případě nenese odpovědnost za náhodné
nebo následné škody vznik
lé při použív
ání tohoto výrobku nebo některé z jeho
součástí. Vrácení nebo výměna náhradních dílů a/nebo výrobků může podléhat
poplatkům za dopravu, manipulaci, výměnu a/nebo doplnění.
Tiskové chyby a změny informací jsou vyhrazeny.
BEZPEČNOST PŘI PRÁCI SE ZAŘÍZENÍM:
1. Pozorně si přečtěte přiložené bezpečnostní pokyny.
2. Pro správné zacházení s výrobkem si přečtěte nejaktuálnější verzi manuálu,
která je ke stažení na stránce: www.truelife.eu.
3. Tiskové chyby a změny informací jsou vyhrazeny.
Výrobce:
elem6 s.r.o., Braškovská 15, 16100 Praha 6,
Česká republika
SK MANUÁL
Popis rodičovskej jednotky
1. LCD displej
2. Zvýšiť hlasitosť / Pohyb hore / Vypnúť/Zapnúť VOX
3. Znížiť hlasitosť / Pohyb dole / Tlačidlo Push to Talk
4. Tlačidlo MENU / OK / Zapnúť/Vypnúť melódie
5. Tlačidlo Zapnúť / Návrat / Zobrazenie času
6. Bezdrôtové napájanie
7. Reproduktor
8. Mikrofón
Popis detskej jednotky
1. Senzor svetla
2. Objektív kamery
3. LED Indikátor Zapnutia/
Vypnutia
4. Infrač
ervené LED svetlo
5. Reproduktor
6. Tlačidlo párovania
7. Mikrofón
8. Vstup napájania
9. Senzor merania teploty
1
2
3
4
8
7
6
5
9
Popis nabíjacieho stojanu
1. Bezdrôtový konektor pre nabíjanie rodičovskej jednotky
2. Vstup napájania
Inštalácia
1. Zapojte adaptér do vstupu napájania jednotky pre bábätka a zapojte ho do
siete.
2. Položte rodičovskú jednotku na nabíjací stojan a zapojte ho do napájania.
3. Na displeji rodičovskej jednotky sa objaví ikona nabíjania, čo znamená, že ba
-
téria sa začala nabíjať.
4.
Jednotku pre bábätká môžete zavesiť zo steny alebo položiť na vami ideálne
zvolené miesto vo vhodnej vzdialenosti k bábätku.
5. Hlava kamery je polohovateľná, nasmerujte ju smerom aký vám vyhovuje.
6. Spárujte zariadenia – viac v kapitole „Párovanie“.
Displej
1. Indikátor sily signálu
2. Teplota v izbe dieťaťa*
3. Indikátor spustenej melódie
4. Indikátor režimu VOX
5. Indikátor aktívneho alarmu
6. Stav batérie
7. Indikátor funkcie Push to Talk
(mikrofón) aktívny
8. Dátum a čas
*Po
známka: Teplomer u detskej jednotky
nie je certikovaný a údaje o teplote slúžia
na orientačný prehľad.
13:10
03:03 PM 18/01
26.5°C
Menu
Pre vstup do Menu stlačte tlačidlo „Menu/OK“.
1. Nastavenia kamera
2. Nastavenia alarmu
3. Nastavenia funkcie VOX
4. Všeobecné nastavenia
Pre pohyb medzi jednotlivými možnostami Menu
stláčajte tlačidla „Pohyb hore“ a „Pohyb dole“, pre
potvrdenie voľby stlačte tlačidlo „MENU/OK“. Pre
návrat stlačte tlačidlo „Návrat“.
1.
3.
2.
4.
Párovanie*
V menu potvrďte voľbu „Kamera“ pre párovanie. Potvrďte voľbu „Register“ tlači-
dlo „Menu/OK“. Následne podržte tlačidlo na zadnej strane kamery, kým nepre-
behne spárovanie.
*P
oznámk
a: Rodičovská a detská jednotka sú už spárované od výroby, nie je teda
potrebné párovať ich znova. Túto ponuku zvoľte, pokiaľ chcete vykonať nové
párovanie medzi jednotkami, napr. pri dlhodobej strate signálu.
Alarm
V menu potvrďte voľbu „Alarm“. Stláčaním tlačidla „Pohyb dole“ sa pohybujte
medzi hodnotami a tlačidlom „Pohyb hore“ zmeňte hodnotu podľa potreby.
VOX
Slúži pre aktiváciu a deaktiváciu funkcie VOX, nastavenia citlivosti VOX a zapnu-
tie/vypnutie vibrácií. Pokiaľ je režim VOX aktivovaný, dôjde pri živom náhľade po
krá
tkej chvíli ticha k vypnutiu displeja a k obmedzeniu prenosu zvuku na účelom
úspory batérie.
Nastavenia
Pre nastavenie jazyka, času a dátumu, jednotky merania teploty, vlnovej dĺžky
a podsvietenia displeja potvrďte voľbu „Nastavenia“. Systémové informácie a in-
formácie o aktuálnom Firmware nájdete taktiež v „Nastaveniach“.
Obsah balenia
- Rodičovská jednotka + sieťový adaptér
- Detská jednotka + sieťový adaptér
- Nabíjací stojan
- Manuál
Zodpovednosť výrobcu
Na výrobky TrueLife sa vzťahuje záruka na výrobné vady. Povinnosťou spoločnos-
ti elem6 s.r.o. je v prípade takýchto vád zo záruky opraviť alebo vymeniť vadnú
súčasť alebo výrobok za por
ovnateľnú súčasť alebo výrobok podľa vlastného uvá-
ženia. Prevod, zmena alebo iná neoprávnená manipulácia s výrobkom znamená
pr
ekr
očenie rozsahu tejto záruky. To aj v prípade, že v dôsledku zvady, nedbanli-
vosti alebo inej chyby vo výrobku dôjde k jeho strate alebo poškodeniu. Záruka
sa nevzťahuje na poškodenie v
yplýv
ajúce z používania, nehody alebo bežného
opotrebenia. Spoločnosť elem6 s.r.o. nepreberá žiadnu zodpovednosť za akékoľ
-
vek nehody, zranenia, smrť, stratu alebo iné požiadavky súvisiace s alebo vyplý-
vajúce z používania tohto výrobku. Spoločnosť elem6 s.r.o. v žiadnom prípade
nenesie z
odpov
ednosť za náhodné alebo následné škody súvisiace s alebo vy-
plývajúce z používania tohoto výrobku alebo niektorej z jeho súčastí. Vrátenie
alebo v
ýmena náhradn
ých dielov a/alebo výrobkov môže podliehať poplatkom
za dopravu, manipuláciu, výmenu a/alebo doplnenie.
Tlačové chyby a zmeny informácií sú vyhradené.
1
2