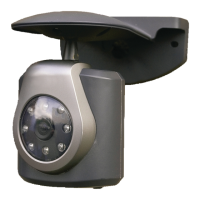
TRUST 100X OUTDOOR WIRELESS SECURITY CAM
2
3 Positioning and adjusting the camera
3.1 Positioning the camera
1. If necessary, drill a 14 mm hole from inside to outside to feed the adapter
cable outside.
Advice: To prevent damaging the cable, feed the cable through a piece of
PVC tubing. This can be purchased from your local DIY store.
2. Feed the adapter cable through the hole outside.
3. Determine the position where the camera will be hung. Preferably hang it in a
sheltered location, for example, under a lean-to.
Note: Do not hang the camera in direct sunlight. This will affect the quality of
the image.
Note: If you wish to fix the camera against a stone or concrete surface, we
recommend using the plugs provided to ensure that the camera is
firmly fixed in position.
4. Bring the connections for the camera and the adapter together and connect
them by pushing them firmly into each other. If desired, use a PVC tube to
provide optimal protection for the cable.
5. Insert the adapter into the plug socket.
Note: NEVER
insert the adapter into an outdoor plug socket. Always use an
indoor plug socket.
3.2 Setting the channel
1. Remove the protective rubber cover on the rear of the camera.
2. Select the camera channel using the switch S which is now visible (see figure
1).
3. Select channel 1, 2, 3 or 4 by sliding the switch to the left or right.
4. Check on the receiver of, for example, your TRUST WIRELESS
OBSERVATION SYSTEM 100M whether you receive a picture.
5. Place the protective rubber cover back on the rear of the camera.
Note: For more information about your receiver, see the instruction manual
for the TRUST 100 series receiver.
3.3 Directing the camera
The lens of the camera can be rotated upwards and downwards. The camera can be
rotated through 360 degrees when on the stand. Once you have found the desired
position, you can secure it in position using the locking screw (A in figure 2).
 Loading...