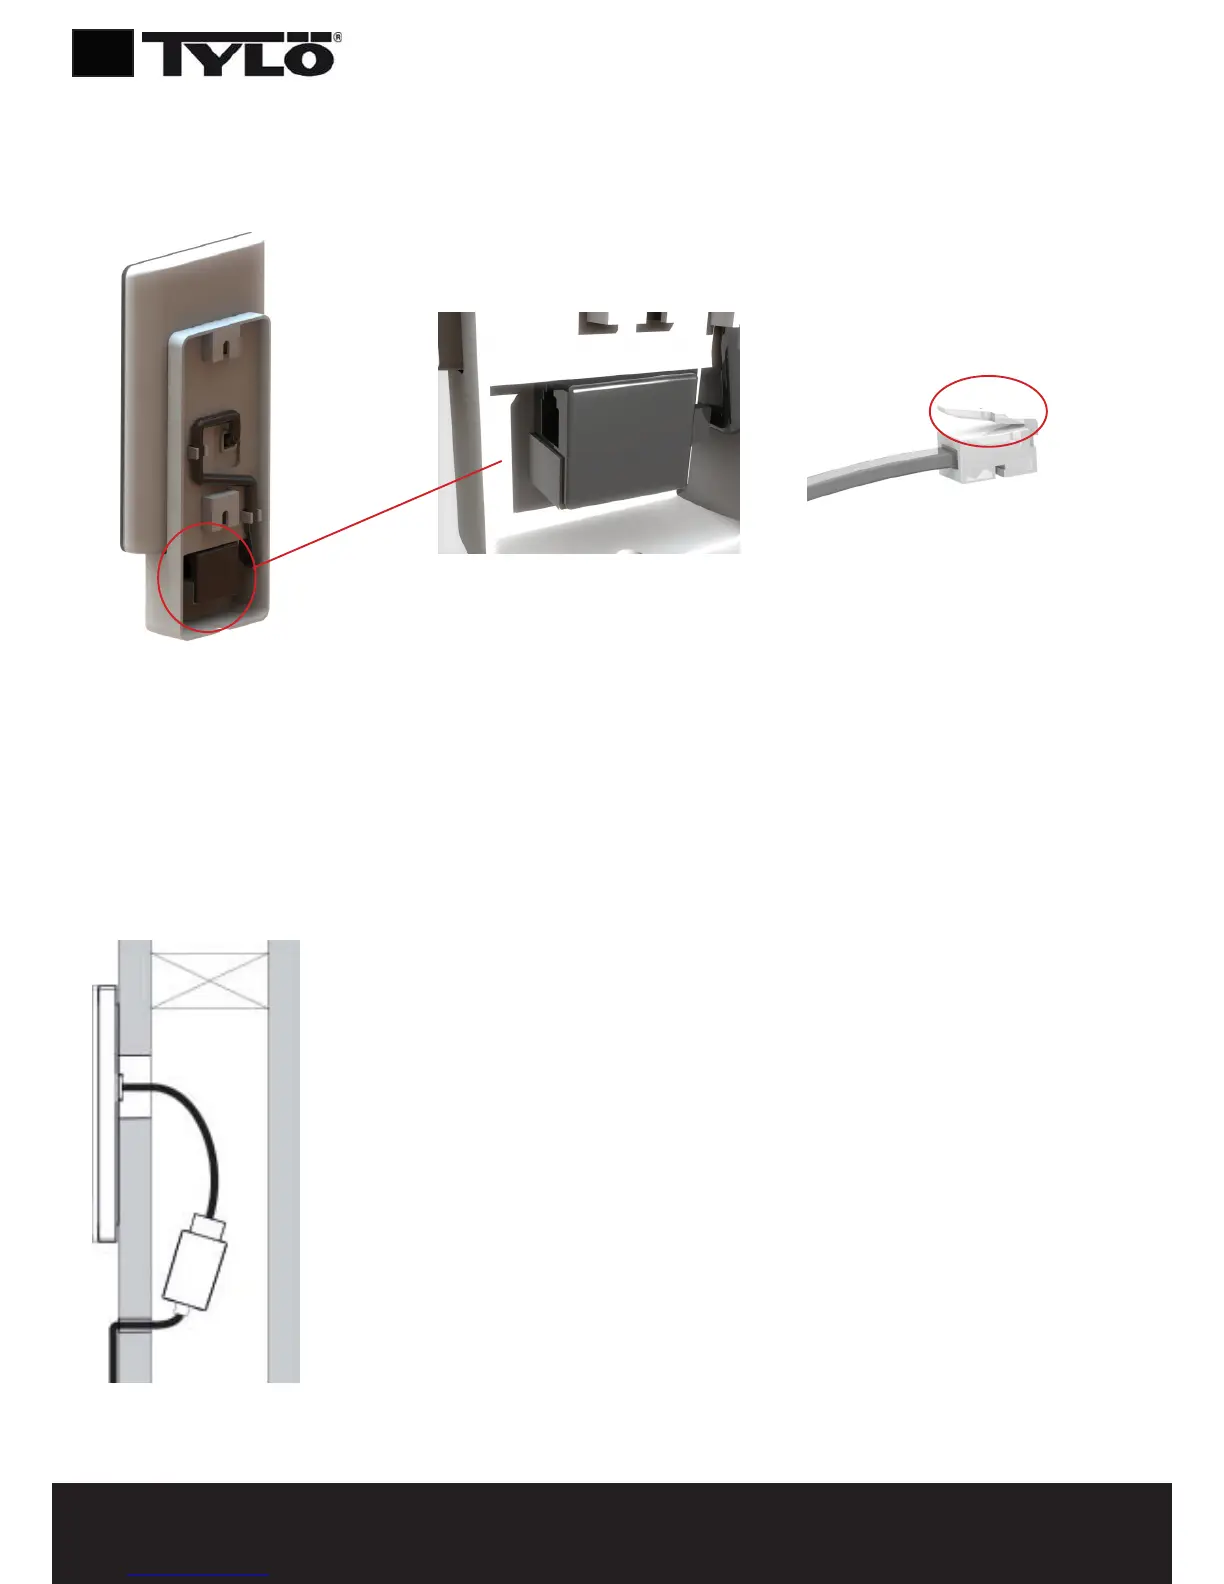
Attach the cable and switch to the bracket (see Figures 3 and 4). Remember to position the switch in
accordance with the illustration (the locking tongue should be at the left side when seen from below).
Install the panel on the wall. Use the supplied control panel cable to connect the panel to the heater.
If the cable is too long, it can be shortened, then use the extra switch supplied. NB: special pliers are
required (crimp pliers for RJ10).
Fig. 3
Fig. 4 Fig. 5
Installation without bracket
Attach the double-sided adhesive to the control panel. Before attaching the panel to the wall,
connect it to the heater to check that everything works. Remove the protective backing from the
adhesive. Connect the panel wire, pass the contact through the hole in the wall and press the
panel rmly against the wall.
If tting the panel without the bracket but it is necessary to run the cable outside the wall, the
following solution can be used (see Figure 6). This only applies to installation inside the sauna
cabin. Remember that the hole through which the contact will pass must be min. 30 mm.
Fig. 6
10
 Loading...