PAGE 2 OF 9 0721 IH-9466
INSTALLATION CONTINUED
8. Align the mounting bracket over the plastic screw
anchors. (See Figure 2)
9. Screw the mounting bracket to the ceiling or wall
through the mounting slots using the two screws
provided. (See Figure 2)
10. Tighten both screws completely. (See Figure 2)
Screws
Screw
Anchors
Figure 2
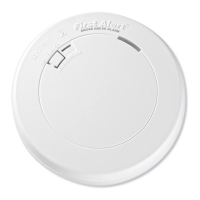
11. Test the smoke detector. Press and hold the test
button on the cover of the unit until the smoke
detector sounds (the smoke detector may continue
to sound for a few seconds after the button is
released). (See Figure 3) During testing, user will hear
a loud, repeating horn pattern: three beeps, pause,
three beeps, pause. If the smoke detector does not
sound during testing, call Uline Customer Service at
1-800-295-5510.
Test Button
Figure 3
ACTIVATING SMOKE DETECTOR
IMPORTANT! The smoke detector must be
activated before attaching to the bracket.
1. Turn the smoke detector upside down and pull
out activation tab (See Figure 4). If having trouble
activating the unit, call Uline Customer Service at
1-800-295-5510.
Activation Tab
Figure 4
ATTACHING SMOKE DETECTOR TO MOUNTING
BRACKET
1. Push the unit toward the bracket and turn it
clockwise until it snaps into place.
2. Test the unit again. Press the test button until the
horn begins sounding. During testing, user will hear
a loud, repeating horn pattern: three beeps, pause,
three beeps, pause.
LOCKING FEATURE (OPTIONAL)
NOTE: The locking feature is designed to
discourage unauthorized removal of the
battery or detector. It is not necessary to
activate the lock in single-family households
where unauthorized battery or detector
removal is not a concern.
NOTE: The locking feature uses locking pins
molded into the mounting bracket. Using
needle-nose pliers or a utility knife, remove
one or both pins.
 Loading...