- 16 -
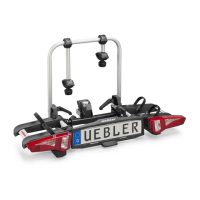
14. Press the holder (22) down. Slide the number plate into the
number plate holder (13), push it up and press it all the way in.
15. Let go of the holder (22) and check that the number plate is
securely fitted.
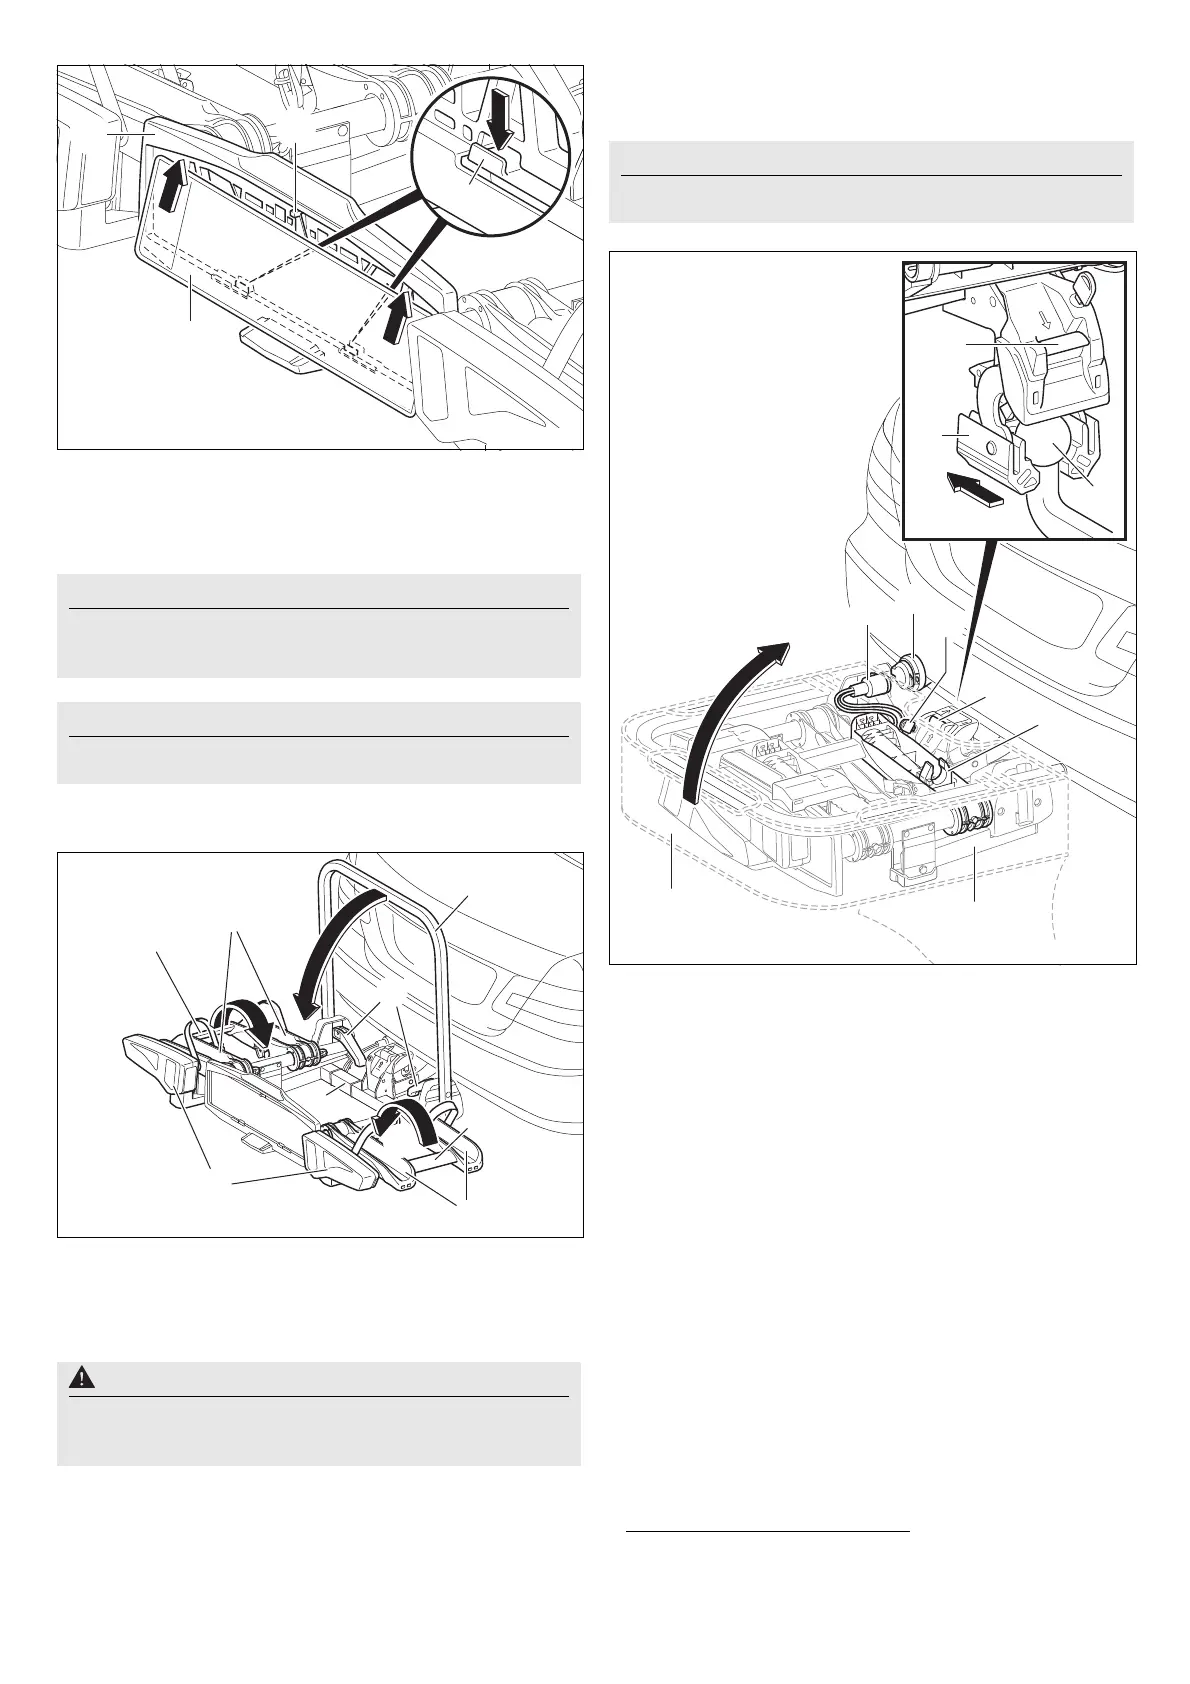
Removing the bicycle rack
1. Fold in the wheel rails (8) and tail lights (9) on the left side
(arrow I) by the crosspieces (21).
2. Fold in the wheel rails (8) and tail lights (9) on the right side
(arrow II) by the crosspieces (21).
3. Open up the quick-release clamp (7).
4. Fold down the rack frame (6) (arrow III) and fully close the
quick-release clamp (7) again to fasten the rack frame (6).
5. Remove the plug (12) from the socket (20) and push it into the
plug holder on the wheel rail (8).
6. Unlock the bicycle rack (1) with the key (4).
7. Push the bag (18)
3
onto the bicycle rack (1).
8. Press the safety lever (11) and push the bicycle rack (1) upright
(arrow IV).
9. Pull the bicycle rack (1) back off the ball head of the
towbar (19).
10. Put the bicycle rack (1) with the attachment (10) on the ground
to close the attachment (10).
11. Close the flap of the bag (18).
12. Put the holders (2) and (3) in the side pocket of the bag (18)
3
.
Note
To put in larger number plates, press back the stopper (24) and
push the number plate all the way into the number plate
holder (13).
Note
The number plate on the bicycle rack must match the vehicle’s
registration number and must be clearly legible.
Attention
Always fold in the wheel rails (8) by holding the
crosspieces (21) and not the tail light unit (9). Otherwise the tail
light unit (9) may be damaged.
6
I
II
III
1
7
8
9
8
21
21
M+P-25A-0208
Note
Regularly clean the quick-release clamps (7) and rack
frame (6) with soapy water, especially if they are dirty or stiff.
3 The bag is available as an option (item no. 19840).
12
1
18
11
10
19
IV
20
4
11
8
M+P-25A-0265
 Loading...