Page 19
POWERING TECHNOLOGY
Document No. M00035-MAN rev. 3a
aspiro1u_m35-man-rev3a-0417.indd
Chapter 4 Installation Guide
WARNING There are potential hazards related to installing this power system. It is
important to carefully read and understand the contents of Chapter 3 System Safety before
performing system installation.
CAUTION Make sure sucient room is left around the system, enabling optimal air
circulation and thus preventing the system from overheating. Keep vent openings from
blocking.
4.1 Introduction
This chapter provides detailed instructions for installing the Aspiro 1U Power System.
4.2 Unpacking
Check that the received equipment is in accordance with the packing list. Ensure that the
cabinet and the equipment have not been damaged during transportation.
Report any parts that are damaged, missing or incorrect. If possible, correct the problem
before continuing.
4.3 Tools
The following tools are required for a safe installation of the system:
WARNING Use only single-ended, fully insulated tools. Shafts of for example screwdrivers
should be insulated.
• Anti-static hand strap.
• Insulated screwdrivers, at, sizes 1, 2 and 3.
• Insulated screwdrivers, pozidrive (cross-slot), sizes 1, 2 and 3.
• Insulated torque spanner (for battery connection).
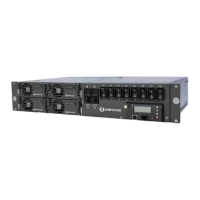
4.4 Rack Mounting
The power system is designed for rack mounting, and the default bracket is for 19 inch rack
width. This bracket can be easily adjusted to 23” or ETSI mounting. See Figure 4-1 below.
The brackets are front mounted but can be moved by the user for center mount rack setup.
There needs to be sucient clearance at the front for rectier installation, and at the rear for
connections. When using side mains and DC connectors, sucient space should be allowed
for access in this case.
 Loading...