35
help
You will need:
6PDOOÀDWKHDGVFUHZGULYHU
RESETTING THE UNIVERSAL
CAR REMOTE
Q. Can I pair the Universal Car Remote to work
with more than one vehicle?
A. The Universal Car Remote is designed to work with
one vehicle. You cannot pair it to work with multiple
vehicles at a time.
47KHVWDWXVOLJKWQRORQJHUÁDVKHVZKHQ
pressing a button but the remote still works with
the vehicle.
A. See page 5 for instructions on ENABLING/
DISABLING the STATUS LIGHT.
Q. I successfully paired the Universal Car Remote
to my vehicle but my old remote no longer works.
A. All remotes, old and new, must be paired at once.
Refer to the PAIRING procedure for your vehicle for
more information.
Q. STATUS LIGHT remains lit and will not turn off.
A. See “RESETTING YOUR REMOTE”.
AUTOMOTIVE SERVICE DEPARTMENTS
The service department at your local automotive
dealership may be able to assist you with questions
about your vehicle’s keyless entry system. Some
dealerships may pair the remote to your vehicle for
free as a courtesy.
The Universal Car Remote’s STATUS LIGHT can
be turned off to conserve battery life by pressing the
TRUNK and FUNCTION II buttons simultaneously.
The STATUS LIGHTZLOOUDSLGO\ÀDVKWKHQH[WLQJXLVK
To turn it back on, use the same procedure.
BATTERY
BATTERY
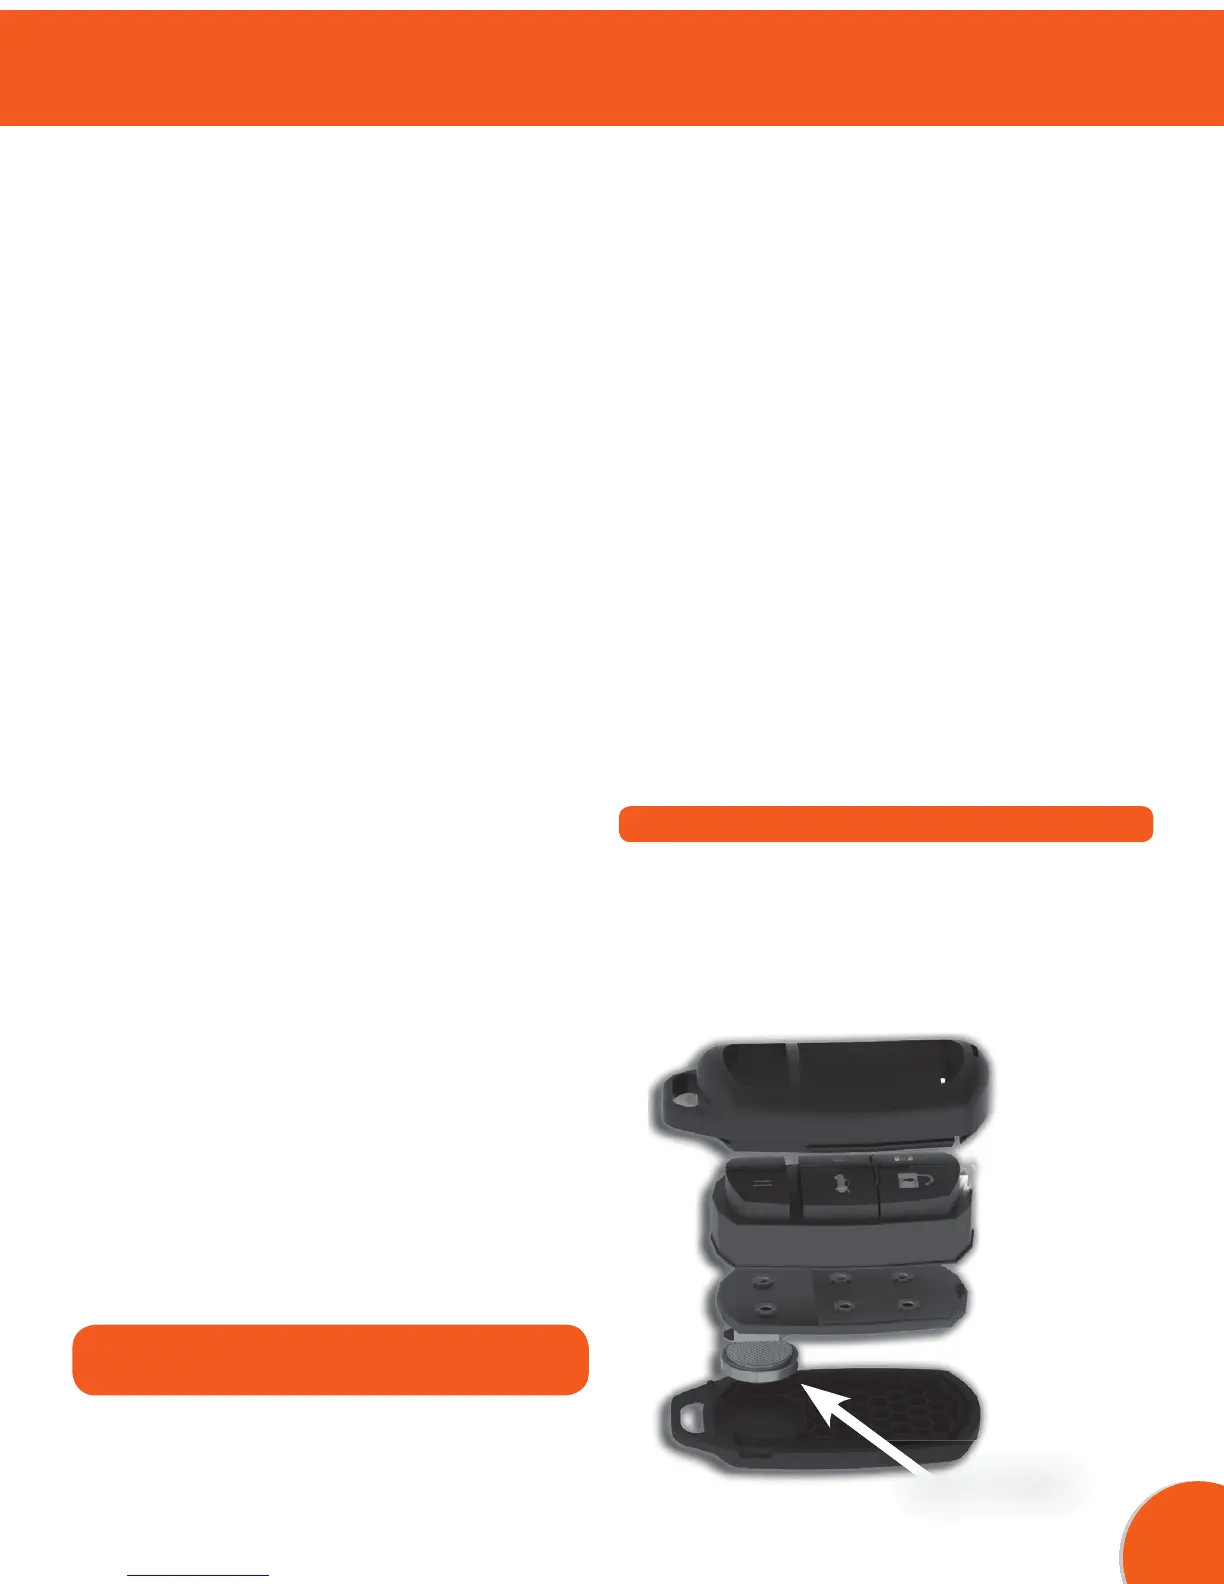
CHANGING THE CR1632 BATTERY
1. Refer to previous section “RESETTING THE
UNIVERSAL CAR REMOTE”.
• Small piece of wood or plastic such
as a pen-cap or toothpick.
1. Insert the screwdriver into the notch on the left side
of the remote. Gently twist the top and bottom shell
of the remote until it separates.
2. Remove the rubber insert and the remote circuit
board. Do not place the circuit board on any metal
surface!
3. Using the wood or plastic tool, carefully push the
battery out of the bottom of the holder. Keep battery
removed for 10 seconds. Make sure the + mark
faces AWAY from the green board, so the + side
touches the metal clip.
4. Insert the battery and retry pairing or usage with
your vehicle.
5. If it still does not work correctly try replacing with a
new CR1632 battery.
6. If you are still having trouble see MORE HELP on
page 35.
 Loading...