min
thickness
0.75’’
bottom
clamp
bolt
max
thickness
3.75’’
g. 1 g. 2 g. 3
Bottom plate
Parts for
Bolt-through assembly
VESA mount
(qty 2)
Monitor screw
(qty 8)
Long bolts
(two sizes included:
50 mm & 70 mm)
Allen wrenches
(set of six:
1.5 mm, 2.5 mm, 4 mm,
5 mm, 6 mm, and 6.5 mm)
Gas arm (qty 2)
Extension arm (qty 2)
Note: There are two ways to attach to your desktop: Clamp and Bolt-through mount. Determine if you need to attach it
around the back side of your desk (follow Step 1.1) or through a hole from 0.4’’ to 3.15’’ in diameter (follow Step 1.2).
Package Contents
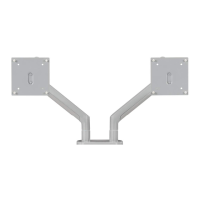
Zilker Dual Monitor Arm
SKU: MON002
© UPLIFT Desk • 1-800-349-3839 • info@upliftdesk.com • upliftdesk.com
Base
Base Cushion
Base Plate
Step 1.1 - Clamp
Peel the adhesive off the base cushion and attach it to the under-
side of the Base. Rest the Bottom plate onto the Base’s bolt. Fit
the Base around the back of the desk and tighten the Bolt & Bot-
tom plate into place using the 6.5 mm Allen wrench.
When placing the Bottom plate on the Base’s bolt, make sure the
edge farthest from the hole is facing the back of the Base and the
edge closest to the hole aligns with the front edge of the Bottom
clamp. If you’re attaching this to a UPLIFT V2 4-Leg Desk, this is
the only way it will t properly.
Note: If the Clamp does not t on your desk edge, you can in-
crease or decrease the space between the Clamp by removing
the bottom of the Clamp and the Bolt, and repositioning them.
Using the 4 mm Allen wrench, unscrew the two screws holding
the bottom of the Clamp (see g. 1).
For thinner desks (0.75’’ minimum), reassemble the Clamp as
shown in g. 2. For thicker desks (3.75’’ maximum), reassemble
the Clamp, as shown in g. 3.
Note: If you’re mounting this to an UPLIFT V2 4-Leg Desk, 2.5’’ will
be the maximum thickness that will work with the Clamp.
Once the Clamp is sized and attached to your desktop as de-
scribed above, continue on to Step 2.
Step 1.2 - Bolt-through
To mount your monitor arm through a hole in your desktop, rst
measure the hole. It must be between a minimum of 0.4’’ and a
maximum of 3.15’’ in diameter.
Prepare the Base for the Bolt-through mount by rst loosen-
ing the screw under the Clamp with the 6 mm Allen wrench.
Note: screw may be tight. Once removed, separate the Clamp as-
sembly from the Base.
With the Base upside down, place the Base plate in the pocket
where the clamp assembly was. Then peel the adhesive backing
off of the Base cushion and attach it over the Base and Base plate
as shown.
Place assembly completely over the hole, and facing the front of
desk. Then, select a Long bolt: the 50 mm Bolt ts desks 0.6’’ to
1.38’’ thick, and the 70 mm Bolt ts desks 1.38’’ to 2.13’’ thick. Insert
the Long bolt through the Bottom plate.
Note: The Bottom plate must straddle the hole’s diameter. As
long as the hole isn’t larger than 3.15’’ than the Bottom plate will
work. Thread the bolt into the Base assembly by hand and tighten
using the 6 mm Allen wrench.