10
Once the wheel is securely inserted into the fork, tighten the metal
rod using the locking lever on the fork. (13)
Once the assembly is finished, make sure that all parts are tight and
properly adjusted. Check that the brake system is correctly positioned
and that the brake pad is inserted.
Check that the handlebars are straight and tight.
Check that the saddle is aligned with the dial on the bike, and that it is
tight.
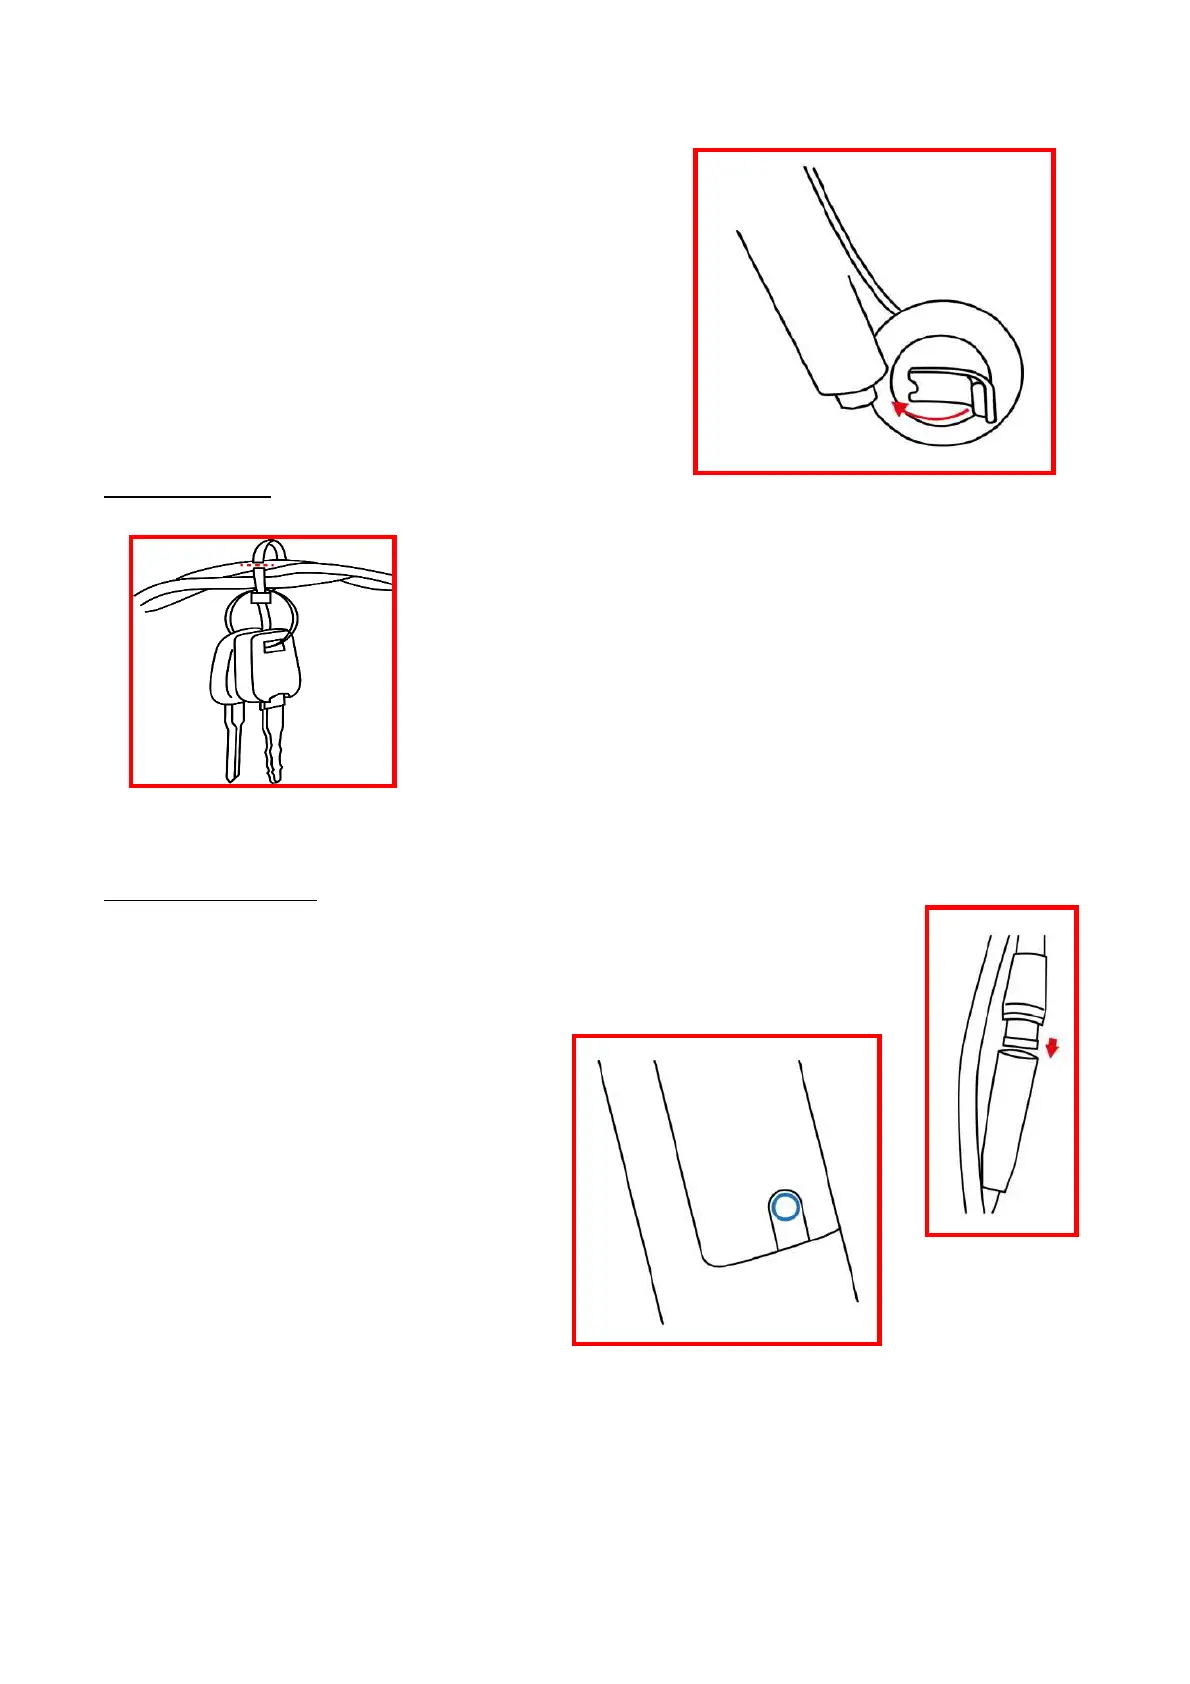
STEP 5: BATTERY
Your battery is removable, you can remove it from your bike to charge it
at home for example. To do this, take the key attached to your
handlebars. (16)
To remove your battery, insert the key into the battery port, turn and
remove the battery. When you put the battery back on your bike, make
sure that you have engaged it and heard a "Click". Once the battery is
inserted, turn the key and remove it.
STEP 6: CONNECTION
In order to start your bike, connect the battery connection cable. (17) Follow the arrows on
the cable and push it in as far as it will go. Once the connections have been made, switch
on your battery by pressing the button on the cable. (18)
If the battery does not turn on, follow these steps:
- Check your connections
- Check that the battery is properly inserted.
- Connect your battery with the charger provided
 Loading...