8
STEP 4: MOUNTING THE PEDALS
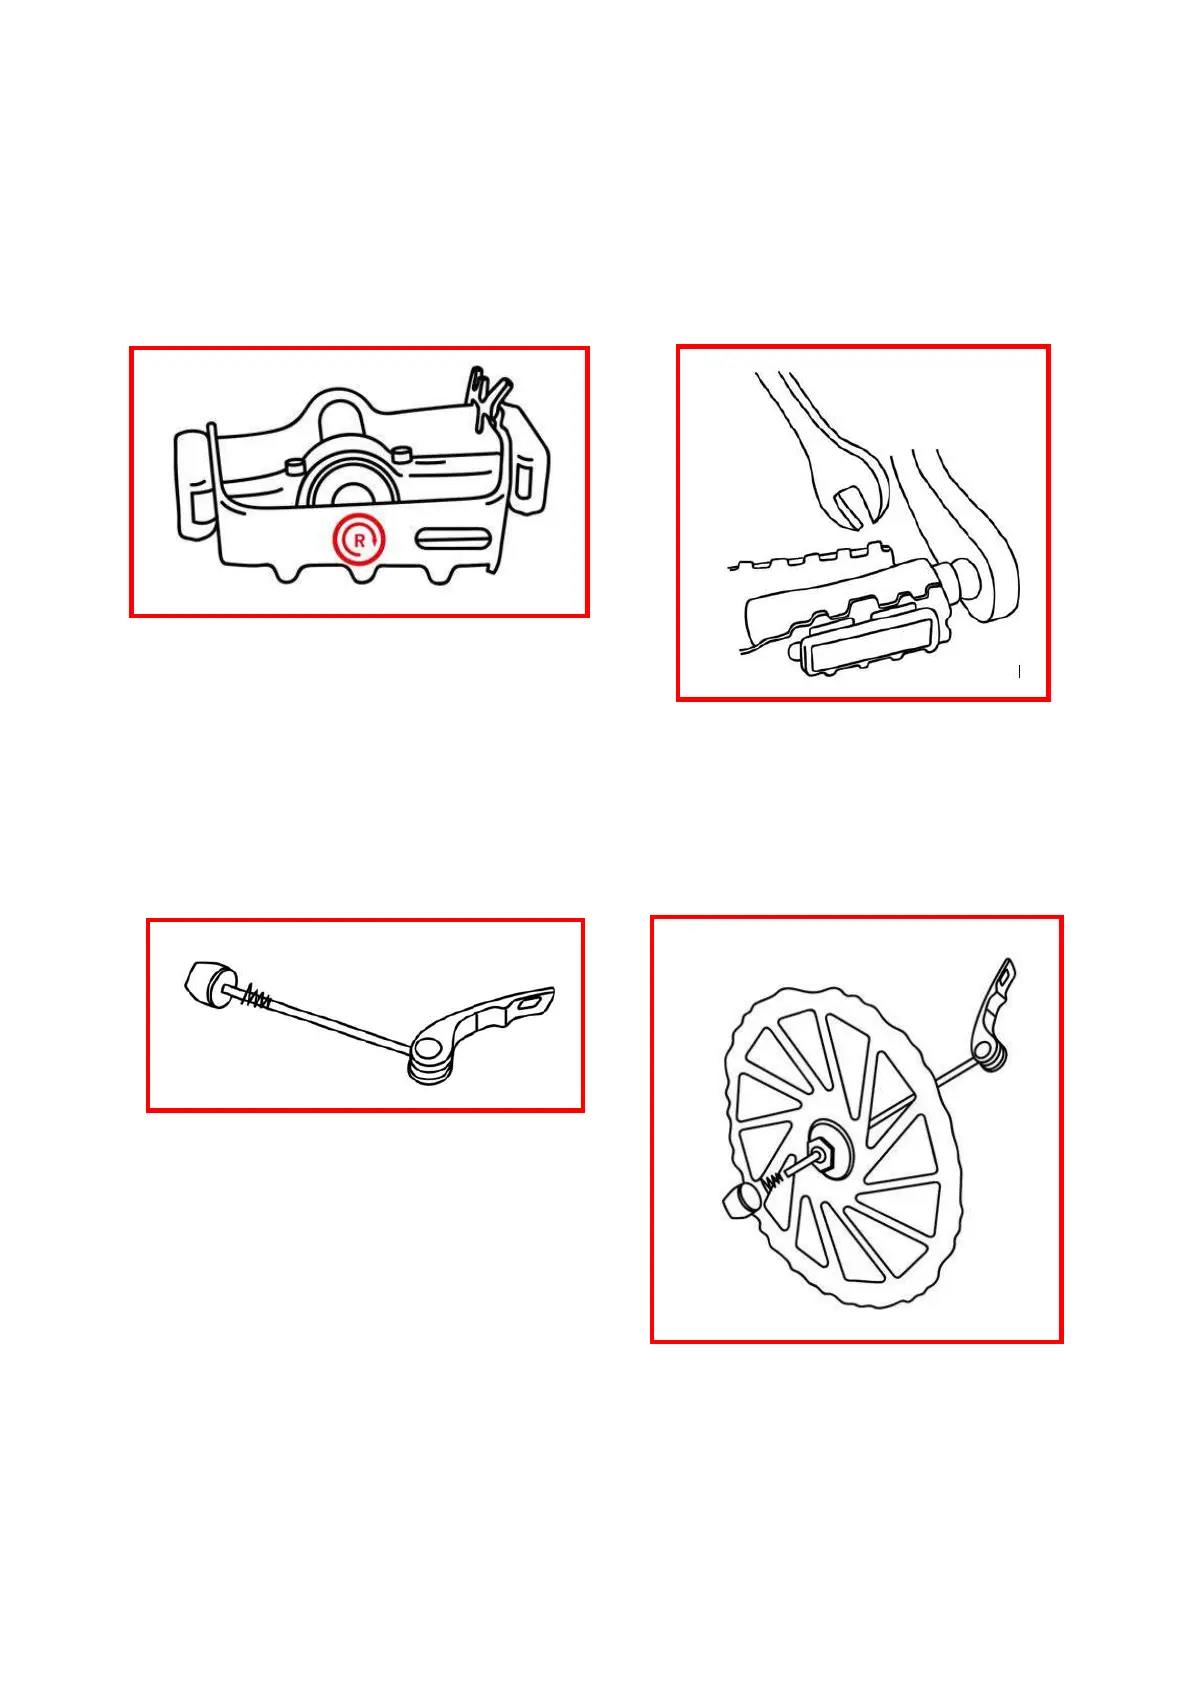
On each pedal is indicated the indication of its location. (6) "R" for right and "L" for left. Once the position has been
determined, start screwing the pedals onto the crankset. The direction in which the pedals are screwed on is also
indicated on the label. (6) Next, screw your pedals more firmly using the spanner provided. (7)
STEP 5: MOUNTING THE FRONT WHEEL
To mount the front wheel, use the black metal rod with the locking lever at the end. (8) Unscrew the round end of the
metal rod and also remove the spring.
Insert the metal rod in the centre of the wheel. (9) WARNING:
The locking lever must be opposite the brake pads on the wheel.
Once the rod is inserted in the centre of the wheel, replace the
spring and screw the round end back in place. Tighten the round
end securely and check that the spring is correctly seated.
 Loading...