5
EN
4 5
9
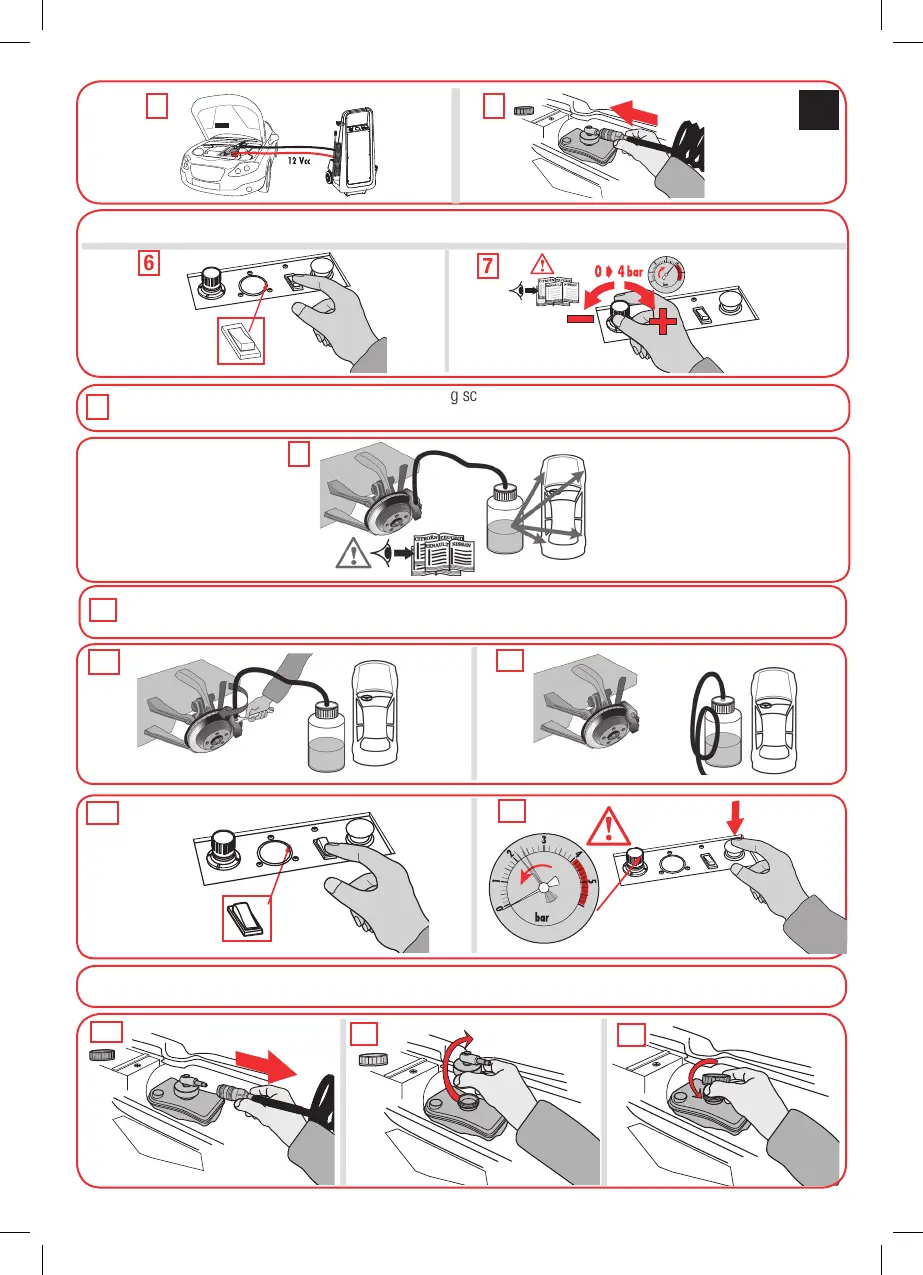
Position the tip of the collection can onto the bleeding screw. Open the bleed screw. Bleed the circuit, one caliper
after another, according to the sequence in the vehicle manufacturer’s manual.
8
"CLIC"
11
Once the used uid is completely replaced and all bubbles are removed, bleeding is complete.
Close the bleed screw.
12
13
14
15
16
17
10
End of bleeding
OEM
Starting bleeding and Adjusting pressure
6
7
ON
OFF