UTILIS S.A.S ZAC Eurotransit RUE ABBE MARIOTTE 57365 ENNERY FRANCE
T: +33 (0)3 87 71 60 74 W: www.utilis-international.com Email: contact@utilis.fr
5
5
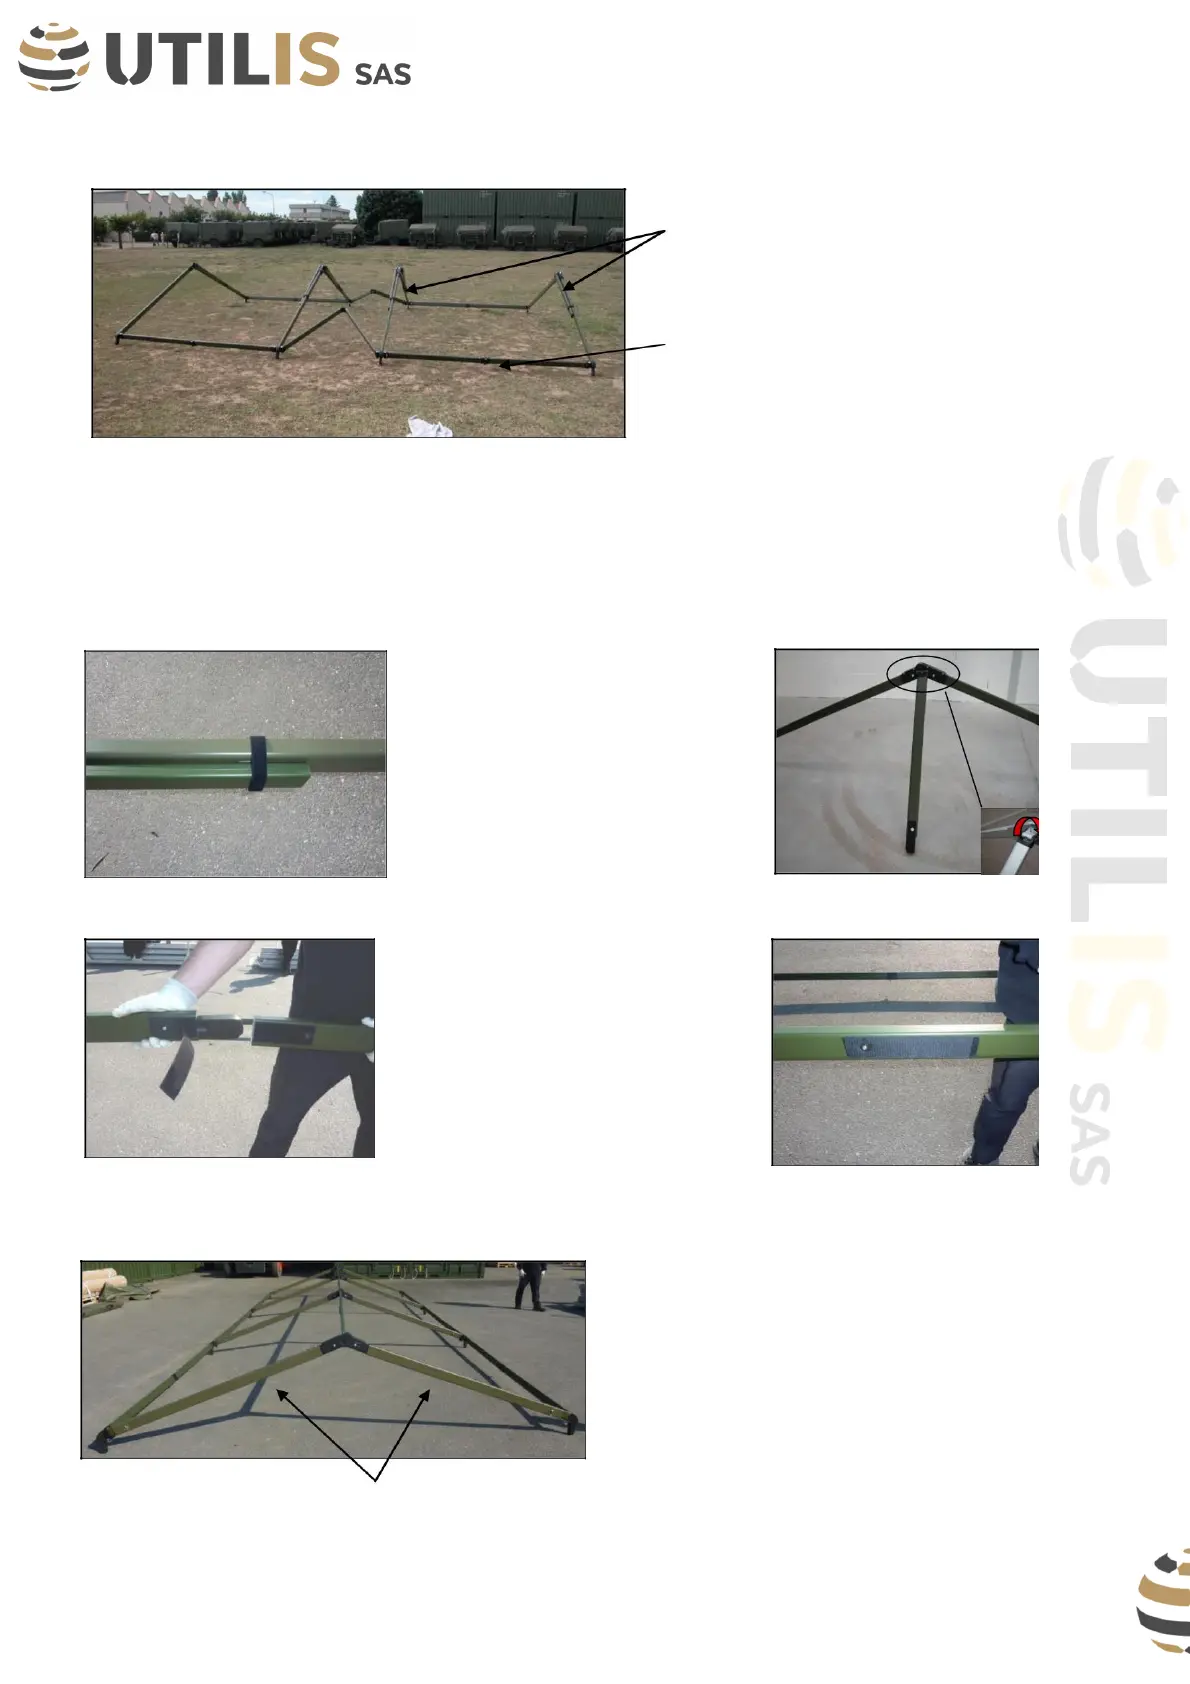
Ridge connection bars
Self-locking mechanism
Deploy the roof frame by grasping the ridge hinge at both ends, lifting slightly off the ground, and pulling
away from the center. The eave purlins will lock into place automatically. The eave purlins will be held
in place mechanically which gives rigidity to the roof assembly.
Slip the Velcro band down and
release the ridge purlins. Grasp the
two pieces of the ridge purlin.
Rotate 90º while lowering it to the
ground. Repeat this procedure on
the other 2 ridge purlins.
Grab the 2 pieces of the ridge purlin
and slide the male connector into the
corresponding piece of the ridge
purlin. When the pieces are
assembled, as added safety use the
Velcro strip across the connection.
Repeat this procedure for the other 2 ridge purlins.
The roof assembly is complete. The roof fram will
be in the configuration shown to the left. Now, you
have to slide out the telescopic part of the roof
arche.
It has to be done simultaneously by 4 people.
Roof arche
 Loading...