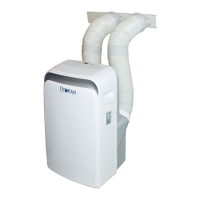
1. Place the unit upright on
a stable surface to minimize
noise and vibration.
2. Install the hoses by twisting
them counterclockwise into the
adapters until secure.
3. Slide the hose adapters onto the
hose seats on the back of the
unit. Use the hook on the side
of each adapter to lock the
adapter in place.
4. Attach the opposite ends of the hoses to the window kit.
5. Adjust the vent control on the back of the unit below the hoses to draw air from the room.
6. Plug the unit into a 120-volt power source.
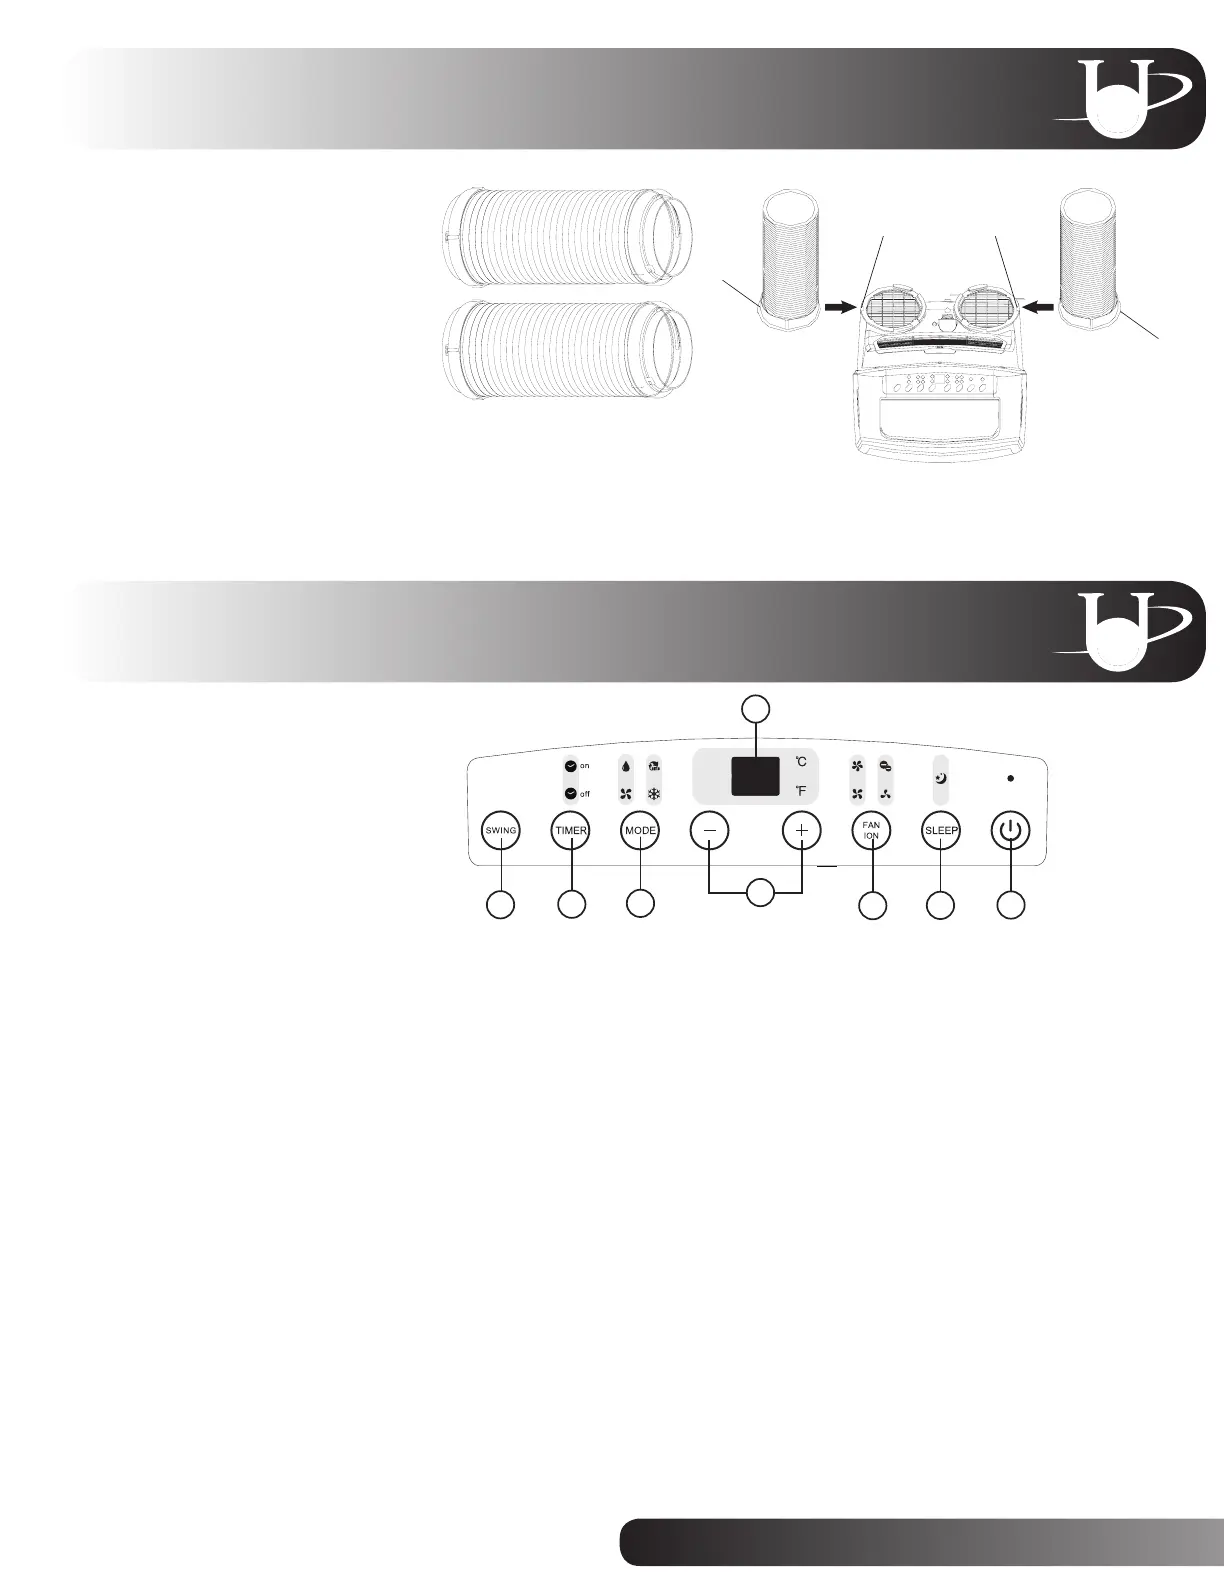
1. Power button:
Press to turn the unit ON and OFF.
2. Sleep button:
Press to begin sleep mode. In sleep mode, the unit automatically increases the set temperature
by 2ºF every 30 minutes for one hour, maintains the new temperature for seven hours, and then
returns to the programmed temperature. Sleep mode is only available during cooling and
auto operation.
3. Fan/ION button:
Press to select the fan speed (low, medium, high or auto). The illuminated fan speed icon indicates
the selected setting. Fan speed can only be adjusted in cooling, dehumidifying and fan modes.
Hold for three seconds to activate or deactivate the ion function. The ion generator helps remove
impurities from the air, trapping them in the filter.
4. Up and Down buttons:
Press to raise or lower the set temperature or adjust the timer setting. Hold both the Up and Down
buttons for three seconds to switch the display between Fahrenheit and Celsius.
5. Mode button:
Press to select the operating mode (auto, cool, dehumidifying or fan). The illuminated icon indicates
the selected mode.
6. Timer button:
Press to program auto-ON and auto-OFF times.
7. Swing button:
Press to initiate the auto-swing function. Press again to stop the louver at the desired angle.
8. LED display:
Displays temperature and timer settings. Displays the room temperature during dehumidifying and
fan modes.
4
1
2
3
5
6
7
8
Hose seat
Hook
Hook
Hose seat
Hose and Adapter Installation
Unit and Remote Functions
4
 Loading...