Instructions and settings
72 27.06.2011
ver. 2
3.32.2 Tramline options
The RDA 400 S model is supplied with equipment for centre marking installed.
The drill is supplied having two or three row shutoff. If one row shutoff is required, it can be
achieved by changing the flap springs for the outlets which are not required to tramline, see
”3.32.4 Adjusting row shutoff” on page 74. For control or alteration of the track width, see ”3.32.3
Adjusting track width” on page 74.
The various tramlining widths are set using the Control Station. The selected tramlining pro-
gramme is shown at the lower left of the display, while the current furrow in the sequence is shown
at the lower right part.
Keep the button depressed until the tramlining programme digit is selected. Then use the
selection dial to set the desired tramline interval and confirm with . Advance to the desired
start value using . The lamps (6) light when tramlining is in progress.
Also see ”3.30.2 Functions” on page 59.
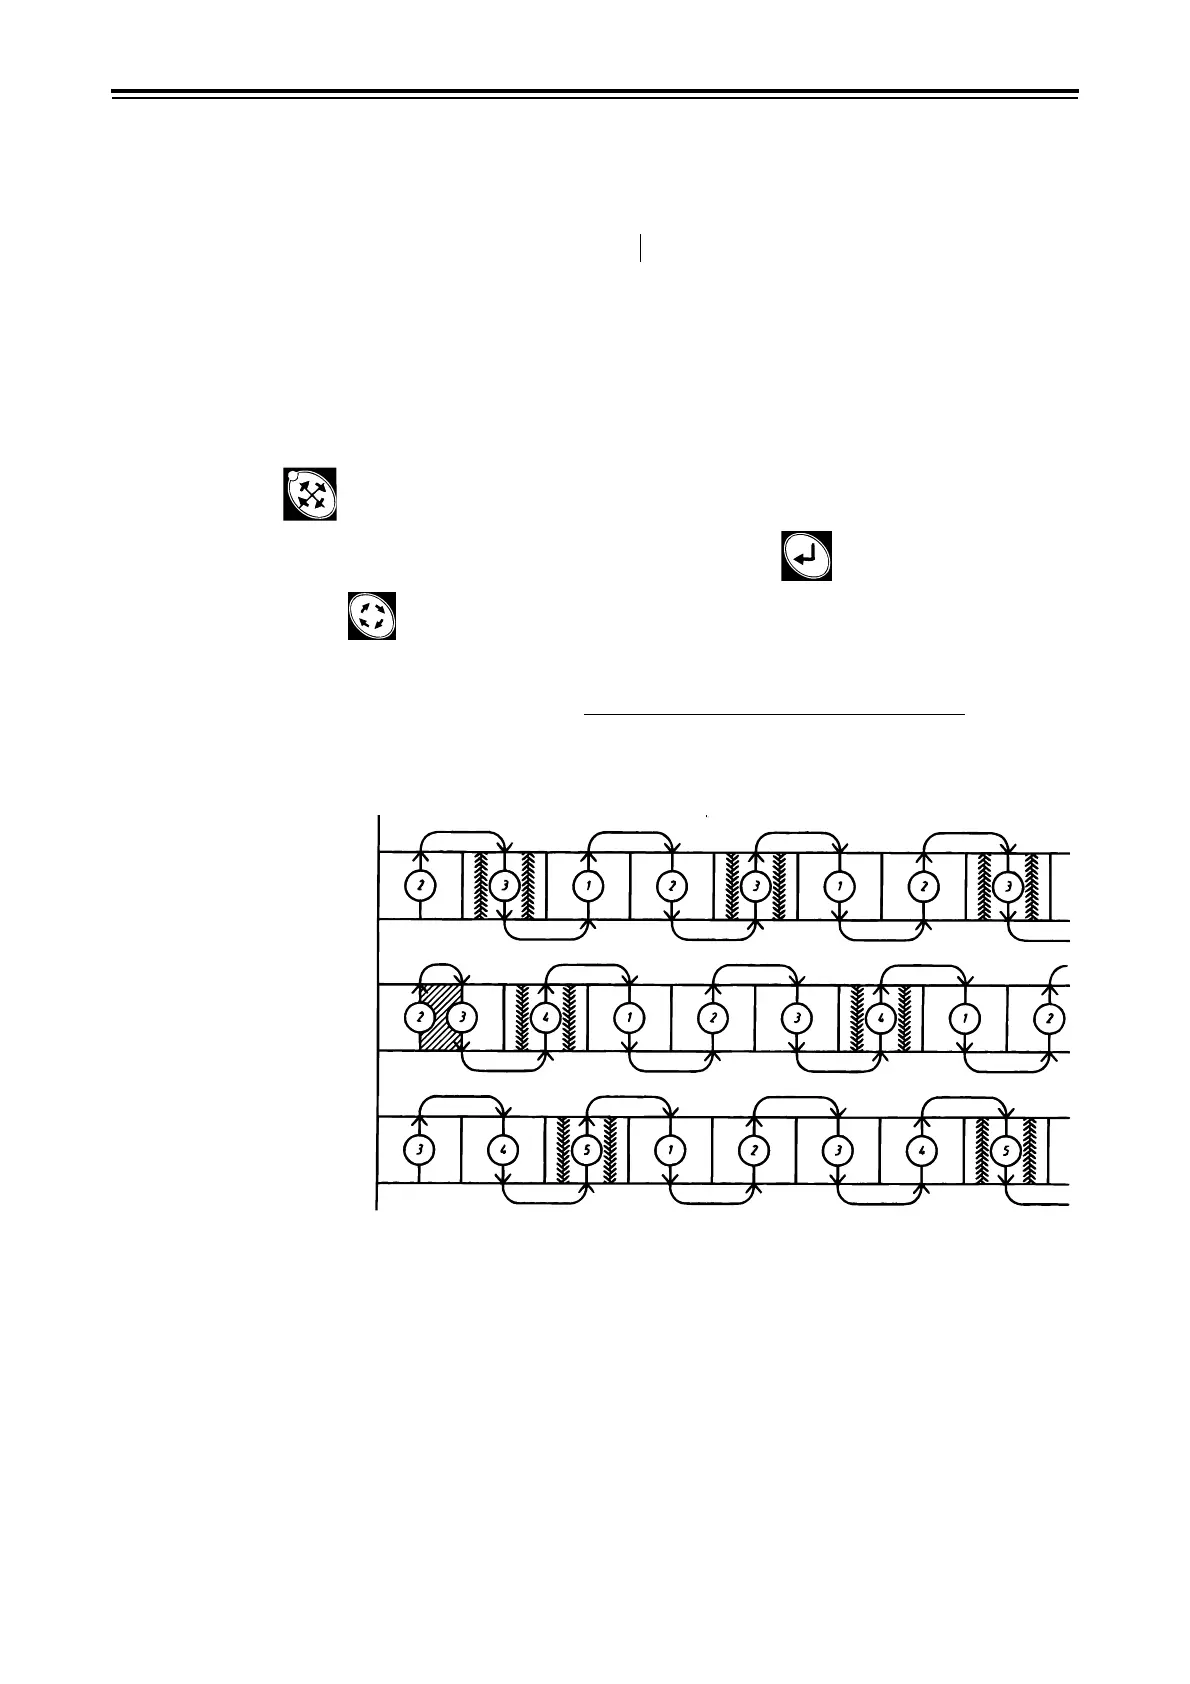
For successful tramlining, it is important to organise the tracks before starting the work.
Example: RDA 400 S to be set for 24 m tramlining. Select tramlining programme 6 (24/4=6). Ad-
vance the starting value to 3.
Figure 3.79 Centre marking
Table 3.3 Tramlining options
RDA 400 S centre marking 8, 12, 16, 20, 24 metre RDA 400 S side marking 16, 24 and 32 metre
RDA 400 S/12 m
RDA 400 S/16 m
RDA 400 S/20 m
 Loading...