TIORK I
NSTRIjCT I ONS
I. CYLIIOER SLOCK AND CYLI
ND€R LI]GRS
A. I,GASUR I t{G I}IE CYL ITDER
L INER IiEAR
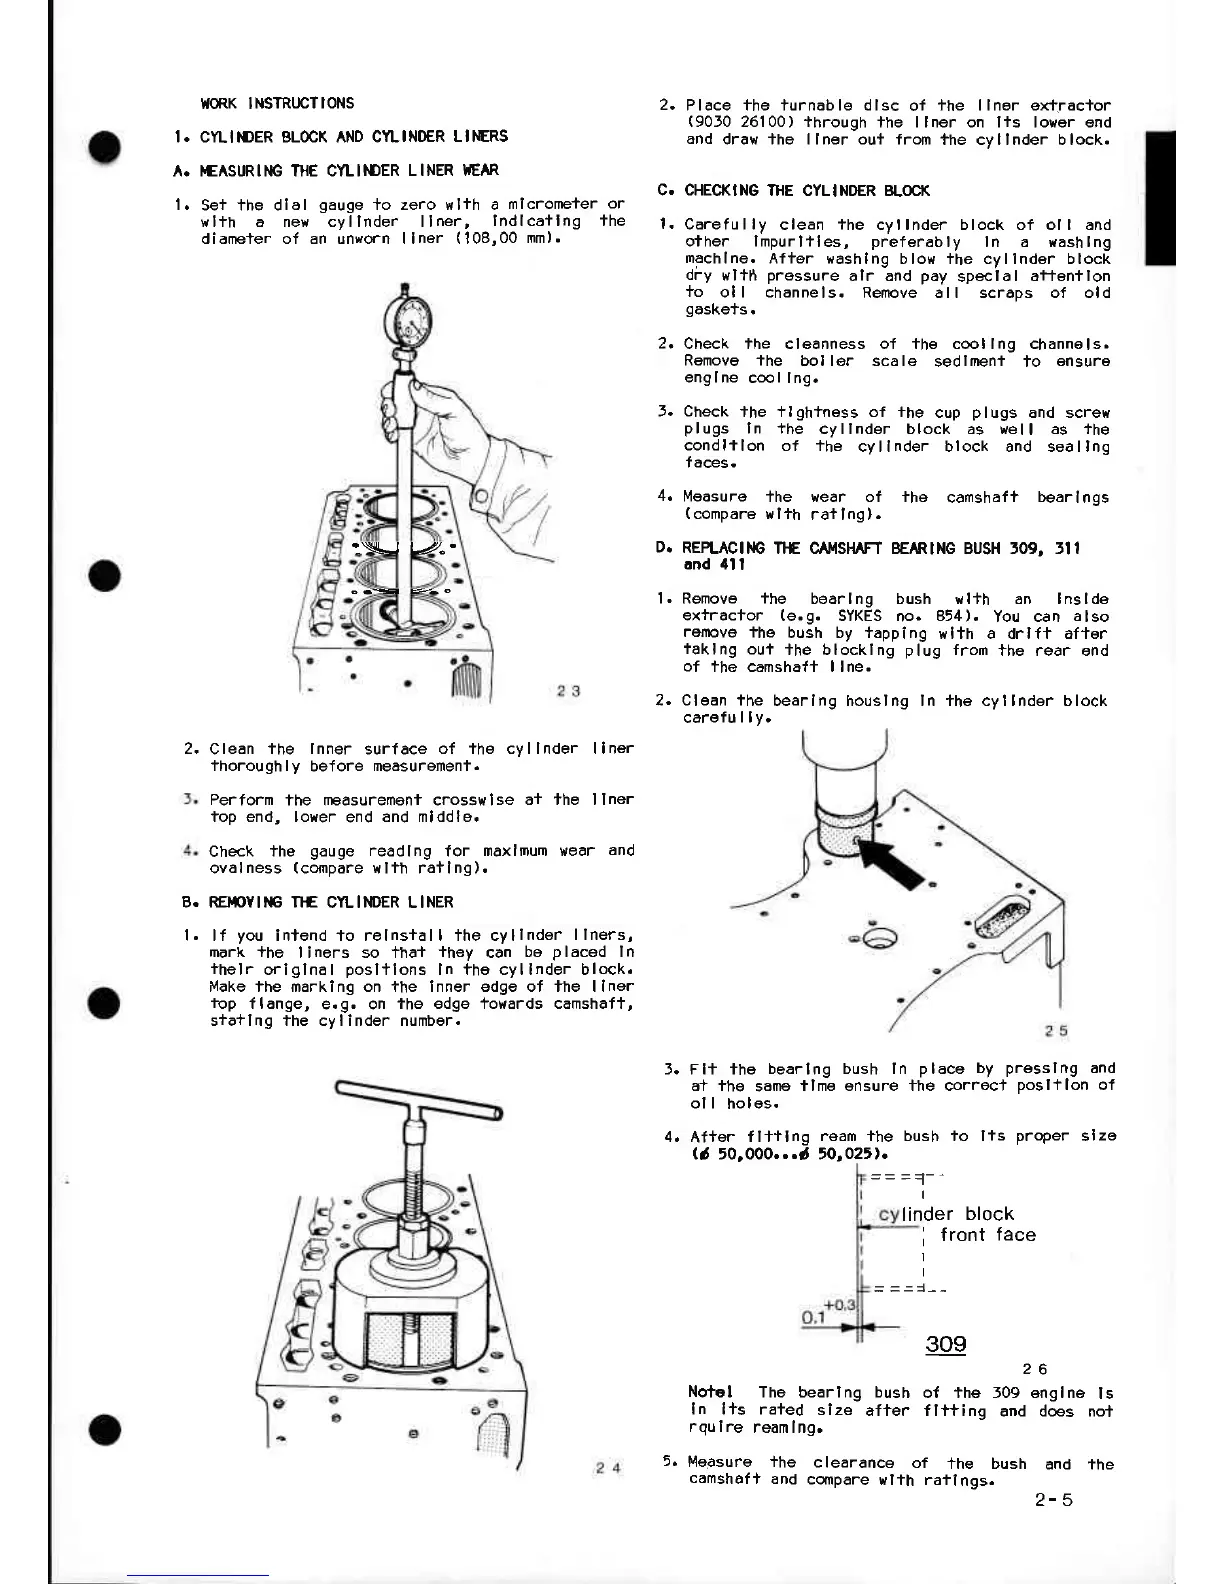
l.
Set ihe dlal
gauge
+o zero wlih a
mlcrome+er
wlth a ne', cyllnder llner,
lndlcatlng
diameter of an unworn llner
(108,00
mm).
2.
Clean
ihe Inner
surface
o{ ihe cvllnder llner
j-horough
ly
before
measureneni.
Perfoim
the neasuremoni crosswlse
a+ tho llner
top end, loYer
end
and mlddle.
Check
ihe
gauge readlng
for
maxlmum vrear
and
ovalness
(conpare
r{lih
ratlng).
RETOY
II€
llf
CYLINDER LINER
It
you
in+end io relnsiall the cyllnder
llners,
mark +he
liners so +ha+
+hey
can
be
placed
ln
ihelr
origlnal
posl+lons
In the cyllnder block.
Make ihe marklng on the lnner sdge of the llnsr
+op
flange,
e.g. on
+he edge towards canshaft,
s+a+lng the cylinder number.
3. Fl+ +he
bearlng bush In
place by
presslng
and
a+ ihe
same
ilme ensure the correc+
poslilon
of
ol I
holes.
4.
Af+er
fl+tlng
|-eam ihe bush io lis
proper
slze
(d
50.000...d 50,025).
I
Place the turnable dlsc
of
+he
llnor
extrac+or
(9010
26100) +hrough
the llner on lis lowar end
and
draw +he llner ou+ fron
the cvllnder block.
CHECKI NG
IHE CYLINDER BI-OCI(
Carefully
clean
the
cyllnder block of ol I and
other lmpurltles,
preferably
In a {ashlng
rnachlne.
Afier Hashlng
blow ihe cyllnder block
dry
wlth
pressure
alr and
pay
speclal
afienflon
to
ol I channels.
Remove all scraps of old
gasKeTs.
Check the cleenness of the coollng channols.
Remove the
bol ler scale
sedlneni to
ensure
englne
coollng.
Check
+he +lgh+ness of fhe
cup
plugs
önd screw
plugs
ln ihe
cyllnder block as l,ell as lhe
condl+lon
of +he
cyllnder block and seallng
laces.
I\4easure
+he wear of the
camshaft
bear
Ings
(compare
wlih
ra+lng).
REPLACI]'IG
ItE C/tljISMFT BEÄRING BUSH tO9, 5l I
ond
'll
I
Rgnove
fhe
bearlng bush rl+h an Inslde
exiracfor
(e.9.
SYKES
no.
854).
You can
also
remove
the
bush by +apping
t{lth a drlfi af+or
iaklng
oui
+he blocklng
plug
from
the rear ond
of
tho camsha{+ llne.
Clean ihe
bearlng houslng ln fhe cyllnder block
carefu
| |
y.
linder
block
i
front
face
I
I
or
Tne
l.
2.
l.
309
2
Notel
The bearlng bush
of the 509
In lls ra+ed
size
afier fliting
and
rqulre
ream Ing.
Measure ihe
clearance
of
+he bush
camshaft
and
cornpare
wlth railngs.
6
englne
ls
does nol
and the
2-5
.-\J
l/..
 Loading...