t.
TllllNG GE^R ASSEIGLY
GEAR }IOUS I }G
REIOY
I
I{G THE GEAR I{OUS
I
}lG
As
the
gear
houslng bo+ion face forms
pari
of
ihe
mgilng
face tor ihe ol I sunp
gasket,
ihe
r^
ol I sump
äusi-
be removed fron the-engtnå, lf
'"'
fhe
9e6r
houslng
needs fo be taken olf
|.hlle
fhe
9n9lne ls
In
place.
Remove
+ha
ol I
sump
from ihe englns.
opgn
the tan flxlng
scrers
and rgmove thg fun.
ll'
Loosgn
the alternator flxlng scrers and
refl|ove
the alternator, beli
pulley
and b€lf.
J. Redtove
ihe oll
pressure
regulailng valve
(Jll,
411
and 6ll enqlnes).
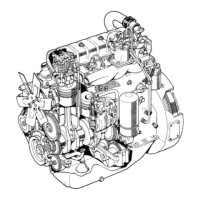
open
fhe
crankshai+ lront end nuf
vrl+h
iool
9024
14200 In case of
J09, 3ll and 41 I englnes
and rlth
+ool
9024 55800 ln
case
of 6ll and 612
englnes.
Pu
| | the belf
pu
lley
-
hub
plece
comb lnal lon oJf the crankshafl-
Remove
the
fron+ cover flxlng
scrers
and nuis
and lake off the cover.
lf
you
need
io
tap
a
wedge b€freen ihe cover and the
gear
houslng
+o
remove
ihe
covor, be sure not to damagg ihe
seallng
surfaces.
Renovo
the
ol
I def lecior
from the crankshati,
Remove
fhe
Injectlon
pump
andlor compressor.
Notcl lf
you
do noi ln+end
to
rep
lace the
g€ar
houslng, li ls noi
necessary to remove
+h€
lnjectlon
punp.
Only
reflDve fhe
fuet, lube ol I
end lnjecilon
plpes
frorn the Injec-t
lon
pump
(englnes
rhere
lhe
Injectlon
punp
ls flxed io
the
gear
houslng).
Opgn
ihe
ldler
gear
flxlng
scrgus.
Romovo tho
ihe refalnlng
flange,
gear
€nd
shaft.
Notcl I
f lhe
cy I
I
nder
head
and
vo I v€
flEchanlsm
have
no+ been
renoved,
lock ihe
valve
+appets up
In such
y.ay
thaf
ihey rlll not
droP
down
when
remov I
ng
+he
carlsha{ t
and ihus
prgvent fhe lns+allailon
o{ ihe
camshöft.
Se€
Ins+rucflons,
polnl
S
2
g.
Open
+he
gear
houslng
flxlng screws
and
rgmove
ihe
houslng.
lf
you noed to tap a red99
betxeen
ih€
gear
houslng
and cyllndsr
block io
re[bve
ihe
houslng,
ensure
+haf +he seallng
taces
rsmaln I n+ac1.
Tap
the crankshaf+
shafi seal
off lhe
fronl-
cover uslng
a sul+able
drl{1. wash
all detached
parts
and
clean ihe seallng surfoces
carefully.
B. REOOIIDITIOTIrc
IHE IDLER GEAR
ldler
gear
rl+h
plaln
bearlng:
lf
you
replace l-he ldler
gear bearlng bush,
oress
+he nefl bush ln
Dlace
so thäl lis
rEar
edge
renalns
0,1
...o,25
nm
Inslde
lhe
gear
rear
f ace.
Afier
lnstallailon th€
bearlng
bush musi be
machlned +o
55,000...55,030
|trn In casg ot 109,
511,
4ll and 611 englnes
and to 55
'200...55,250
nm
ln
case of
6ll
englnes
ylth
50,7
rm long
ldler
gear
shaf+.
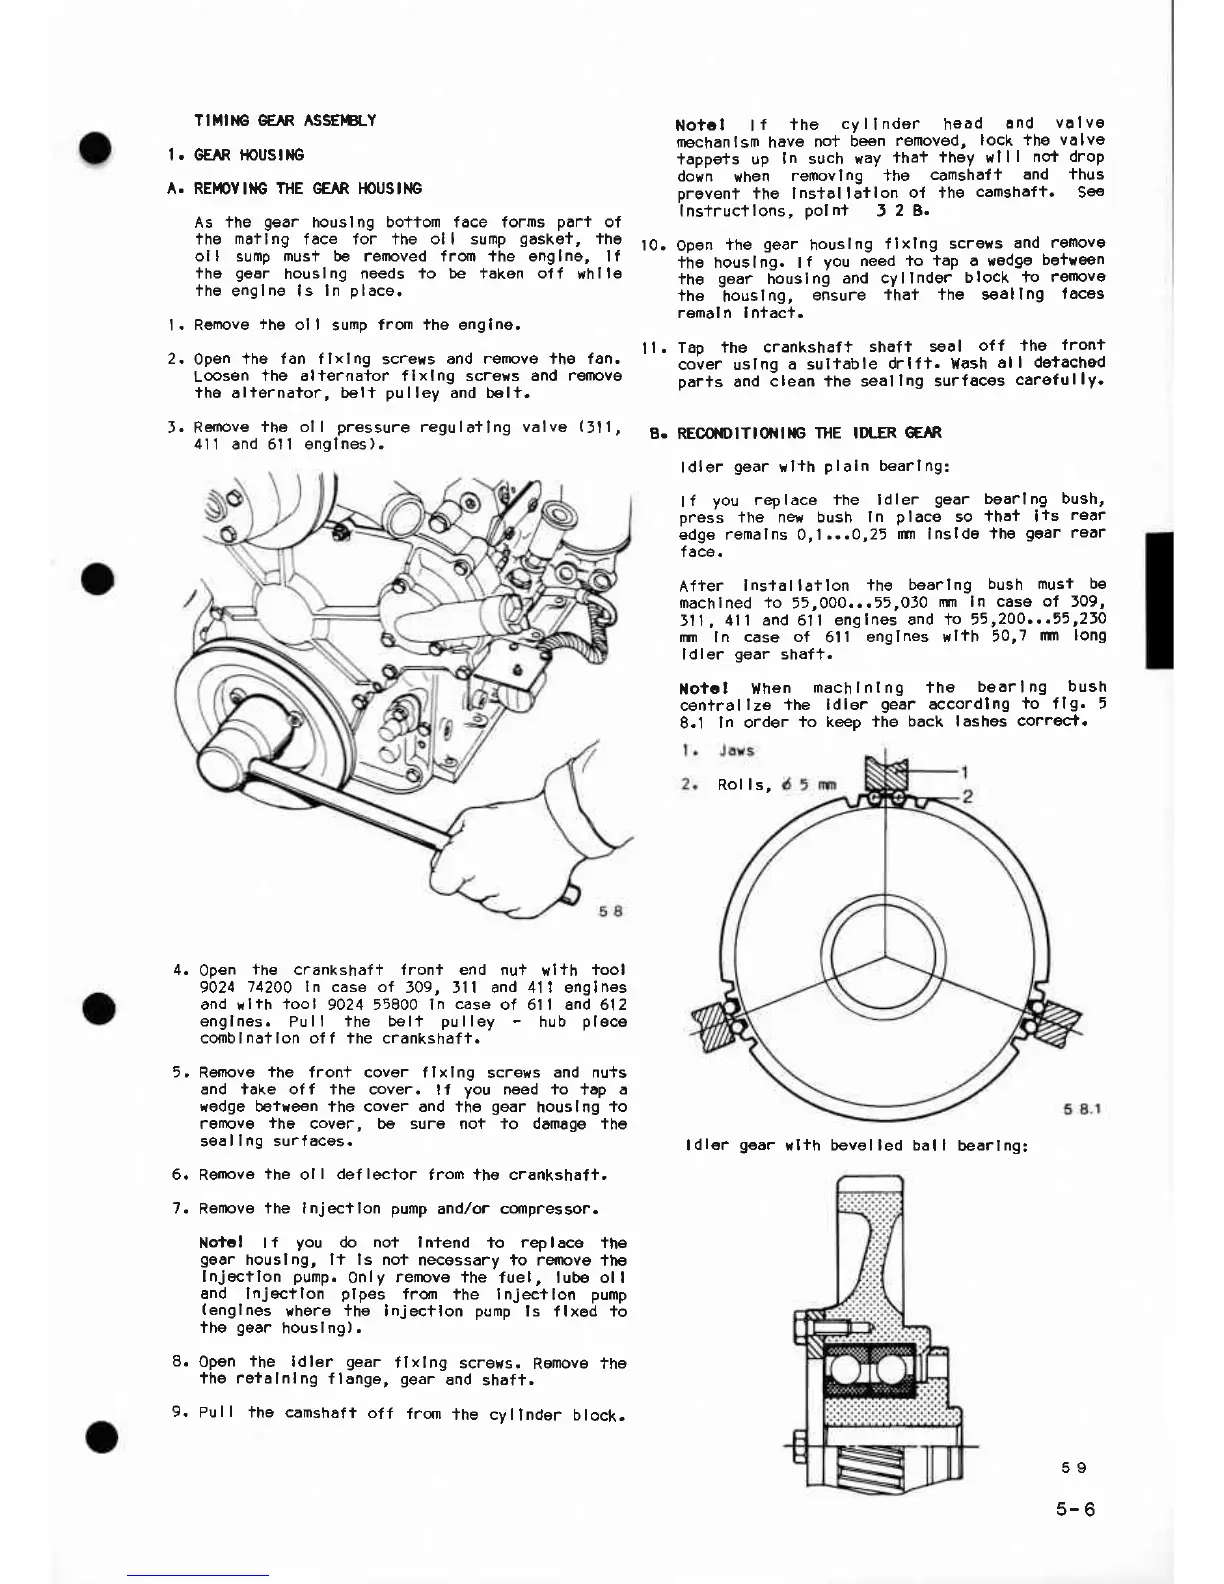
l|otcl
Hhen
machlnlng
lhe
beörlng bush
cenirallze
+he ldlor
gear
accordlng
io tlg. 5
8.1
ln order
to k6eD the
back lashes
correqt.
ldl6r
gear
rl+h bevelled ball
bearlng:
q-
A
Rol ls,
9.
Pull ihe camsh€ft
off
{rom
+he cvllnder
block.
 Loading...