t.
UORK I NSIRI,'CT IONS
LIERICATI()t{
SYSIE
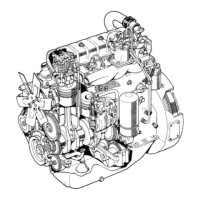
INSPECTI
}{G THE OIL
PRESSURE
REGII-AT IiIG
YALVE
Chgck
the valvg
functlon
every
ilme lf
tho
englne
ol I
pressure
does
not
rlse sutflclenily
or
lf lt varles
conslderobly.
Flrst, however,
ensure
iha+ +here ls
enough
ol I In
lhe engln€.
67
Oll
pressure
regulatlng volyg
(109)
open +he
valve
cover flxlng scr6v.s and
remove
fh6
cover and ihg
sprlng
underneath lf. Noie
ths
washer betre€n
lhe
cover and
ihe
sorlno.
Pull fhe
volve
cyllndei
and lhe
plunger
lnslä6
li out of
the
gear
houslng/cyllnder block. Make
sure lh6i
the cyllnder
o-rlng soal tollows.
lf
nol',
re[bve
+he o-rlng
from tho cyllnder block.
Clean
ihe paris
cargfully. Place lhe
plunger
back
ln the cyllnd€r
and
srlng
ihem
+o and fro.
lf
fhe plunger
do€s noi move
smoo+h ly rllhln
the
cyllnder, scrape
off the
posslble
dlr+
or
other
lmpurl+y lylng
betv,een the
parfs.
ll
necessory,
grind the parts
llghtly wlih
flne
abraslve
cloth or replace the
paris.
Clean ihe
sea I
lng
surfaces ol the
cover
and
+he gear
housl
ng/cy
I lnder
block.
Place
a ner o-rlng
seal
In fhe
groove
on
fhs
cyllnder
end. Flx the
plunger
Inslde the
cyllnder
and
push
the parts
Into ihelr
posl+lon
In the
gear
houslng/cyllnder block.
Place
ihe
wosher
and the
sprlng In +he
houslng
In the
cover
and replace fhe gasket
beireen
fhe
cover
and
ihe
housing.
Flt
the
sprlng
agalns+ the
plunger
bol-tom
and tlghten
lhe cover ln
place.
lf needed,
use extTa long
scrers rhen
prs-
tlghtenlng
l-he
cov€r, ln crdor
+o
overcoip ihe
sprlng
pressure.
l{hen
you gei
ihe cover near
gnough
to the
houslng, use
standard scrers.
B. REIiOV
I
NG AND INSPECTING
THE
OIL
PUif
l. Draln
the englne
oll
and ren|ove
+hs
oll
sutlp
fro +he
eng Ine.
2. Open fhe
flxlng
screws
ol
ihe oll
punp
lnlet
DlDe
and
r€irove
the
lnlei
PIPe.
only open
ihs
flxlng screws
on
the
oll
Pump
end
and leave the
pressure plpe
In
lts
posltlon.
Open the oll
pump
flxlng
screys. Reflpve
ihe
pump
and
posslble
shlms
betreen
thg
pump
foot
and the
cy
I
Inder
block.
5.
Loson iho flxlng scre*s of
+h€
purlp
cover ond
r€npve
+he cover and +he
gaskels.
Pull ou+ ths
gear
on
the tlxed
shafi.
6. Flx
the
pump
ai
lts drlve
gear
ln a screp vlce
equlpped vlfh
protectlve
lugs and
open
the
drlve gear nut.
Tap
th6 pump
drlve shafl ofl
th€
gear
rl+h a
plastlc
hamrpr.
Pull out the
dr
lve shafi
-
gaar.
7. l{ash
ihe
paris
ca.etully and check +hem tor
rear,
conparlng Hlih
iechnlcal döta
poln+
'roll
pumprr.
Replöcs the
posslble
iorn
pörts
and
all
paper gaskgts.
lf
you
replacs +ho oll
punp
beörlngs bushes of
the
611/612
englnes,
machlne them af'ter
Insfallatlon +o 18,000... 18,018.
ASSEiGI-
II{G AND INSTALLIilG THE OIL PUI,P
Placa
+he
gears
In
fhe
houslng
locEfed
In the
body.
lf
n€oded, rep I ace ihe
gaskoi
bel-reen the
body
and
the
cover.
Tlghten the flxlng scraws
ot lhe
cover
llgh-tly.
Turn +he shöli
and iap
ihe
cover sldowoys un+ll
you
flnd fhe
poslilon
wherg
+he
shaft
rotaies
as freely as
posslble.
Tlghten
the
tlxlng screvs of +h6 cover and
check
thai
the shaf+ s'tlll turns snoothlv.
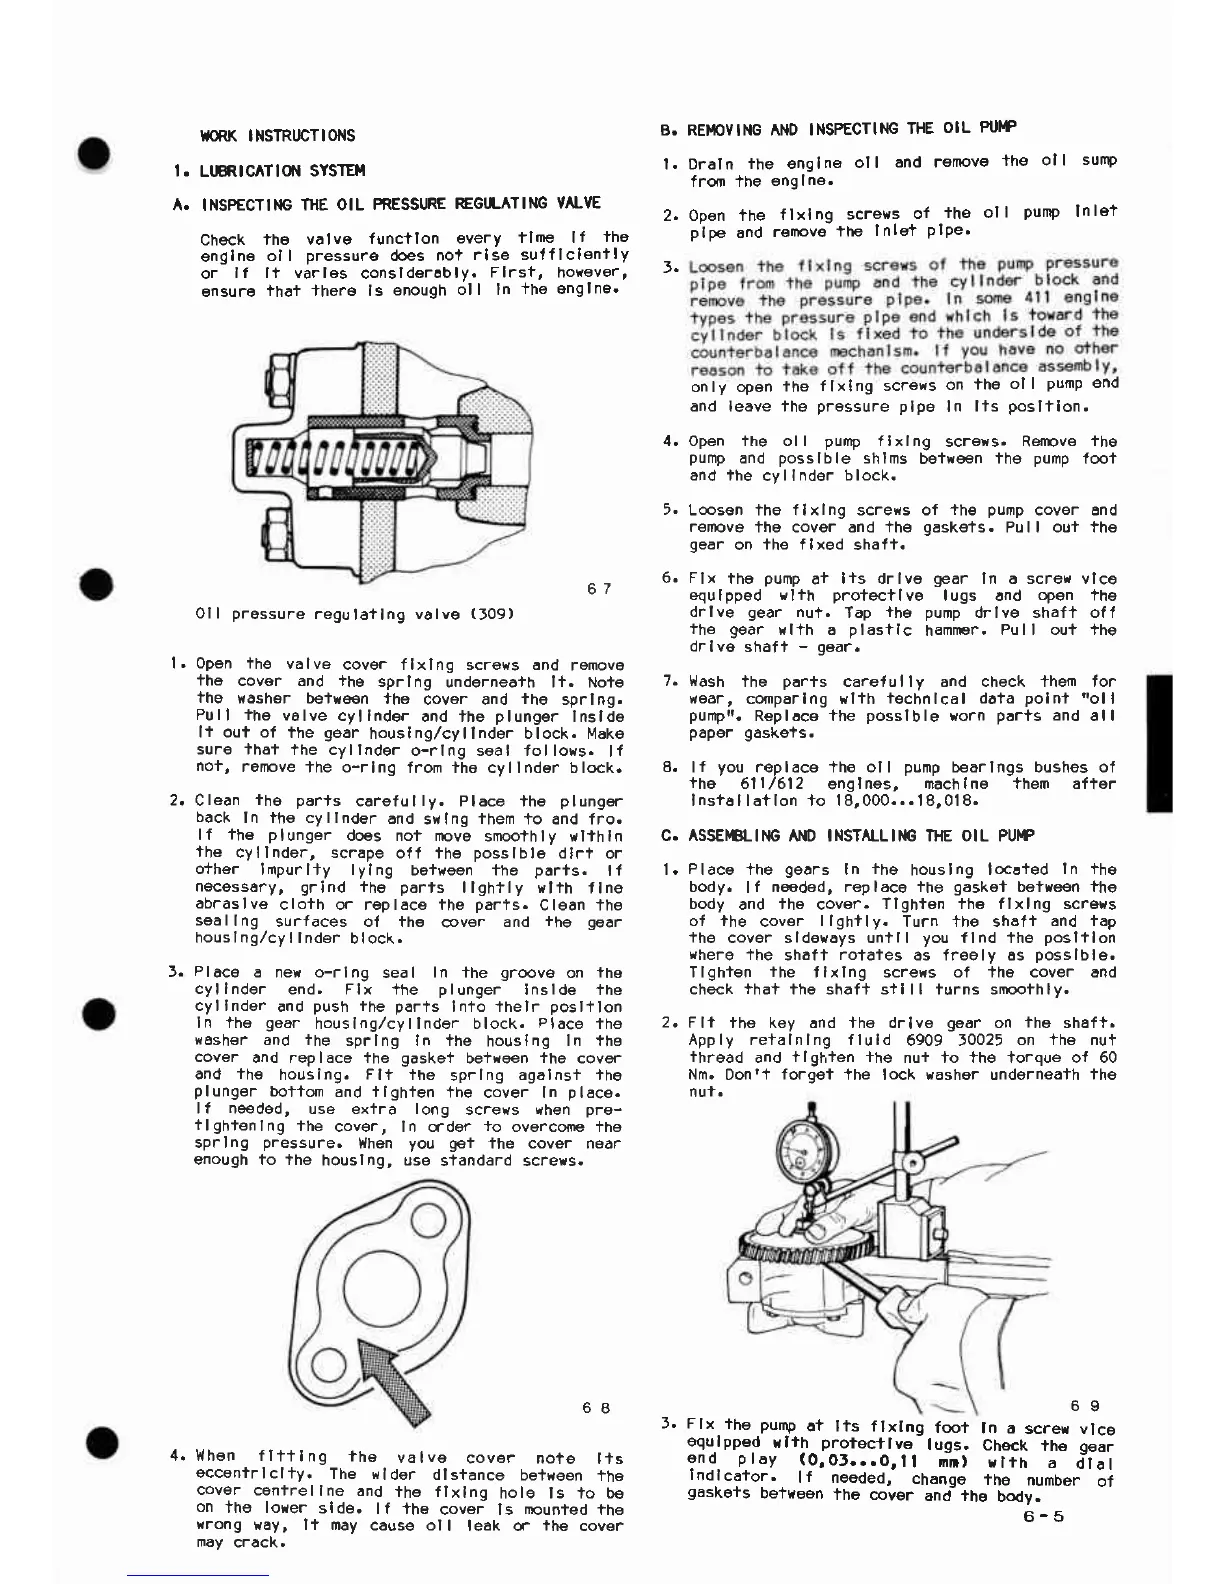
Flf the key and the drlve
gear
on
ihe
shaff.
Apply re+alnlng fluld
6909 f0025
on +he nuf
ihread
and
ilgh+en the
nu+ +o +he lorque ot 60
Nm.
Donrf
forget
fhe lock rashor underneath
the
8.
l.
l{hon fl++lng
fhe
valve
cover note
l+s
gcconirlcl+y.
The rlder
dlstanco
be+ieen
+he
cover
centrellne
and
the flxlng
hole ls to be
on
the lorer
slde.
lf +he
covei ls
mounied
the
rrong
iay, li may
causg oll
leak
q-
ihe
cover
mav
cracK.
Flx
the puip
ot lts flxlng
fooi
ln a
screr vlce
9!l.lpp"g
rilfh^
proiscf
I ve
tugs.
Chsck
the
gear
ond ploy
(0,05...0,11
nD)
ulih
a
dlal
Ind.lcaior.
lf ne€ded,
change
fhe
number
of
gasKers
beilleen
ihe cover
and the
body.
6-5
4.
 Loading...