f,ORK
INSTRI'CTIO S
c00L G
sYsIErl
|. IllE 0,r)ST T
A.
RErcYING
ArI' INSPECTI]€ T}C
T}€S'PSTAT
l.
Draln +he
englne coolani unfl I the fluld
level
ls underngath the thermosia+ houslng.
2.
Renpve fhe
uoDer
Hater
hose
from ihe return
plpe.
Open ihe return
plpe
flxlng
scrers
and
remove tl|e
rgiurn olDe and
+h9 thq-nostal.
5.
lmmerse
ihe
thermos+af ln a
waler conialner so
+hat lt
cannot louch
iho *alls
or lhe
boi+om.
4. tlärm
up
+he woier
slowly, noflng lhe
rlse
In
tempera+ure
on
å thermometer.
Compare
lhe
openlng ienperafure of fhe fhermostai and *he
fempera+ure
rhere lt ls lully
open
rlth lhe
raflng
(see
technlcal dota,
polnl
rThernpstalsn
).
5.
lf
the therrpsfat
valve
stlcks or
ihe thermo-
s+ai
opens ai foo lori or foo
hlgh
a +empera+urg
replace
the thernostai.
Clean iha
seöllng tac€s of the
therrpsfaf
houslng and the reiurn
plpe.
Place the thermo-
stat In
posltlon
rlih the by-pass
closlng dlsc
dornr€rd.
Rgplace the
return
plpe gasket
and
Inslall the return
plpe
and the upper xa+er
n0se.
Flll the coollng
sys+en. Siari ihe englne and
check for
posslbla
loaks.
Run
+he englne
llgh+ly loadlng
lt untll
you
see
ihöi ihe
thq-mosia+
ln lts
posltlq|
operetes nq-mally.
2.
@OLANT flTP
A. REIOY
I
G IHE
ML^I{T
PIIP
l. Draln +he
englne c@lant. Dlsconneci +he upp€r
and ihe lorer rater
hoses. Open
ihe tlxlng
screis of the thermosiai
houslng,
renpve the
houslng and the by-pass
plpa.
2. Renrove fh€
hea'i'lng
deylce
connecilon,
+he ol
I
cooler connecilon
and
ln the
case
ol f-cyllnder
englnos
+he
block
heaier
(ll
assembled)
{rqr
the
c@len+
punp.
J. Loosen
lhe aligrnaior flxlng
scrers.
Open lhe
lan flxlng
scrers,
reflpve ihg fan, the
pulp
pu
I ley and the v-beli.
4.
Open the
coolani
pufip
flxlng screys
and roflbve
the
punp.
Rerpve ihe
gasket
bgtreen the
pump
and lhe
cyllnder block and cle€n ihe seallng
t€cas.
B. RE@ND|T|ON|NG
IHE @0L
|tT
pt[f
'09, '
,
ftl
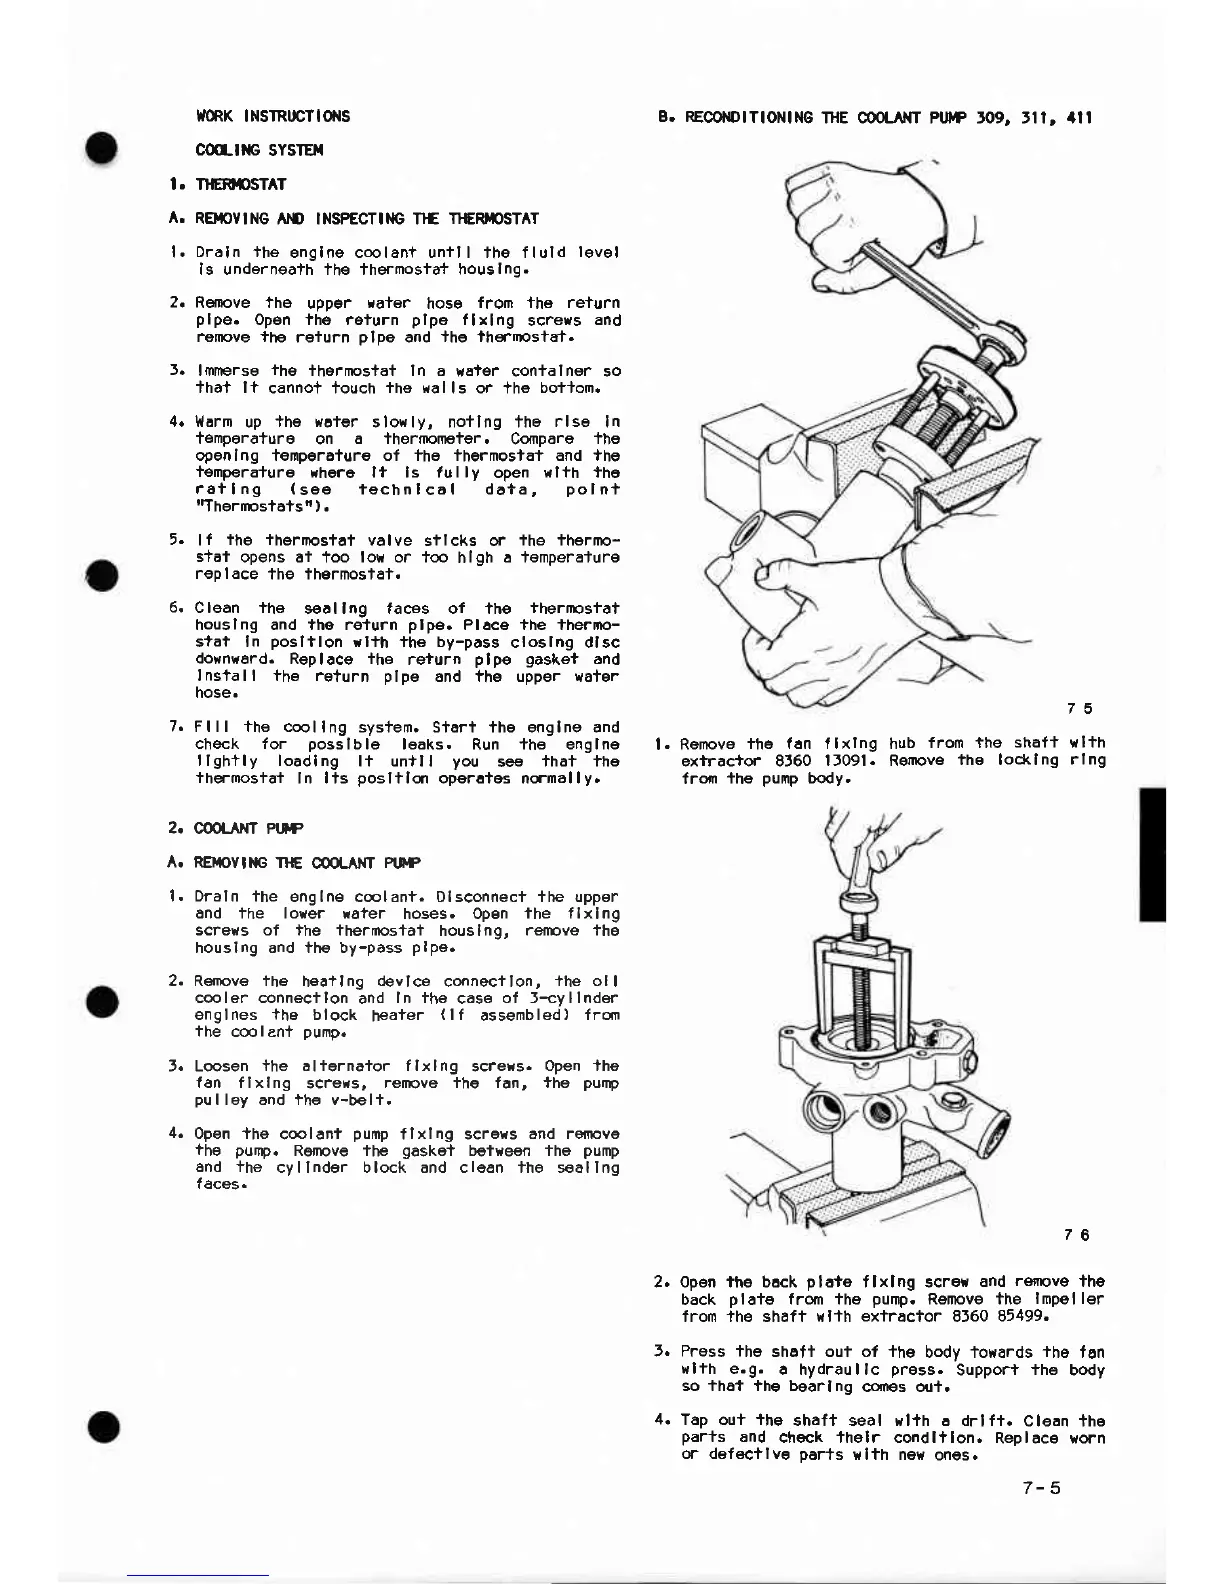
7.
t.
Renovs
iha fan t lxlng
exirac+or 8560
| 1091.
frorn
+he
pump
body.
hub
from fhe
shafi
lalth
Remove
the lod(lng
rlng
76
2. open the bock
plafe
flxlng screr
and
reflpva
the
back
plaie
from the
purp.
RE rove the
ltnpeller
from lhe shaft xl+h
exiractor
8560
85499.
5. Press the
shaft oui of +hs
bodv towards
ih6
tån
wlih e.g.
a hydraullc
press.
Support
the
body
so that ih9 bearlng
cones oil+.
4.
Tap out +he
shafi seal rlih å drlfi.
Clean fhe
parts
and
ch€ck lhelr condlilon.
Replac€ rorn
or defecilve
par+s
rlth ne{
ongs.
7- 5
 Loading...