l{ot€l
In connecllon
rlfh cyllnder
llner
fltflng renove
nEierlal, lf ne€ded'
Ylth
correctlon reanFr 9045 87200 In case
of ll ond
12
€erles
onglnes
and
wl+h reair€r 905.|
72m0 In
case
of
f09
eng lnes.
lf
the llner
protrudes
hlgher
on one
slde than
on
the
opposl+e slde, chack
the thlckness
of
+he
llner
flange and the deplh of
the
flange
recess
ln
ihe
cyllnder
block.-lf there
are any
lrregularl+los, replace
ihe llner.
Correci
ihe
I
lange .ecess
In
the cy I Inder
block slth
correcllon
r€amer.
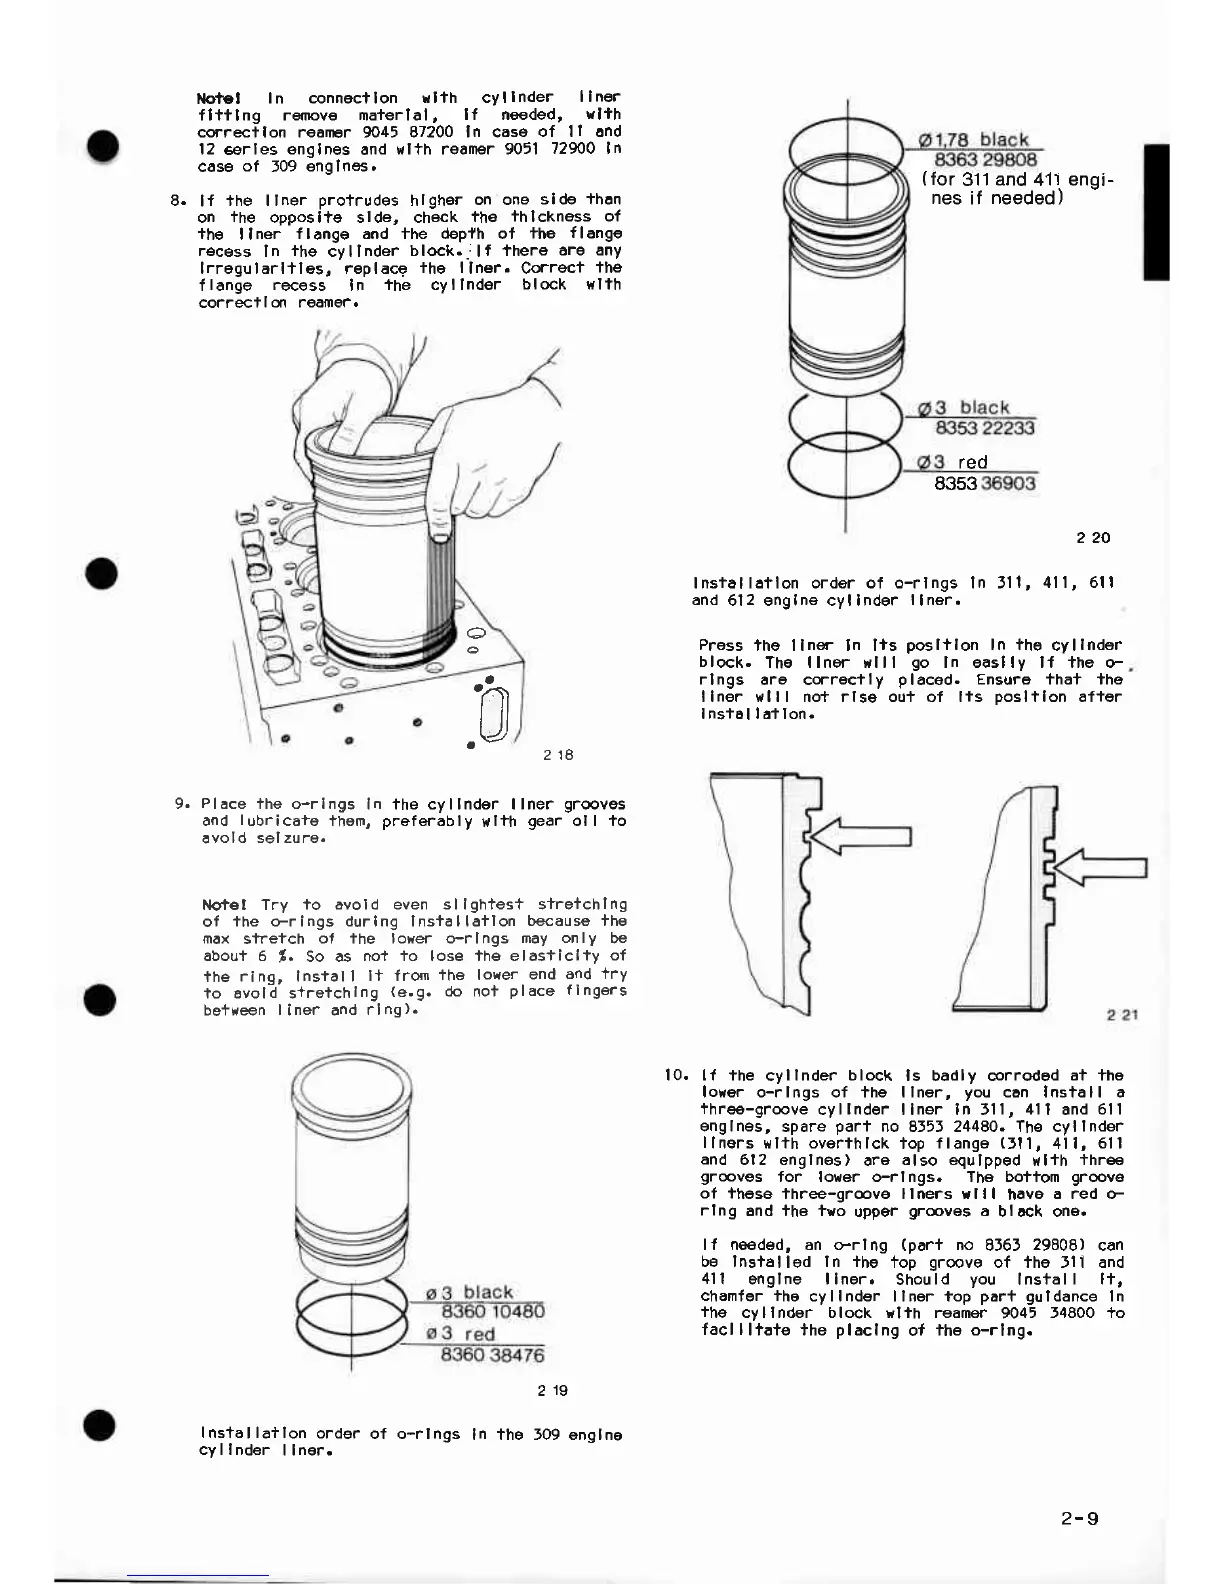
(
for
311and 411
engi-
nes if needed )
red
214
the cy I Indor llner
gr@vgs
preferably
wlth
gear
oll to
.L'CJ
220
Insiallatlon ordor of o-rlngs ln 3ll,4ll,6ll
and
61
2
eng Ine cy I Inder
|
|
ner.
Press
the llnei- In lfs
poslflon
In fhe
cyllnder
block.
The llner rlll
go
ln easlly ll ihe o-
rlngs
are correcily
placed.
Ensure fhal ihe
llner vtlll no+ rlse ou+ of lis
Dosltlon
af+er
Insiolla+lon.
lf ihe
cyllnder
block
ls badly corraded
ai +he
lorer o-rlngs of ihg llner,
you
can Install a
thr€€-groove
cyllnder llner In 5ll,
4ll
and
6ll
englnes,
spare
pari
no 8555 24480. The cyllndsr
llners
rl+h ovsrihlck
fop
flange
(lll,4ll,6ll
and
612 englnes)
are
also equlpped
wlfh
+hre€
gr@ves
for lorrer o-rlngs. The boftom
groove
of
thgse +hree-gr@ve llners rlll
hove
a red o-
rlng
and lha t{o
upper
gr@vas
a
block ong.
ll n€€ded, an o-rlng
(parf
no
8565
29808)
can
be lnslalled ln the
fop
groove
of the fll and
4ll
englne llner.
Should
you
Insfall
lt,
chamter iho
cyllnder llner top
par+ guldance
In
the
cyllnder block
ylth
reamer
9045
54800 io
lacllliate
the
placlng
ol
the o-rlng.
'n
.a
9.
Place
ihe o-rlngs
In
and
lubricate
ihem,
avold
sel zure.
t{otel Try
io åvold even sllghiest streichlng
ot
ihe o-rlngs durlng lnsfallailon
because the
max
sl-retch
ot ihe lorer o-rlngs
may only
be
about 6
t.
So as
no't io lose the elasiiclty
of
the
ring, Install
l+ lrom
fhe loYer
end
and iry
to avold s+retchlng
(e.g.
do not
place fingers
befreen
liner
and
rlng).
10.
219
ln the f09
Ins+allailon
ordgr
of o-r I ngs
cyllnder
llner.
snglne
2-
9
 Loading...