FEATURES
• Easy to read backlit LCD display
• 90 second auto-off function
• Tough aluminium die cast body with rubber sleeve
OPERATION
1) Remove tire valve cap.
, ensure that no
air leaks.
automatically after 90 seconds.
and can only be activated by pressing the on/unit/light button once the unit is turned on.
6) Changing the unit of measure: Press on/unit/light button for at least 3 seconds to enter unit change mode, then
one quick press of the on/unit/light button to choose the desired unit. The unit chosen will be the default unit
until changed by the above procedure.
7) The battery used is a CR2450, 2.4-3.6VDC. Once the voltage goes below 2.4V, the low battery signal on the top
To avoid the risk of personal injury, especially to the eyes, face or skin, DO NOT direct the air
stream at any person, or any part of the body.
This equipment is not intended for use by children without adult supervision.
The manufacturer reserves the right to change product features at any time without notice.
SPECIFICATIONS
CALIBRATION CERTIFICATE
normal working position on test equipment with an
accuracy that is traceable to International Standards
according to: 86/217/EEC
Serial Number: ______________________________
Date: ______________________________________
BATTERY REPLACEMENT
WARNING
Hose length 50cm with swivel
Chuck type Clip on
Accuracy exceeds 86/217/EEC
Units of measure bar, p.s.i., kPa, kgF
0-12 bar
0-174 p.s.i.
1200 kPa
12 kgF
Reading accuracy 0.01 bar
0.2 p.s.i.
1 kPa
0.01 kgF
Max. inlet air supply 16 bar
232 p.s.i.
1600 kPa
16 kgF
Inlet thread 1/4” female BSP
Dimensions 300L x 150W x 110H mm
Battery CR2450 coin cell lithium
Weight 1.2 kg
ALLOWABLE TOLERANCE
BAR
±0.08 up to and including 4 bar
±0.16
between 4 bar and 10 bar
inclusive
±0.25 greater than 10 bar
p.s.i.
±1.2
up to and including 58
p.s.i.
±2.3
between 58 and 145 p.s.i.
inclusive
±3.6 greater than 145 p.s.i.
TEST RESULT
REFERENCE PRESSURE
BAR P.S.I.
DISPLAY PRESSURE
BAR P.S.I.
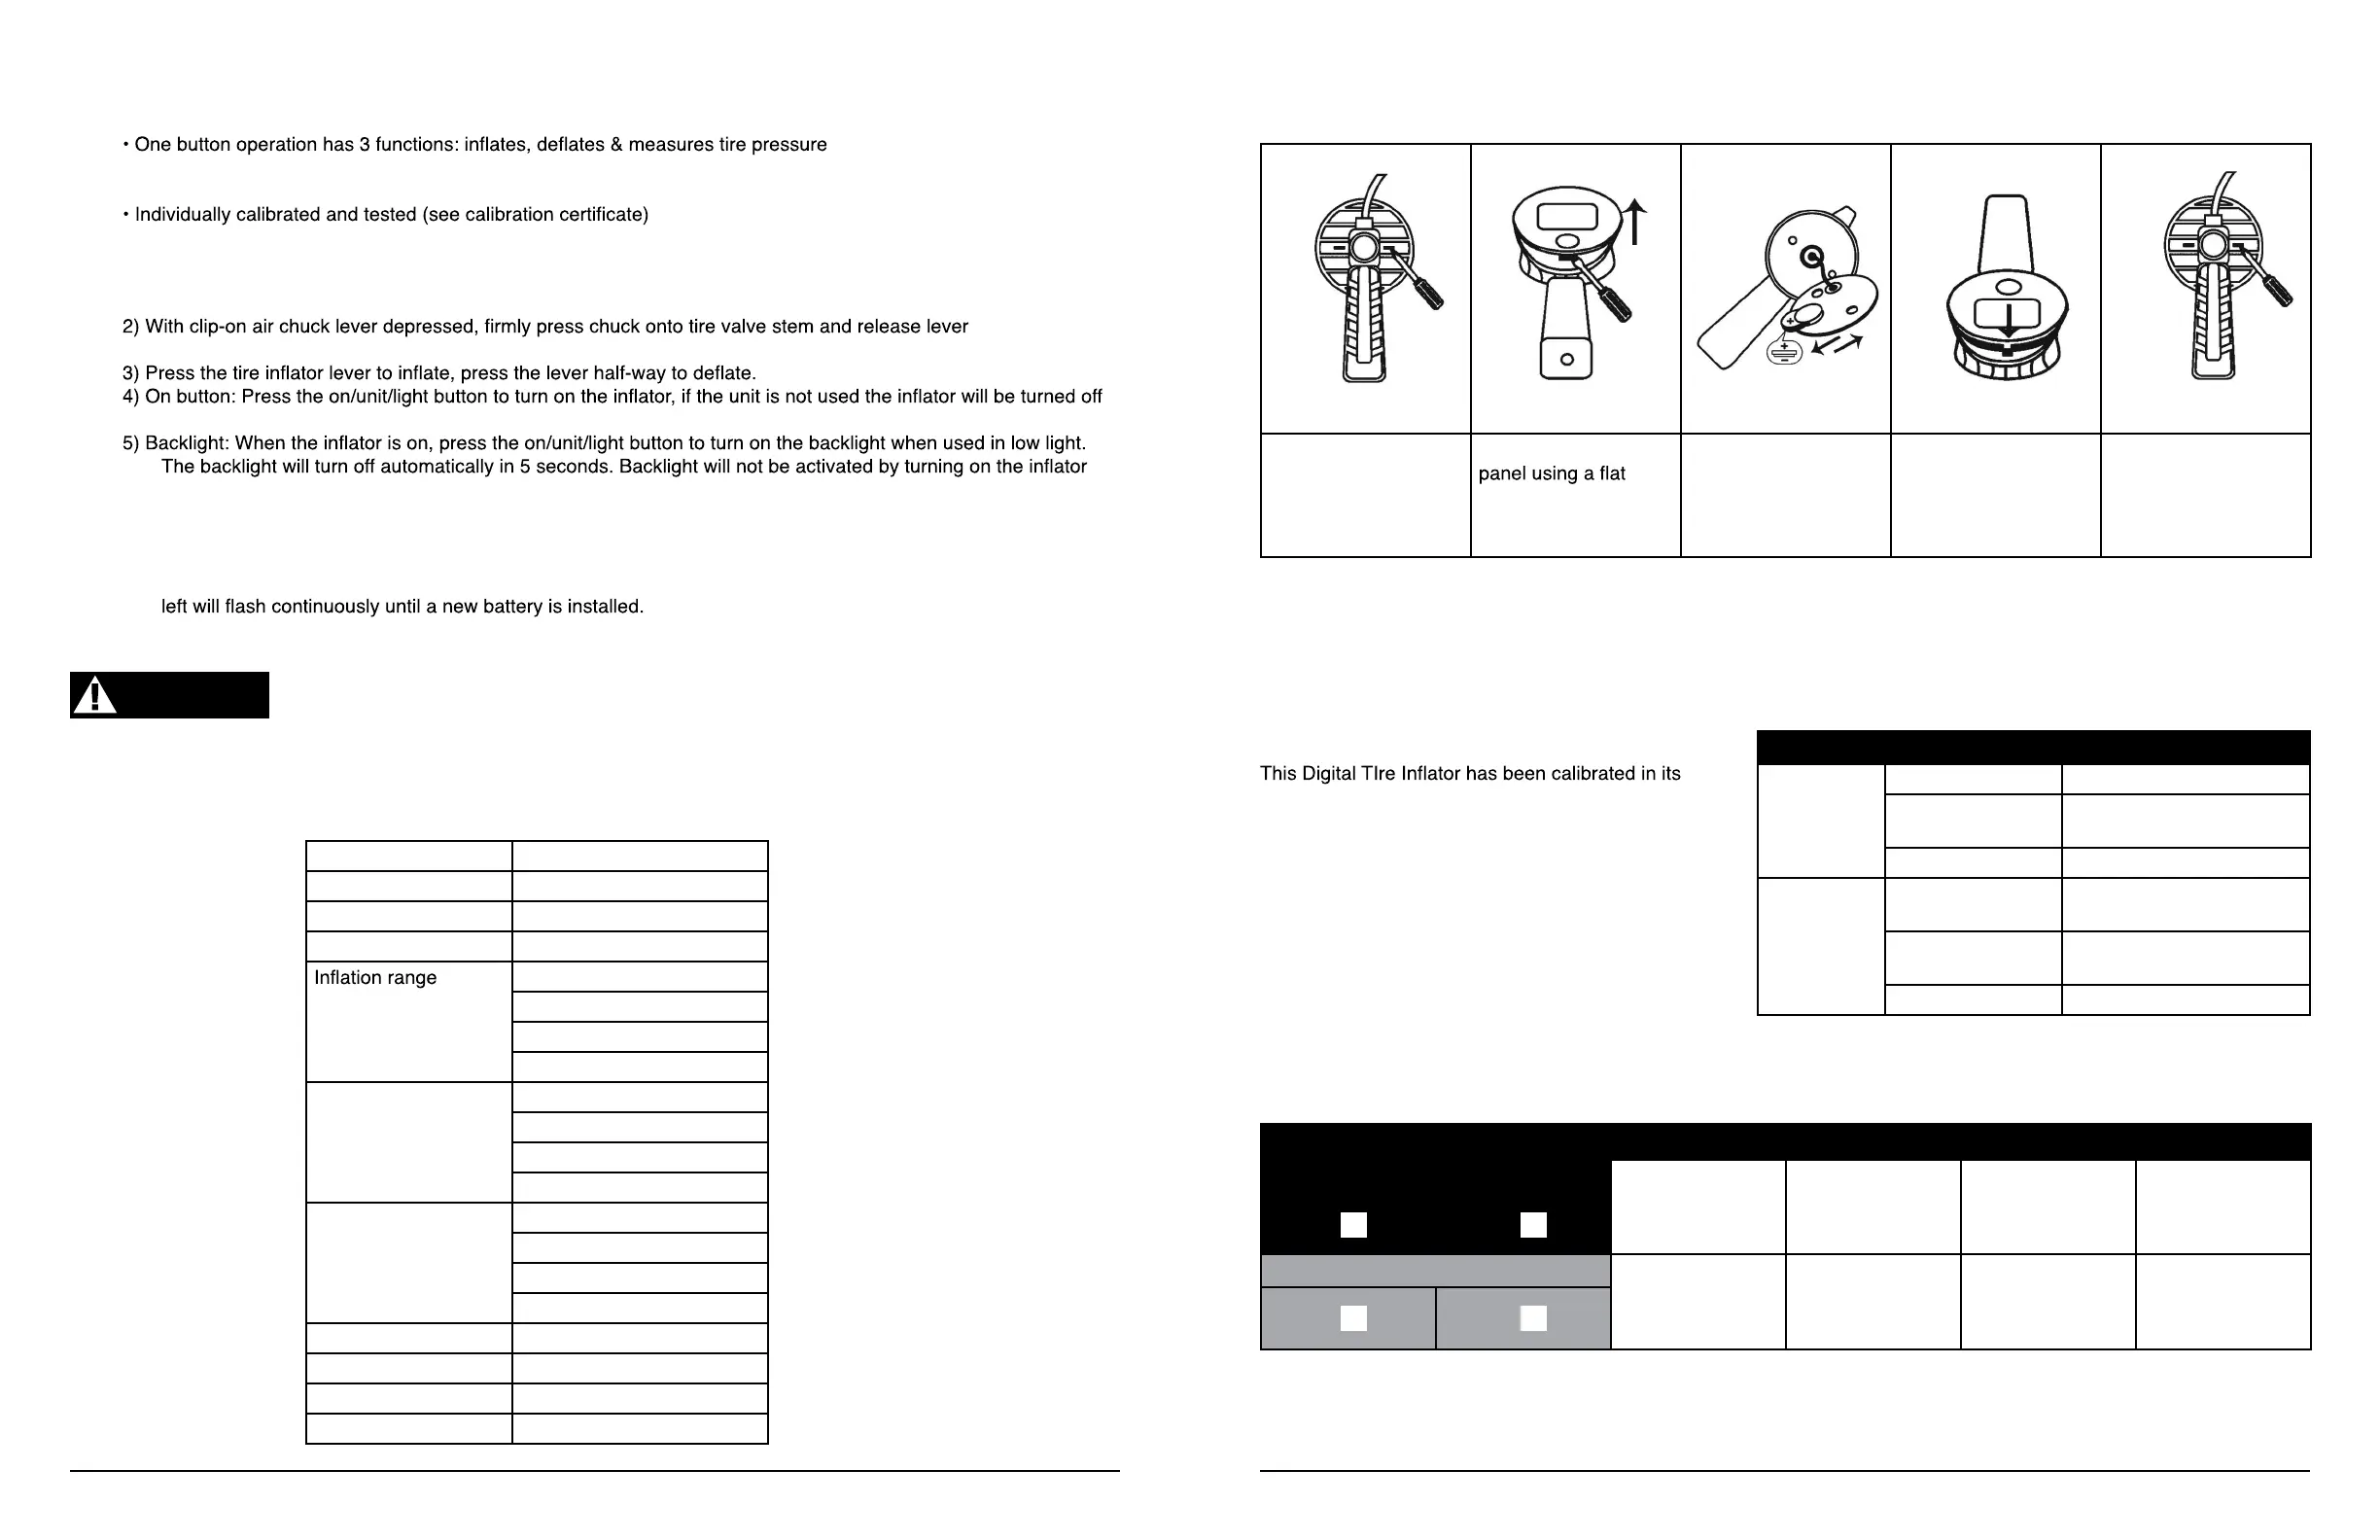
1. Unscrew front LCD
panel using Phillips
head screwdriver. Ac-
cess screws through
slots in rear of unit.
2. Open the front LCD
blade screwdriver
3. Insert new bat-
tery making sure of
positive and negative
polarity
4. Close front LCD
panel
5. Replace front LCD
panel by tightening
screws at rear of unit
using Phillips head
screwdriver
Need help with your new Air Tool?
Call our customer service hotline at 1-800-386-0191

 Loading...