Using your window vacuum
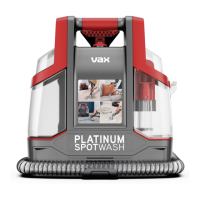
Insert the charger cable into the
power charger connector. Plug
the charger into the mains. The
power charger indicator light will
fl ash during charging and when
fully charged the indicator light will
show solid red. The Spray & Vac
will need to charge for 3 hours
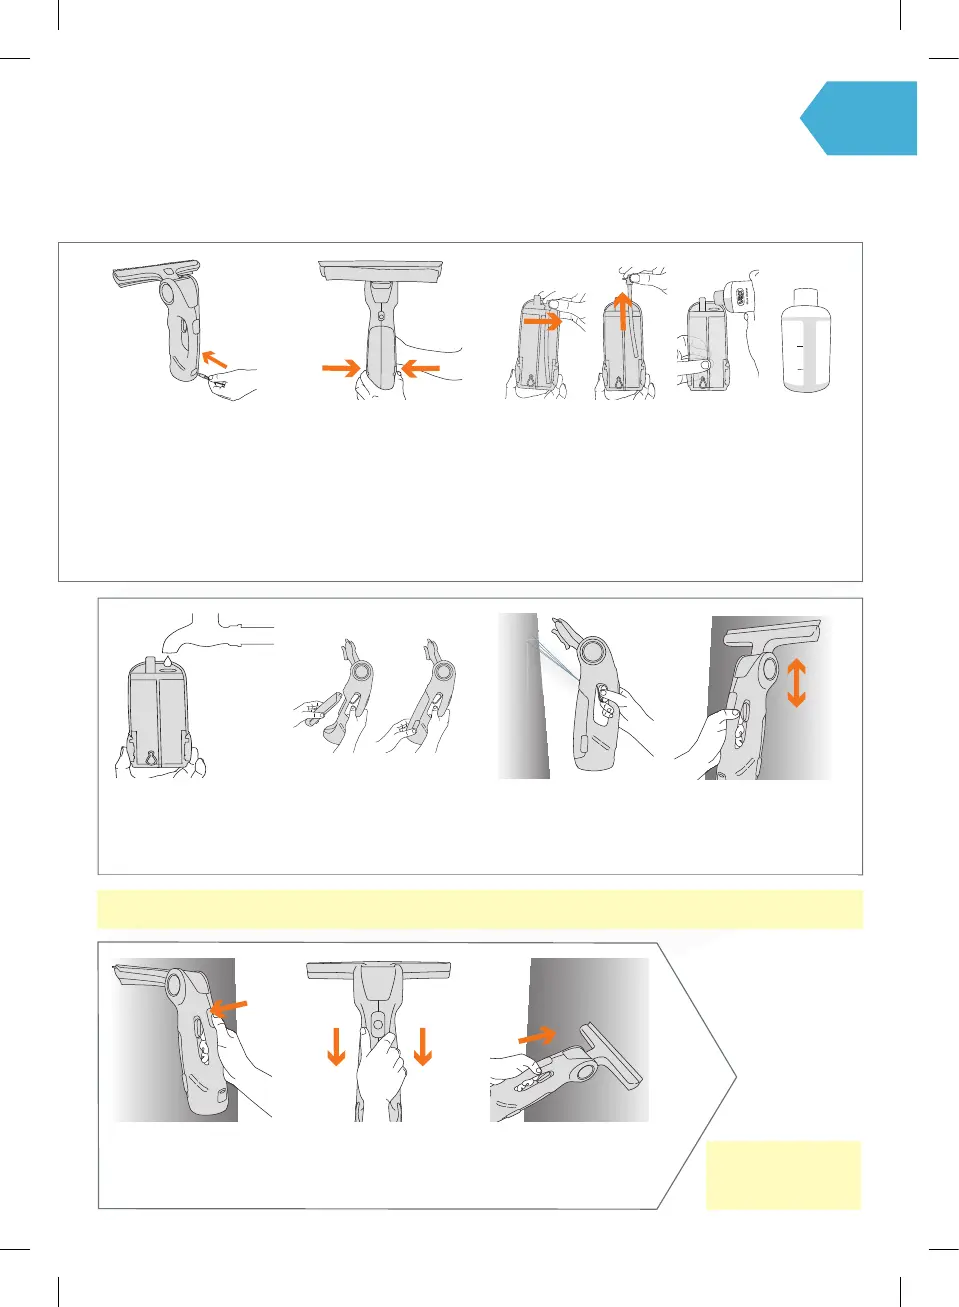
Top up with water (Max 35�C)
to MAX line on solution side of
the dual tank and turn the cap
clockwise to close
Squeeze the tank release
buttons to remove the dual
tank from the machine
To attach the dual tank back
onto the unit, insert top fi rst
and gently push the bottom
until it fastens into place
Pull the trigger to spray
solution onto the surface
to be cleaned
Turn the lid of the
cleaning solution tube
anticlockwise and lift
to remove
Pour 40ml of Vax
window solution into the
cleaning solution side of
the dual tank
Turn the Spray & Vac
on using the power
on/o button
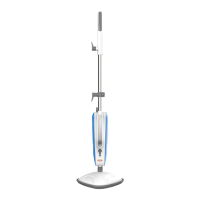
When you reach the
bottom of the window,
apply pressure and the
suction head will pivot
Wipe/scrub the surface
with the microfi bre or
scrub pad on the
suction head
Using your machine
Vacuum up the water using
slow, straight strokes
Note: You may need to press the trigger a few times fi rst before solution is dispensed, this clears air from the system
Note: Only use the
window vacuum or
vertical surfaces