This document is a Quick Start Guide for the Velotric Thunder 1 ST electric bicycle, providing instructions for assembly, maintenance, and usage.
Function Description:
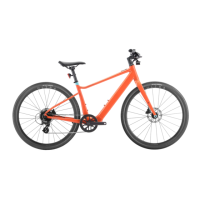
The Velotric Thunder 1 ST is an electric bicycle designed for various riding conditions, from city commuting to active riding and extreme adventures, offering pedal assist levels and a range of features to enhance the riding experience. It includes components like a motor, battery, and control panel to provide electric assistance.
Important Technical Specifications:
While specific technical specifications like motor wattage, battery capacity, or range are not detailed in this quick start guide, the guide does mention several key components and features:
- Pedal Assist Levels: The bike offers 5 pedal assist levels: OFF (no power support), ECO MODE (minimum power output for maximum battery efficiency), TOUR MODE (low power output for riding long distances), NORMAL MODE (medium power output for city commuting), SPORT MODE (strong power output for active riding), and TURBO MODE (maximum power output for extreme riding). These levels are indicated by the color of an LED ring on the control panel.
- Charging: The charging port is located on the left side of the frame's bottom bracket near the pedal arm. A red light indicates charging, and a green light indicates a full charge.
- Brakes: The bike features disc brakes, which require calibration to ensure proper function and prevent rubbing.
- Tires: Velotric tires have recommended pressure indicated on their sidewall.
- Lighting: Includes a front light and a rear light. The rear light uses two CR2032 batteries.
- Phone Mount: The bike comes with a phone mount that attaches to the stem, allowing the phone to be secured by twisting it 90 degrees clockwise. The phone adapter uses 3M adhesive.
- Toolkit Contents: The toolkit includes a Quick Start Guide, Tool Bag (containing a Phillips screwdriver, M15/M8 wrench, M4/M5/M6 hex key), Left/Right Pedals, Front/Rear Reflector, Bell, Phone Mount, Front Light, Rear Light, Adapter & Charging Cable, Kickstand, and two Kickstand Bolts. It also mentions a "Find My™-enabled Thunder 1 ST Manual," suggesting location tracking capabilities.
Usage Features:
- Assembly: The guide provides step-by-step instructions for assembling the kickstand and handlebar, front wheel, brake levers, pedals, saddle, front light and reflector, rear light, and phone mount.
- Kickstand & Handlebar: Install the kickstand on the left chain stay using an M4 hex key. Turn the handlebar 90 degrees toward the frame and ensure the headtube is locked with the front fork.
- Front Wheel: Remove the brake pad spacer and hub axle. Slot the wheel into the fork, ensuring the brake caliper is on the same side as the brake disc, then tighten the front wheel bolt with an M6 hex key.
- Brake Lever: Loosen bolts on the left brake lever (M5 hex key) and both bolts on the right brake lever and shifter. Twist the brake to a comfortable angle and tighten.
- Pedal: Differentiate left (L) and right (R) pedals by stickers. Screw the right pedal clockwise and the left pedal counter-clockwise onto the pedal arm, then tighten with a wrench.
- Saddle: Loosen the seat post clamp (M5 hex key), insert the seat post, adjust saddle height, and tighten the clamp.
- Front Light & Reflector: Unscrew the bolt from the light, attach it to the mount bracket, adjust the angle, and fix the bolt and nut with a Phillips screwdriver and M8 wrench. Connect the two front light cables. The reflector can be attached with the front light mount.
- Rear Light: Remove the bolt on the rear light clamp, mount the light to the seat post, adjust the angle (perpendicular to the ground), tighten the bolt, remove the film spacer, and press the power button to turn it on.
- Phone Mount: Peel off the protective layer from the 3M adhesive, position the adapter to the center of the phone case, press firmly, and allow 24 hours for maximum adhesion. Attach the phone to the stem mount and twist 90 degrees clockwise to secure.
- Operation:
- Power On/Off: Press and hold the power button to turn on the bike. Press and hold the power button or light button for 3 seconds to turn off the bike.
- Pedal Assist Level: Press and release the power button to shift between the 5 pedal assist levels. Use [+] or [-] to shift the pedal assist level up or down.
- Walk Mode: Press and hold [-] to enable Walk Mode; release to stop.
- Lights: Press the light button to turn the front light on or off.
- Disc Brake Calibration: Spin the wheel to check for rubbing. If rubbing occurs, loosen the screw with an M4 hex key, adjust the brake caliper until no sounds are heard, and then tighten the screws.
- Rear Light Battery Replacement: Unscrew the bolt on the back of the light, insert a coin beneath the lid, spin it, and lift it open. Replace both CR2032 batteries, put the lid back, and press the power button.
Maintenance Features:
- Keep it Clean: Clean the e-bike with water, mild detergent, and a non-abrasive sponge. Avoid high-pressure water sources, direct spraying on bearing points or electrical parts, and harsh chemicals or alcohol wipes.
- Parts Replacement: For genuine replacement parts (e.g., worn brake pads), visit a local bike shop or velotricbike.com. Using non-genuine parts may compromise safety, performance, and warranty.
- Tires: Check tire pressure regularly (weekly for daily riders, every other ride for less frequent riders). Maintain the recommended pressure indicated on the tire sidewall, ensuring not to exceed it.
- Derailleurs: Shift through all gear combinations to ensure smooth and correct operation and prevent the chain from coming off.
- Brake Pads: Check brake pads for wear monthly. Replace pads thinner than 1mm.
- Disc Brake Rotors: Check the thickness/wear of the rotor. The minimum thickness is often printed on the disc.