INSTALLATION AND USER GUIDE FOR 20-40-60 DELUXE CONTROL
VÄN
EE PART NO. 41301 VENMAR PART NO. 41401
READ AND SAVE THESE INSTRUCTIONS
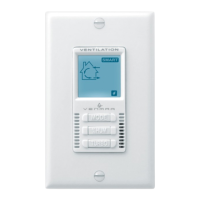
The illustrations in this document are generic; your control appearance may be slightly different from the ones shown.
Wear safety glasses and gloves while performing these instructions (steps 1 to 5).
WARNING
Cut a 2
7
/8” x 1¾” hole in a wall, at a
convenient location for the control. See
figure at right.
Temporarily place the control over the
hole and mark both mounting screw hole
positions.
Remove the control, drill both screw
holes (3/16” Ø) in wall and insert the wall
anchors (included).
Ø 3/16", typ.
VC0206A
Unplug the ventilation unit.
NOTE: If the control is to be installed in an electric box,, go to step
.
VC0195
23851 rev. 01
VC0209
!
Mount the control to the wall.
The button works following this sequence:
• Click 1 = 20 min
• Click 2 = 40 min
• Click 3 = 60 min
• Click 4 = OFF
• and so on
The indicator lights up as per the selected
duration and the system exchanges air at
MAX speed.
If the humidity sensor detects a humidity
rise, the exhaust fan will activate in MAX
speed for a 20-minute, a 40-minute or a
60-minute period as per the Automatic
Auxiliary Control setting.
This auxiliary control must be paired with the Advanced Touchscreen Control.
Plug the ventilation unit.
Keep the auxiliary control in hand. Go
to the main control. Reach the Wireless
Connection screen (see figure at right)
following this path:
HOME PAG E (press on
the gear at the bottom right)\
SETTINGS\
INSTALLATION\WIRELESS CONNECTION. Press
on the auxiliary control button for 5
seconds. The LED indicator will fade
in and out to indicate the system is
trying to pair the auxiliary control with
the main control. The main control will
detect the item. This procedure will take
30 s max. Press on + to complete pairing. Once the pairing is
done, the item will move in the upper part of the screen and a √
will appear at the left of the item.
NOTE: It is possible to unpair an item by pressing on x.
VC0207A
WIRELESS CONNECTION
If needed, reach the Automatic
Auxiliary Control screen (see figure
at right) following this path:
HOME PA GE
(press on the gear at the bottom right)\
PREFERENCES\AUTOMATIC AUXILIARY CONTROL
to modify the humidity detection feature.
AUXILIARY CONTROL
VC0208A
SENSITIVITY
SENSITIVITY
INSTALLATION
VO0291
Disengage the control from its support
by lifting and tilting the bottom part of the
control.
NOTE: This wall control requires 2 AAA 1.5 V
batteries (included).
Install the batteries at the back of the
control.
VO0292
LInstall the auxiliary control back in its
support. Insert the top brackets in the
notches. Push on the bottom part of the
control until it clicks in place.
M
Test the wall control.
HOW TO USE THE CONTROL
HOW TO CHANGE THE BATTERIES
If a batteries change is required, the low batteries indicator will flash
for 5 seconds when pressing on the button.
Perform step to access the batteries.
Remove the old batteries. Dispose of used batteries as per local
rules and regulations.
Replace the batteries. The use of rechargeable batteries is not
recommended.
Perform step L to install the auxiliary control back in its support.
TROUBLESHOOTING
PROBLEM CAUSE
No detected item on Wireless
Connection screen
The batteries are not installed
Low batteries
LED indicator does not light up
when pressing on the button
The batteries are not installed
Low batteries
Range too high between the
auxiliary control and the main
control
Humidity sensor does not work Low batteries
Sensitivity too low, set
sensitivity to High in the
Automatic Auxiliary Control
screen