Installation
Mounting option 2: Mullion or wall
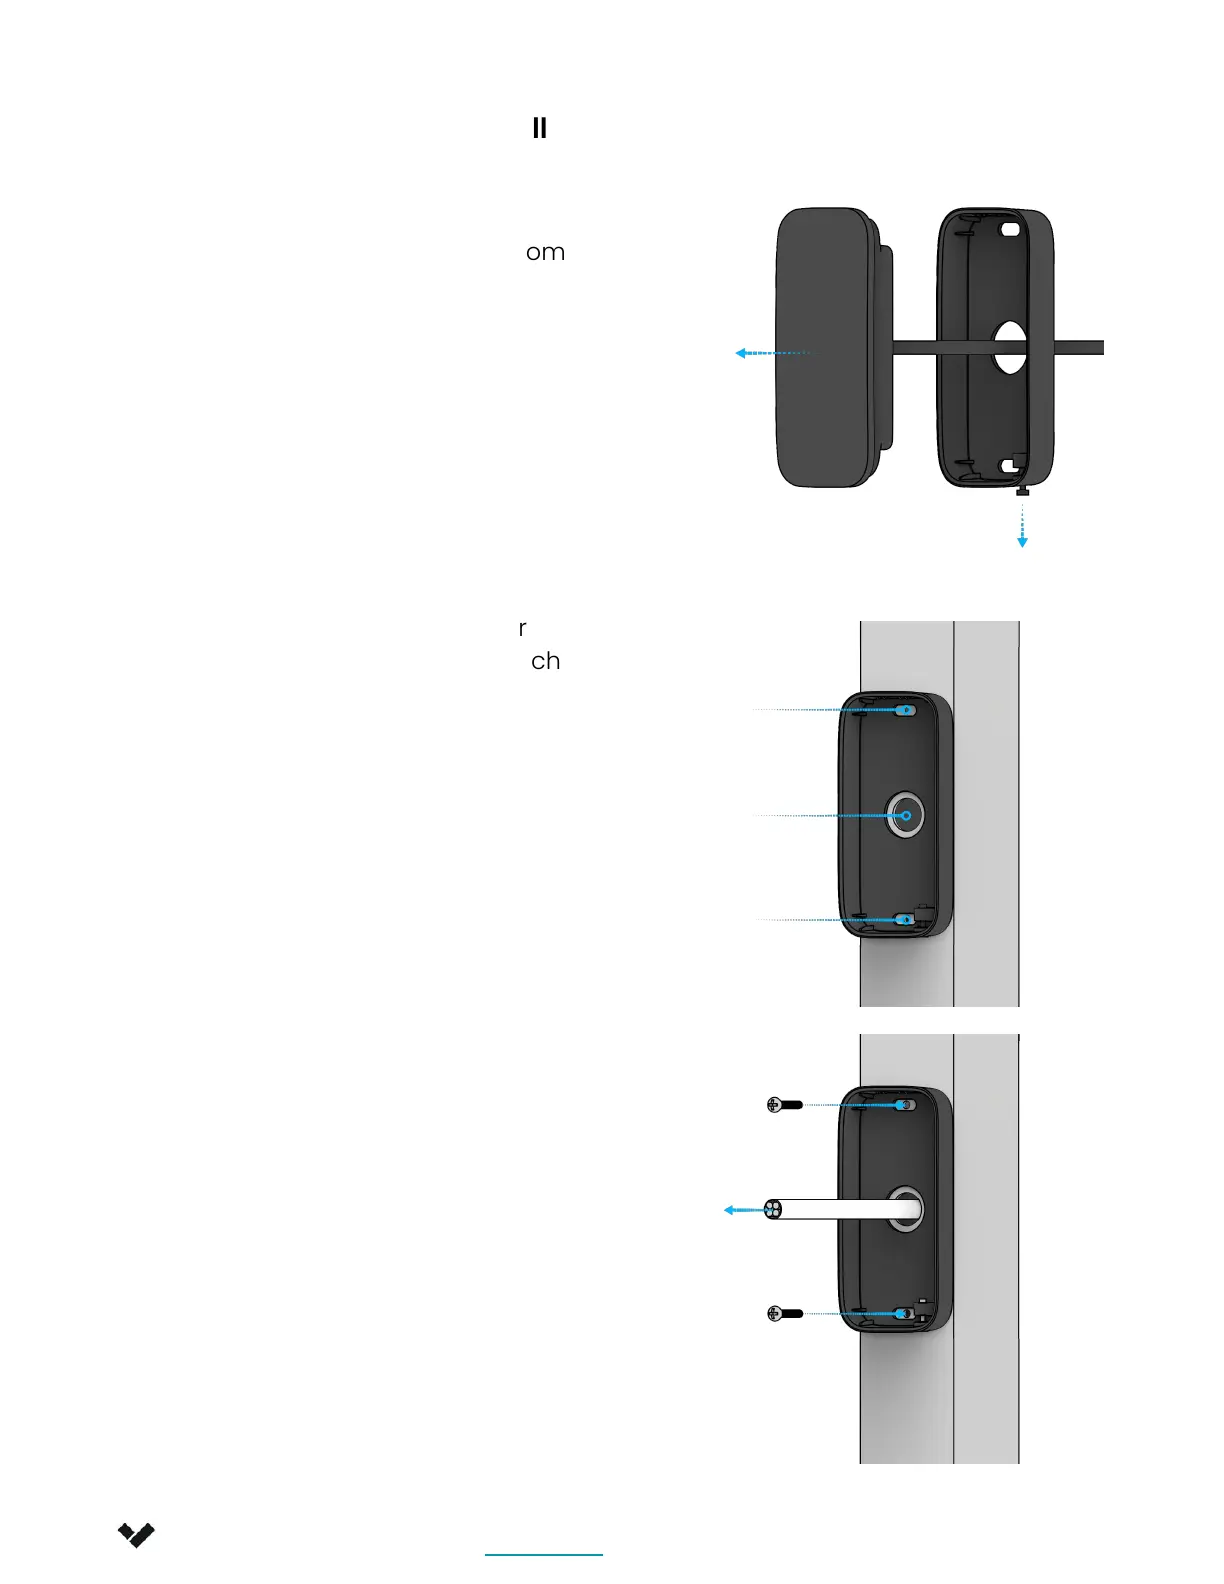
1. Loosen the security screw and
remove the AD33 Door Reader from
the mullion mount.
2. Using the mullion mount as your
template, mark and drill two ⅛ inch
(3mm) pilot holes at the top and
bottom. Drill a 1/2 inch (12.7mm)
center hole for cable routing.
3. Route building-side cable through
the center hole and the circular
opening in the mullion mount.
Secure the mullion mount to the
mullion using the 2 M3 machine
screws. If you are installing on a
wall, use the 2 provided wall mount
screws instead.
Verkada Inc. 405 E 4th Ave, San Mateo, CA 94401
sales@verkada.com
All specifications are subject to change without notice
Copyright © Verkada Inc. All rights reserved.
8
 Loading...