Vertex™ Rx-C 6D Calcium Reactor / Instruction Manual © Vertex Aquaristik ™GmbH, Deutschland 2014
21- Gently match the pump-output’s union to its matching counterpart welded to the primary chamber.
Ensure the O-ring is present prior to tightening this connection. Gently tighten the union.
Warning: The Pump-Output union is glued in place permanently. Do not attempt to turn or move
this union. Turning the union will render the pump assembly useless. Broken pump assembly due to
excessive use of force or improper installation are not covered under warranty.
22- Remove the Bubble-Counter, Flow-Meter and its screws from the box.
23- Fill the Bubble-Counter with RO Water. It might be required to refill the Bubble-Counter with Clean water
periodically.
24- Place the Bubble counter in its dedicated slot located behind the manifold.
25- Place the Flow-Meter against the Acrylic holder. The Acrylic Holder has been machined in a countersunk
fashion to house the Screw-Heads. Ensure the meter is placed on the right (correct) side of the holder.
Using a flathead screw driver tighten the Titanium screws. Do not use excessive force as this will damage
the Screw’s head and the Flow-Meter.
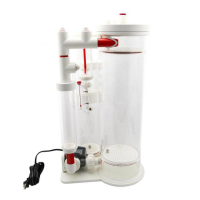
26- Remove the secondary chamber from the box and place it on a hard flat surface. Mind the push to connect
fittings connected to the bottom of the chamber as well as other internal component. If placed on an
angle or applied forced against, this connection can break rendering the secondary chamber unusable.
27- Hold the Bottom sub-chamber’s body with one hand and the upper sub-chamber’s body with the other
hand. Twist in opposite directions and the bottom sub-chamber (Secondary Chamber for Carbonate
Media) will separate.
28- If desired this chamber can be filled with additional Calcium Carbonate media to remove any excess CO2
still present in the effluent at this stage. It can also be utilized for dolomite placement in the reactor.
29- Hold the bottom of Top Sub-Secondary Chamber with one hand and its lid with the other hand. Twist in
the opposite directions and remove the lid.
30- Holding the Titanium knob; remove the basket from the chamber.
31- Using a flathead screwdriver remove the Titanium screw from the top of the basket and remove the
perforated plate lid from the basket.
32- This basket can be utilized for additional Medias such as Dolomite or other desired media. It is best to
reserve the basket for media that would need occasional replacement such as phosphate removers.
Ensure that you are using proper media that will not react with saltwater of lower PH range in a negative
way. While the input saltwater can have PH as high as 9; the effluent PH can drop to lower than 6.
Specially if the reactor is not dialed in properly.
33- Rinse your media with RO water. You can now place your media of choice in the basket.
34- Place the lid back on and match the perforated lid’s screw hole with that of the internal basket’s shaft.
35- Using a flathead screw driver gently screw the perforated lid back to the basket.
 Loading...