Do you have a question about the Verve 200386 and is the answer not in the manual?
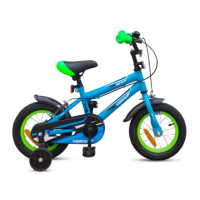
Bikes designed for roads and bike paths, not for trails or off-road use. Saddle height: 435-635mm.
Designed for road use by young adults under 40kg. Saddle height: 635-750mm. Not for off-road paths.
Designed for off-road trails and bike paths, also roads. Stronger frame, wider tyres, wide gear range. Saddle height > 635mm.
For amateur use on high-speed roads. Aerodynamic handlebar, wide gear range. Max tyre 28mm, max weight 12kg. Saddle height > 635mm.
Designed for leisure and commuting on roads. Not for trails or off-road paths. Maximum saddle height > 635mm.
Designed for road use, bike paths, acrobatics, and stunts. Two categories based on rider weight.
Guide to setting the correct saddle height for the rider, ensuring leg bend and reach to pedals.
Examines the tyre's rubber pattern, canvas visibility, and checks for bulges or tears.
Attaching the handlebar to the bike stem, ensuring correct alignment and height adjustment.
Inserting the seat post and seat, ensuring correct height and alignment before tightening.
Attaching the front wheel to the fork, securing it with nuts and washers.
Attaching the front mudguard to the fork, if the bike is equipped with one.
Assembling and adjusting caliper brakes, ensuring proper pad alignment and cable tension.
Attaching the stabilisers (training wheels) to the rear axle, ensuring correct position and clearance.
Attaching the left and right pedals correctly, noting thread direction and tightening.
Instructions for fitting optional accessories like reflectors, doll seat, basket, bell, and pads.
Detailed steps for adjusting caliper brakes for optimal performance.
Guide on adjusting the brake lever position and cable tension for proper function.