This document is a user manual for a VEVOR Demolition Jack Hammer, model JH-65A. It provides essential information for safe operation, technical specifications, usage instructions, and maintenance guidelines for the tool.
Function Description
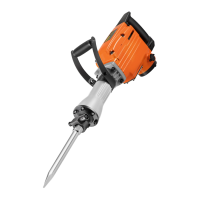
The VEVOR Demolition Jack Hammer is a heavy-duty power tool specifically designed for chiseling work in concrete, brick, and stone. It is intended for demolition tasks without limitations on the dimensions of the workpiece. The tool operates by delivering powerful impacts to a chisel bit, breaking down hard materials.
Important Technical Specifications
- Model: JH-65A
- Voltage: 220-240V~50Hz (EUR/AUS); 120V~60Hz (USA)
- Input Power: 2200W
- Rated Power: 1500W
- Idling Speed: 1350 BPM (Blows Per Minute)
- Oil Type: Hydraulic oil type ISOVG46
- Sound Power Level (LwA): 102dB(A)
Usage Features
The manual outlines several key features and instructions for using the demolition jack hammer:
- Safety First: Before any assembly, replacement, or adjustment of accessories, the power supply must be disconnected to prevent accidental startup. Users are advised to check the power supply voltage before use and ensure all packing materials and loose parts are removed.
- Auxiliary Handle: The machine must be used with both the main non-slip handle (A) and the auxiliary handle (B) for proper control and safety. If the auxiliary handle is damaged, it should not be used.
- Chisel Insertion and Removal: The chisel is secured by a chisel lock (C). To insert a new chisel, pull out the chisel lock (C), rotate it clockwise 180 degrees, insert the chisel into the chuck, then turn the chisel lock counterclockwise and release it to automatically lock the chisel. To remove, follow the same steps in reverse: pull out the chisel lock (C), rotate it clockwise 180 degrees, and pull out the old chisel.
- On/Off Switch: The tool is started by holding down the On/Off switch (F) for continuous operation. Releasing the switch turns the machine off.
- Operating Pressure: It is important not to apply excessive pressure to the machine. The chiseling mechanism activates with slight pressure when the drill bit contacts the workpiece. Optimal cutting is achieved by maintaining this slight pressure to ensure automatic clutch engagement.
- Accessory Compatibility: The manual provides a list of main parts and accessories, including different types of bits (point bit, flat bit, scraping bit, clay spade, shovel bit) and safety gear (goggles, face mask, gloves). The accessories are categorized into 2-piece, 4-piece, and 6-piece sets, indicating what is included with each.
- Pre-use Check: Before operation, all accessories should be checked to ensure they fit the machine and are suitable for the intended purpose.
- Warm-up (Low Temperature): If the ambient temperature is low or the tool has not been used for a long time, it should be run under no load for a period to preheat. This circulates the lubricant, improving drilling performance.
Maintenance Features
Proper maintenance is crucial for the longevity and safe operation of the demolition jack hammer:
- Pre-Maintenance Safety: Always unplug the appliance before performing any maintenance.
- Cleaning: The housing should be cleaned regularly with a damp cloth. Solvents should not be used. Ensure the tool is thoroughly dried afterward. Ventilation openings must be kept clear and clean.
- Oil Level Check and Replenishment: The machine is supplied with some oil and can run for 20-30 hours initially. The oil level is indicated by the oil hole window (G). Users should check the oil window daily. Adding 20-30g of hydraulic oil (ISOVG46) each time can extend the run time by another 20-30 hours. The oil level should be approximately half-full in the window. Overfilling will cause the machine to malfunction, and excess oil should be poured out. Regular oil checks and replenishment are essential.
- Lubrication Service: It is recommended to re-lubricate the tool after each carbon brush change. While sending the tool to a service center for lubrication is ideal, users can perform it themselves:
- Operate the tool for a few minutes to warm it up.
- Switch off and disconnect from the socket.
- Use the wrench (I) to unscrew the oil filling port (G), being careful not to lose or damage the seals.
- Fill the oil tank with hydraulic oil type ISOVG46.
- Refit and secure the cover on the housing.
- Carbon Brush Replacement: Carbon brushes (M) are expendable and wear down with use. They should be changed regularly, and both brushes must be replaced simultaneously to prevent damage to the electrical circuit. This task should only be performed by authorized service personnel. The machine must only be used with both brushes installed.
- Troubleshooting: The manual includes a troubleshooting guide for common faults such as oil leakage, motor not running, recoil failure, surface overheating, and abnormal noise/rotation issues. It provides possible reasons and corresponding solutions, ranging from simple checks (e.g., plug connection, voltage) to more complex repairs (e.g., replacing carbon brushes, motor, or seal rings), some of which require professional service.
- Storage: The machine, operating instructions, and accessories should be stored in their original packaging to protect them and keep all information readily available. The equipment should be properly packed to prevent transportation damage. Always store the machine in a dry place. It should not be stored in high-temperature environments, as this can cause oil leakage. After use, the machine should be stored flat, not vertically.
- Repair: Repairs must only be carried out by qualified repair technicians using the same spare parts to ensure safety and proper functioning. Unauthorized repairs can lead to injury risks.