Do you have a question about the VEVOR NLSSHL412 and is the answer not in the manual?
Specifies the primary purpose and restrictions for the pool safety fence.
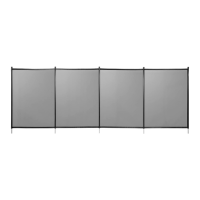
Details about different models, their sizes, and available colors.
Lists all components that come with the pool fence package.
Identifies the necessary tools for assembling and installing the fence.
Planning the fence layout and marking hole locations.
Steps for marking a custom cut section of the fence.
Guidance on selecting correct angles (lean/level) for post holes.
Methods to determine and mark the correct drilling angle for fence posts.
Instructions for drilling post holes using specified drill bits.
Details on flushing debris and inserting sleeves into drilled holes.
Steps to measure, cut, and finish a custom fence section.
Attaching border material and pole to the custom-cut fence section.
Instructions for maintaining the pool fence and its components.
Essential safety guidelines for pool fence usage and supervision.
| Brand | VEVOR |
|---|---|
| Model | NLSSHL412 |
| Category | Swimming Pool |
| Language | English |