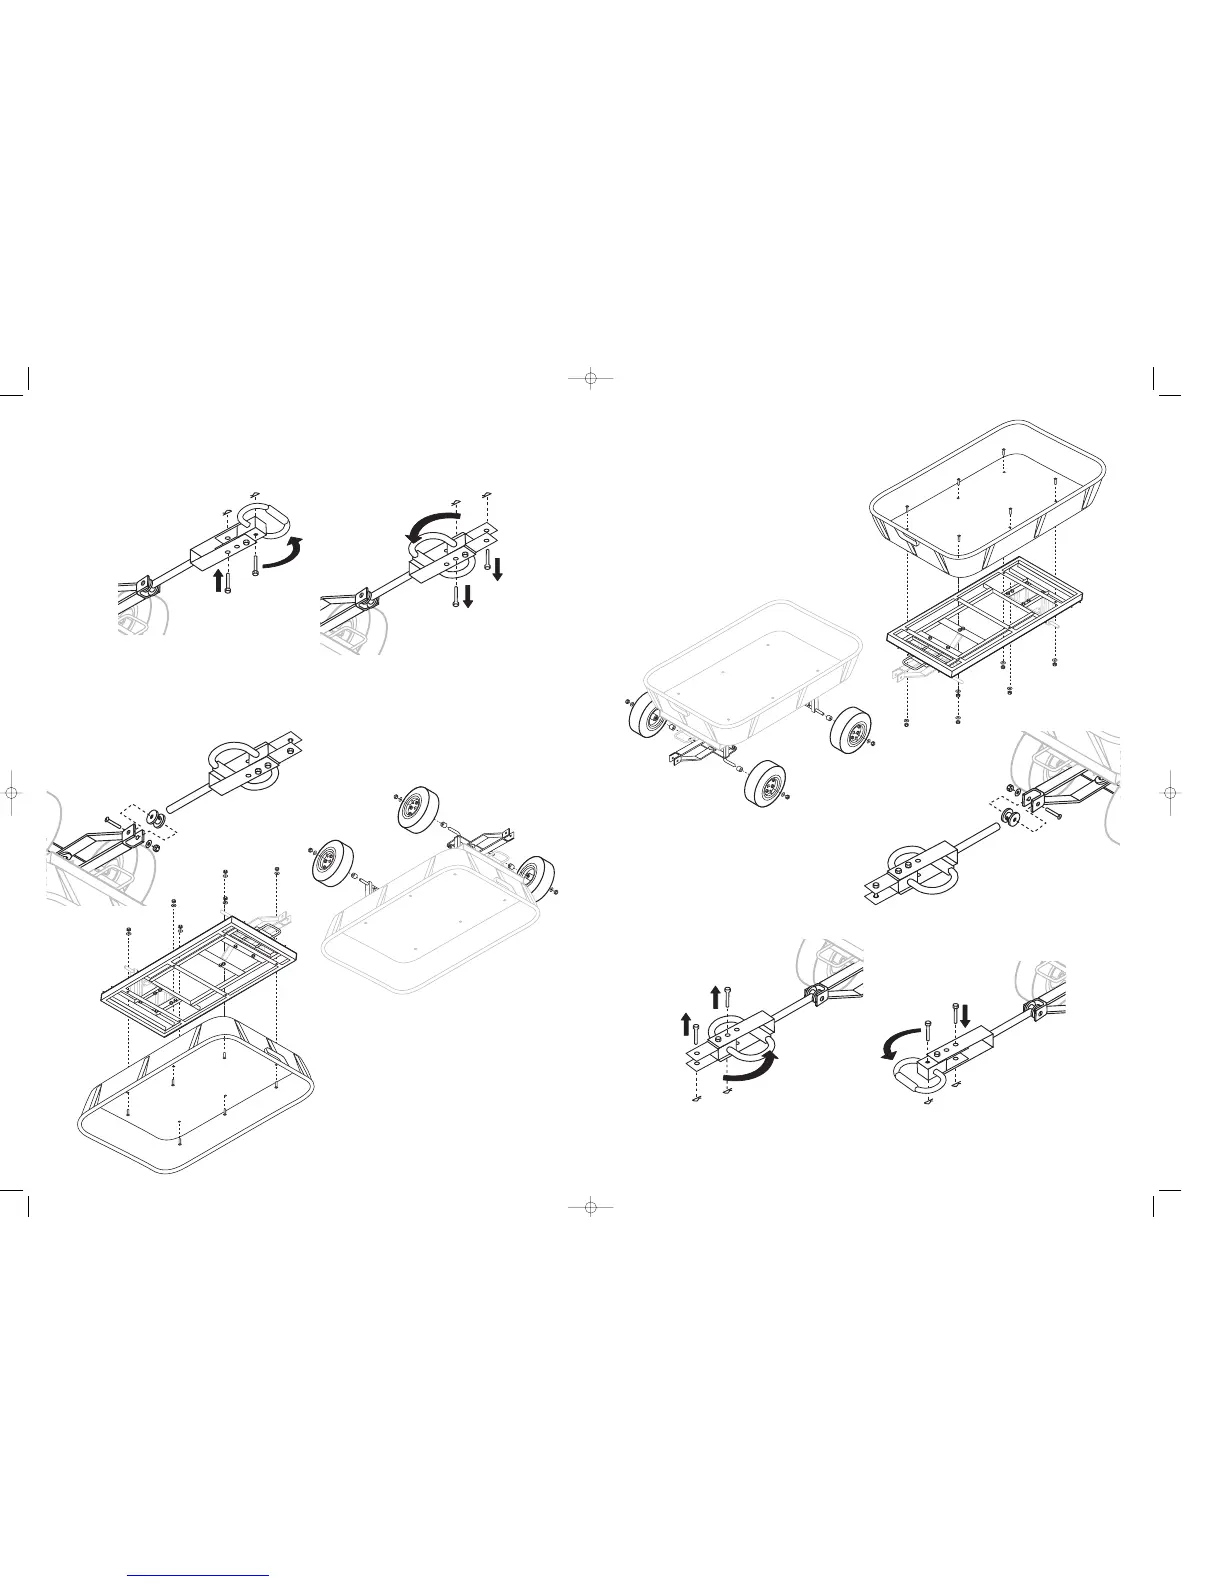
PASO 4 Deslice los 4 bujes espaciadores de
las ruedas sobre los ejes. Coloque
las ruedas en los ejes con los
vástagos de las válvulas apuntando
hacia fuera. Conecte las ruedas a los
ejes mediante las 4 arandelas de 12
mm y las contratuercas de 12 mm.
PASO 6 Para cambiar el enganche de remolque a la posición de manija de tiro, simplemente retire el pasador de
la manija y el pasador de horquilla y gire la manija en 180 grados. Vuelva a insertar el pasador a través
del conjunto y fíjelo con el pasador de horquilla. Repita este procedimiento para volver a la posición de
enganche de remolque.
PASO 3 Conecte el conjunto del bastidor de soporte, que se
armó en los pasos anteriores, a la plataforma de
plástico. Alinee todos los orificios en el conjunto del
bastidor de soporte y la plataforma, y conecte
mediante los 6 pernos de 8 x 50 mm, arandelas de 8
mm, y contratuercas de 8 mm.
PASO 5 Coloque el carro boca arriba sobre
sus ruedas. Conecte la manija al
conjunto del bastidor mediante el
acoplamiento de plástico, el perno de
8 x 60 mm, las arandelas de 8 mm, y
la contratuerca de 8 mm.
STEP 4 Slide the (4) wheel spacer bushings
over the axles. Place the wheels over
the axles with the valve stems facing
out. Attach the wheels to the axles
using the (4) 12mm washers and
12mm lock nuts.
STEP 6 To change the trailer hitch to the pull handle position, simply remove the handle pins and clevis pins, rotate
the handle 180 degrees. Re-insert the pins through the assembly and lock in place with the clevis pins.
Repeat this process to change back to the trailer hitch position.
STEP 3 Attach the completed frame support assembly from
the previous steps to the plastic bed. Align all of the
holes in the frame support assembly and the bed,
and attach using (6) 8 x 30mm bolts, 8mm washers,
and 8mm lock nuts.
STEP 5 Attach the handle to the frame
support assembly using the plastic
coupling, the 8 x 60mm bolt, 8mm
washer, and 8mm lock nut.
 Loading...