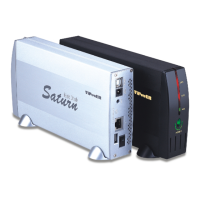
Do you have a question about the VIPowER Saturn VPA-35018NAS and is the answer not in the manual?
| Model | VPA-35018NAS |
|---|---|
| Category | Storage |
| Type | NAS |
| Drive Bays | 5 |
| Interface | Gigabit Ethernet |
| Size | 5-Bay |
Specifies the power adapter requirements: 12V DC, Max 2 Amps, 100-240V AC, 50-60Hz.
Details the Ethernet port for network connection and USB port for storage devices or PC connection.
Explains the function of the Reset Button for factory default settings based on press duration.
Details the meaning of Power, LAN, USB, and HDD LED indicators: ON, Off, and Blinking states.
Lists prerequisites for NAS operation: TCP/IP, network connection, and USB storage devices.
Guides on connecting network, USB devices, and power, followed by the initial boot-up process.
Introduces the Quick Setup Wizard for network device discovery, information display, and basic configuration.
Instructions on accessing the NAS web interface by entering its IP address in a browser.
Displays basic NAS information, including USB device status and system details like firmware and IP address.
Details the administration login screen, requiring username and password with default credentials provided.
Covers configuring network settings: DHCP, Static IP, and PPPoE for network connectivity.
Allows configuration of Device Name, Description, Date, Time Zone, NTP, FTP, and HTTP Port.
Displays connected USB storage devices and printers, and how to access Samba shares.
Covers managing user accounts, including changing passwords and deleting users with share folder options.
Allows modification of user share folder properties, setting access levels like read-only or read/write.
Enables downloading files via Bit Torrent, requiring a NAS hard disk.
Configures Bit Torrent download/upload rates, seed options, and download behavior.
Allows scheduling NAS restarts and performing immediate device restarts.
Provides tools for formatting hard disks (FAT32/XFS) and running disk error checks (Scandisk).
Process for upgrading the NAS firmware to the latest version.
Enables backing up current settings and restoring from saved configuration files.
Resets all NAS settings to their original factory defaults.
Allows changing the administrator's login username and password for security.
View the system log for event history and operational details.
Identifies front panel components including LED indicators and ventilation holes.
Details rear panel connectors and controls: USB, power, reset, and LAN ports.
Step-by-step guide for opening the case, installing the HDD, and reassembling the unit.
Steps 1 & 2: Removing screws and separating the NAS casing to access internal components.
Steps 3 & 4: Connecting the HDD to the PCB and securing it with screws.
Step 5: Positioning and sliding the inner cradle assembly back into the outer cover.
Step 6: Replacing screws and attaching rubber stands to the NAS unit.