www.vitalbaby.com
Made in China to Vital Baby
®
specifications.
Vital Innovations Limited, Hatfield, Herts, AL10 9EW, United Kingdom.
Vital Baby
®
is a registered trademark. NURTURE™ is a trademark.
Patent protected. Design Rights. © Vital Innovations Ltd 2020.
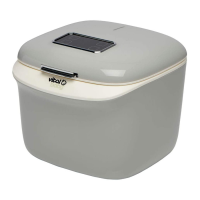
pro UV steriliser & dryer
™
STERILISE MODE
1. Clean all parts according to the instructions given in “cleaning and
maintenance”. Ensure that all items to be sterilised have been thoroughly
cleaned and completely dried before putting into the machine for
sterilising without performing a dry cycle.
2. Open the lid and place your items into the steriliser. See diagrams 1 and 2
for placement guidance.
3. Close the lid and switch your steriliser on at the mains. The steriliser will
beep when on.
4. Press
sterilise
to select the function. There is 1 sterilising option of 11 minutes,
which will be automatically selected and displayed on the timer when
pressing
sterilise
. The time will flash when you press
sterilise
- once it has stopped
flashing and your sterilising cycle will begin.
If the lid is lifted during a cycle, the function will end. Do not open the lid
during a sterilising function, as this will affect the sterilisation results of
the contents.
To cancel your cycle at any point, press
sterilise
.
When your steriliser beeps 6 times your cycle is complete and your items
are fully sterilised. The steriliser will then enter standby mode and the
screen will switch off until the lid is opened.
DRY MODE
1. Clean all parts according to the instructions given in “cleaning and
maintenance”. Ensure that all items to be dried have been thoroughly
cleaned and roughly dried to remove excess water.
2. Open the lid and place your items into the steriliser. See diagrams 1 and 2
for placement guidance.
3. Press
dry
to select the function. There are 3 different cycles available -
31minutes (default), 41minutes and 51 minutes - for use depending on how
many items you have placed in the unit and how long it will take to dry
them. Ifthere are a lot of items in the steriliser, we recommend you choose
a longer cycle in order to ensure that all of your items are completely dry.
The time will flash until you have selected your cycle - once the time has
stopped flashing your drying cycle will begin.
4. If the lid is lifted during a cycle the function will end.
To cancel your cycle at any point press
dry
. If the fan is on when you press
the button, it will continue to dry for 15 seconds and enter standby mode
when finished.
When your steriliser beeps 6 times, your cycle is complete and your items
are dry. The steriliser will then enter standby mode and the screen will
switch off until the lid is opened.
STORE MODE
1. Clean all parts according to the instructions given in “cleaning &
maintenance”. Ensure that all items to be sterilised have been thoroughly
cleaned and roughly dried to remove excess water.
2. Open the lid and place your items into the steriliser.
3. Press to select the function. In store mode, the steriliser will initially
perform a full sterilising and drying cycle of 41 minutes. 41 minutes will be
automatically selected and displayed on the timer when pressing .
The time will flash when you press - once it has stopped flashing your
cycle will begin.
4. Once your steriliser has completed its auto cycle, store mode will then
commence. In store mode, once completing a full sterilising and drying
cycle, the steriliser will automatically sterilise the contents every 2 hours
for 2 minutes for up to 3 days or until the lid is opened.
If the lid is lifted during a cycle the function will end.
Tocancel your cycle at any point, press . If the fan is on when you
press the button, it will continue to dry for 15 seconds and enter standby
mode when finished.
When your steriliser beeps 6 times, your 72 hour cycle is complete. The
steriliser will then enter standby mode and the screen will switch off until
the lid is opened. To perform another ‘store’ cycle, repeat this section from
step 1.
TECHNICAL SPECIFICATION
Model: 443853
Drying Power: 240V~50Hz 75W
Inner Capacity: 7L
UV-LED light: 7V 3W
Wavelength: 275nm
DISPOSAL
In order to minimise hazards to health and the environment and ensure that
materials can be recycled, this product should be disposed of at a separate
collection facility for waste electrical and electronic equipment.
filter
REPLACING THE FILTER
• The filter in your UV steriliser
should be replaced every 6-12
months. Tochange the filter,
remove the filter casing using
the latch and gently pull the
filter out.
• Place the new filter over the vent
on the back of your steriliser
and replace the filter casing,
ensuring that the latch clicks
back into place.
• Place bottles (with the neck facing upwards), collars and caps upright in
the base of the steriliser and teats upright in the basket. We recommend
that no items come into contact with each other when placed in the
steriliser for accurate and efficient sterilising.
THIS WAY UP
Diagram 1 Diagram 2
Don’t forget to register your warranty at
www.vitalbaby.com/warranty
VB UVSteriliser A6 8pp Leaflet.indd 1-4VB UVSteriliser A6 8pp Leaflet.indd 1-4 13/02/2020 15:4513/02/2020 15:45