4
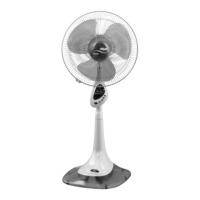
FAN ASSEMBLING
•
The fan is supplied disassembled. Do not con-
nect the unit to the mains, if it is not completely
assembled.
•
Unpack the fan and remove any advertising stickers
that can prevent its operation.
•
Check the unit for damages, do not use it in case
of damages.
•
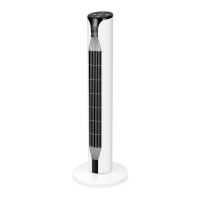
Install the vertical duct (3), on the fan housing (2),
by aligning the clamps on the duct (3), with the slots
on the housing (2). to fix the duct, press the front
lower part of it.
•
Before using the unit for the first time, make sure
that the voltage in your mains corresponds to the
fan operating voltage.
USING THE REMOTE CONTROL (12)
•
Functions of the buttons on the remote control (12)
fully correspond to functions of the buttons on the
control panel (4).
ATTENTION!
The unit contains a lithium battery. Prevent children
from swallowing the lithium battery. If your child
has swallowed a battery, immediately see your
doctor.
Battery leakage can cause injuries or damage the
unit. To avoid the unit damage, follow the instruc-
tions given below:
– use only the «CR2025» battery;
– do not recharge the battery;
– insert the battery strictly following the polarity;
– remove the battery if you are not planning to use
the unit for a long time;
– replace the battery timely.
– apply to specialized centers for further recycling
of the battery;
– avoid the power nippers circuit.
Installing or replacing the battery
in the remote control (12)
•
Remove the battery holder (13) by pressing the
side clamp, install a CR2025 battery, strictly follow-
ing the polarity.
•
Install the battery holder (13) back to its place.
Note: - if there is an isolation insert, remove the insert.
•
There is a remote control (12) storage (5) on the
fan body.
USING THE FAN
•
Plug the unit in, the display (14) will light up, and
the digital symbols (11) will show the room tem-
perature.
Notes:
– The operation mode buttons on the control panel
(4) are sensory, you just need to touch the button to
switch the necessary operation mode on.
– Pressing of each button is accompanied by a sound
signal.
– The air temperature indications may be slightly dif-
ferent from the readings of another thermometer.
•
Press the on/off button (6) «
» or the button (6)
«
» on the RC (12), the fan will switch on at the
first speed. After some time the display will show the
room temperature.
Notes:
– In 30 seconds the control panel (4) buttons will be
locked, the brightness of the digital symbols will
grow twice less.
– To unlock the control panel (4), touch any but-
ton. The brightness of the digital symbols will be
maximal.
•
Select the speed mode by pressing the button (7)
«
» or the button (7) «
» on the RC (12). You
can select any of twelve speed modes which will be
shown on the display (14) with the digital symbols
(11) «1-2-3-4-5-6-7-8-9-10-11-12».
•
Select the air flow mode by pressing the button (8)
«
» or the button (8) «
» on the RC (12). You can
set two air flow modes which will be shown on the
display (14) with the symbols:
- the air flow speed will increase and decrease
gradually;
- night mode.
•
Select the auto-switch off operation time with the
button (9) «
» or the button (9) «
» on the RC
(12), the timer operation time will be shown on the
display by digital symbols. Available operation time
is from 1 hour to 12 hours with 1 hour setting step.
•
To switch the timer off consequently press the but-
ton (9) «
» or the button (9) «
» on the RC (12)
until the display (14) shows the selected speed.
•
To switch the oscillation mode on, press the button
(10) «
OSC
» or the button (10) «
OSC
» on the RC (12),
the letter symbols will appear on the display
(14). To stop the oscillation mode, press the but-
ton (10) «
OSC
» or the button (10) «
OSC
» on the RC
(12) once again.
•
To switch the fan off, press the on/off button (6)
«
» or the button (6) «
» on the RC (12) and
unplug the unit.
MAINTENANCE AND CARE
•
Before cleaning the fan switch it off by pressing the
on/off button (6) «
» or the button (6) «
» on the
RC (12) and unplug the unit.
•
Do not use abrasive cleaners and solvents to clean
the fan.
•
Clean the unit body (2) with a slightly damp cloth
and then wipe it dry.
•
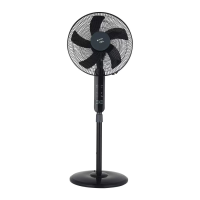
You can clean the vertical air pipe (3) with a vac-
uum cleaner using a corresponding attachment.
 Loading...