Installation Instructions Outline
Installing
the AirBridge node is simple and straightforward, and can be quickly learned and mastered. As noted, you can install multiple VAB nodes to a Vivint
that is based on the Smart Hub control panel (SkyControl is not supported) if warranted by the home environment and size and scope of the system.
IMPORTANT: In order to configure the secure dedicated Vivint network, either the initial AirBridge node or the Smart Hub panel itself must be hardwired to
the home's broadband internet router via an Ethernet connection, designating that hardwired component as the network's single portal node. To be clear,
only one portal node is allowed on the Vivint network, and the Ethernet port on the VAB can be used for connection only when it is acting as that portal node.
technician should carefully read these steps in order to ensure a successful installation and optimal performance. For additional information, including
details for specific network configurations and troubleshooting guidelines, refer to the Field Service Smart Home Pros website.
Vivint AirBridge™ wireless mesh node is a connectivity device that can be added to the homeowner's Vivint Smart
m. This proprietary 5GHz Wi-Fi solution creates a secure mesh network dedicated to a Vivint system with
Smart Hub panel and connected devices such as cameras, sensors, etc. Vivint AirBridge is not supported on
the older
SkyControl panel.
Adding Airbridge node(s) to configure a dedicated Vivint network eliminates bandwidth sharing
worry about rogue devices, and the need for third-party hardware such as repeaters, extenders, etc.
ou can, if necessary, add more than one node to the system in order to expand coverage for the Vivint network (see
). AirBridge optimizes network traffic; increases signal strength between cameras and the panel,
ing video quality; and improves the speed, reliability, and control of the overall Vivint smart home experience.
AirBridge (VAB) is professionally installed by a Vivint Field Service Pro (FSP) technician. VAB nodes are added to
system via either NFC or WPS. Features include an LED light that indicates function and status; and a multi-function
button that lets you toggle the LED on
/off, send a WPS signal to the panel, and reboot or reset the node. Once installed
configured, AirBridge nodes operate seamlessly and transparently in improving every aspect of the Vivint
system. In other words, when functioning properly AirBridge requires very little if any end user interaction.
This document includes a product description
overview, key features, illustrations, installation and test instructions, as
well as technical specifications
, standards certifications listings, and regulatory notices and declarations.
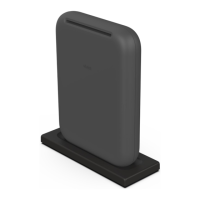
AirBridge Wireless Mesh Node
S-YOFIMN-000)
Quick Reference (Overview, Installation, Specs, Regulatory)
PRINT INSTRUCTIONS: REFERENCE SHEET FOR VS-YOFIMN-000, DOCUMENT P/N 77-600036-001 REV 1.0 |
INK:
BLACK | MATERIAL: 20 LB MEAD BOND | SIZE: 8.50" X 11.00" SCALE 1:1 |
BI-FOLD VERTICAL, BI-FOLD HORIZONTAL (TO FIT IN BOX)
Follow these steps to pair a VAB node and add it to the system:
1. First, change the panel connection type to AirBridge mode. At the panel, tap on the menu icon (…) in the
bottom right corner > tap Software version > enter the PIN code 2203 to access the Installer Toolbox > tap
Networking > and then select AirBridge. Press Back > and then press OK to confirm the change.
IMPORTANT: Do NOT reboot the panel during the AirBridge node installation process. Once the node(s)
are installed, the network connection status will update to show the new connection type.
2. Pair the VAB node to the panel via NFC. In the Installer Toolbox > tap Networking > Add AirBridge > NFC >
and then tap Add. Align the upper left side of the VAB node with the white LED light in the bottom right
corner of the panel, and hold it in physical contact with the panel until pairing is complete (this may take
several minutes, make sure to wait until prompted that the node is successfully paired).
NOTE: If NFC doesn't work you can use WPS, making sure to first plug in the VAB node (powered on) and
then press the button on the bottom of the node for 3-5 seconds to send a WPS signal to the panel.
3. Name each VAB node that you add. In the Installer Toolbox > tap Networking > Advanced Networking >
AirBridge Node View. Tap the node and then its name field to enter a unique descriptive name (based on its
location and function as either a portal or point node).
4. Install the VAB node. Plug the node directly into an unswitched wall outlet.
NOTE: If the panel is wirelessly connected to the home router, you must install the first VAB node (as the
network's single portal node) where it can be directly connected to the router via the Ethernet port.
However, if the panel is hardwired to the router, you should install the first VAB node and subsequent
nodes (as network point nodes) in a location that best enhances network performance, such as in between
a camera with a weak signal and the panel. You can use the AirBridge Network Graph tool (on the
Networking page) to both view the network and to determine how many nodes are needed and where
they should be installed for optimal coverage. See the Field Service Pros website for details and examples.
5. Verify power is present at the node. The LED will illuminate white. (See LED descriptions.)
6. Wait for the node to establish a connection to the panel and update its firmware. The LED will illuminate
green. This may take several minutes, make sure to wait until prompted that the node is connected.
7. If after running the Network Graph tool you need to install multiple nodes, follow the same steps as above.
8. Once finished, the panel will automatically configure all of the nodes on the Vivint network.
Button Functionality
The button located on the bottom of the
AirBridge node can
perform multiple functions, as described below
.
• Press & let go quickly — Toggles on/off the LED light
• Press & hold for 3-5 seconds — Sends a WPS signal
• Press & hold for 10 seconds — Reboots the node
• Press & hold for 20 seconds — Factory resets the node