spotlight camera is offline, attempt these troubleshooting steps in order to resolve:
Power cycle or reboot the Wi-Fi bridge
Factory reset the Wi-Fi bridge
Power cycle the spotlight camera
Factory reset the spotlight camera (press the button for 5 seconds)
Ensure wire termination points are clean and secure
Ensure wire terminations are following the T-568B order (see Figure 1 and Figure 2)
Ensure punchdown terminations are fully seated
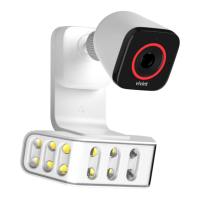
Spotlight Pro with Outdoor Camera Pro (assembled) —
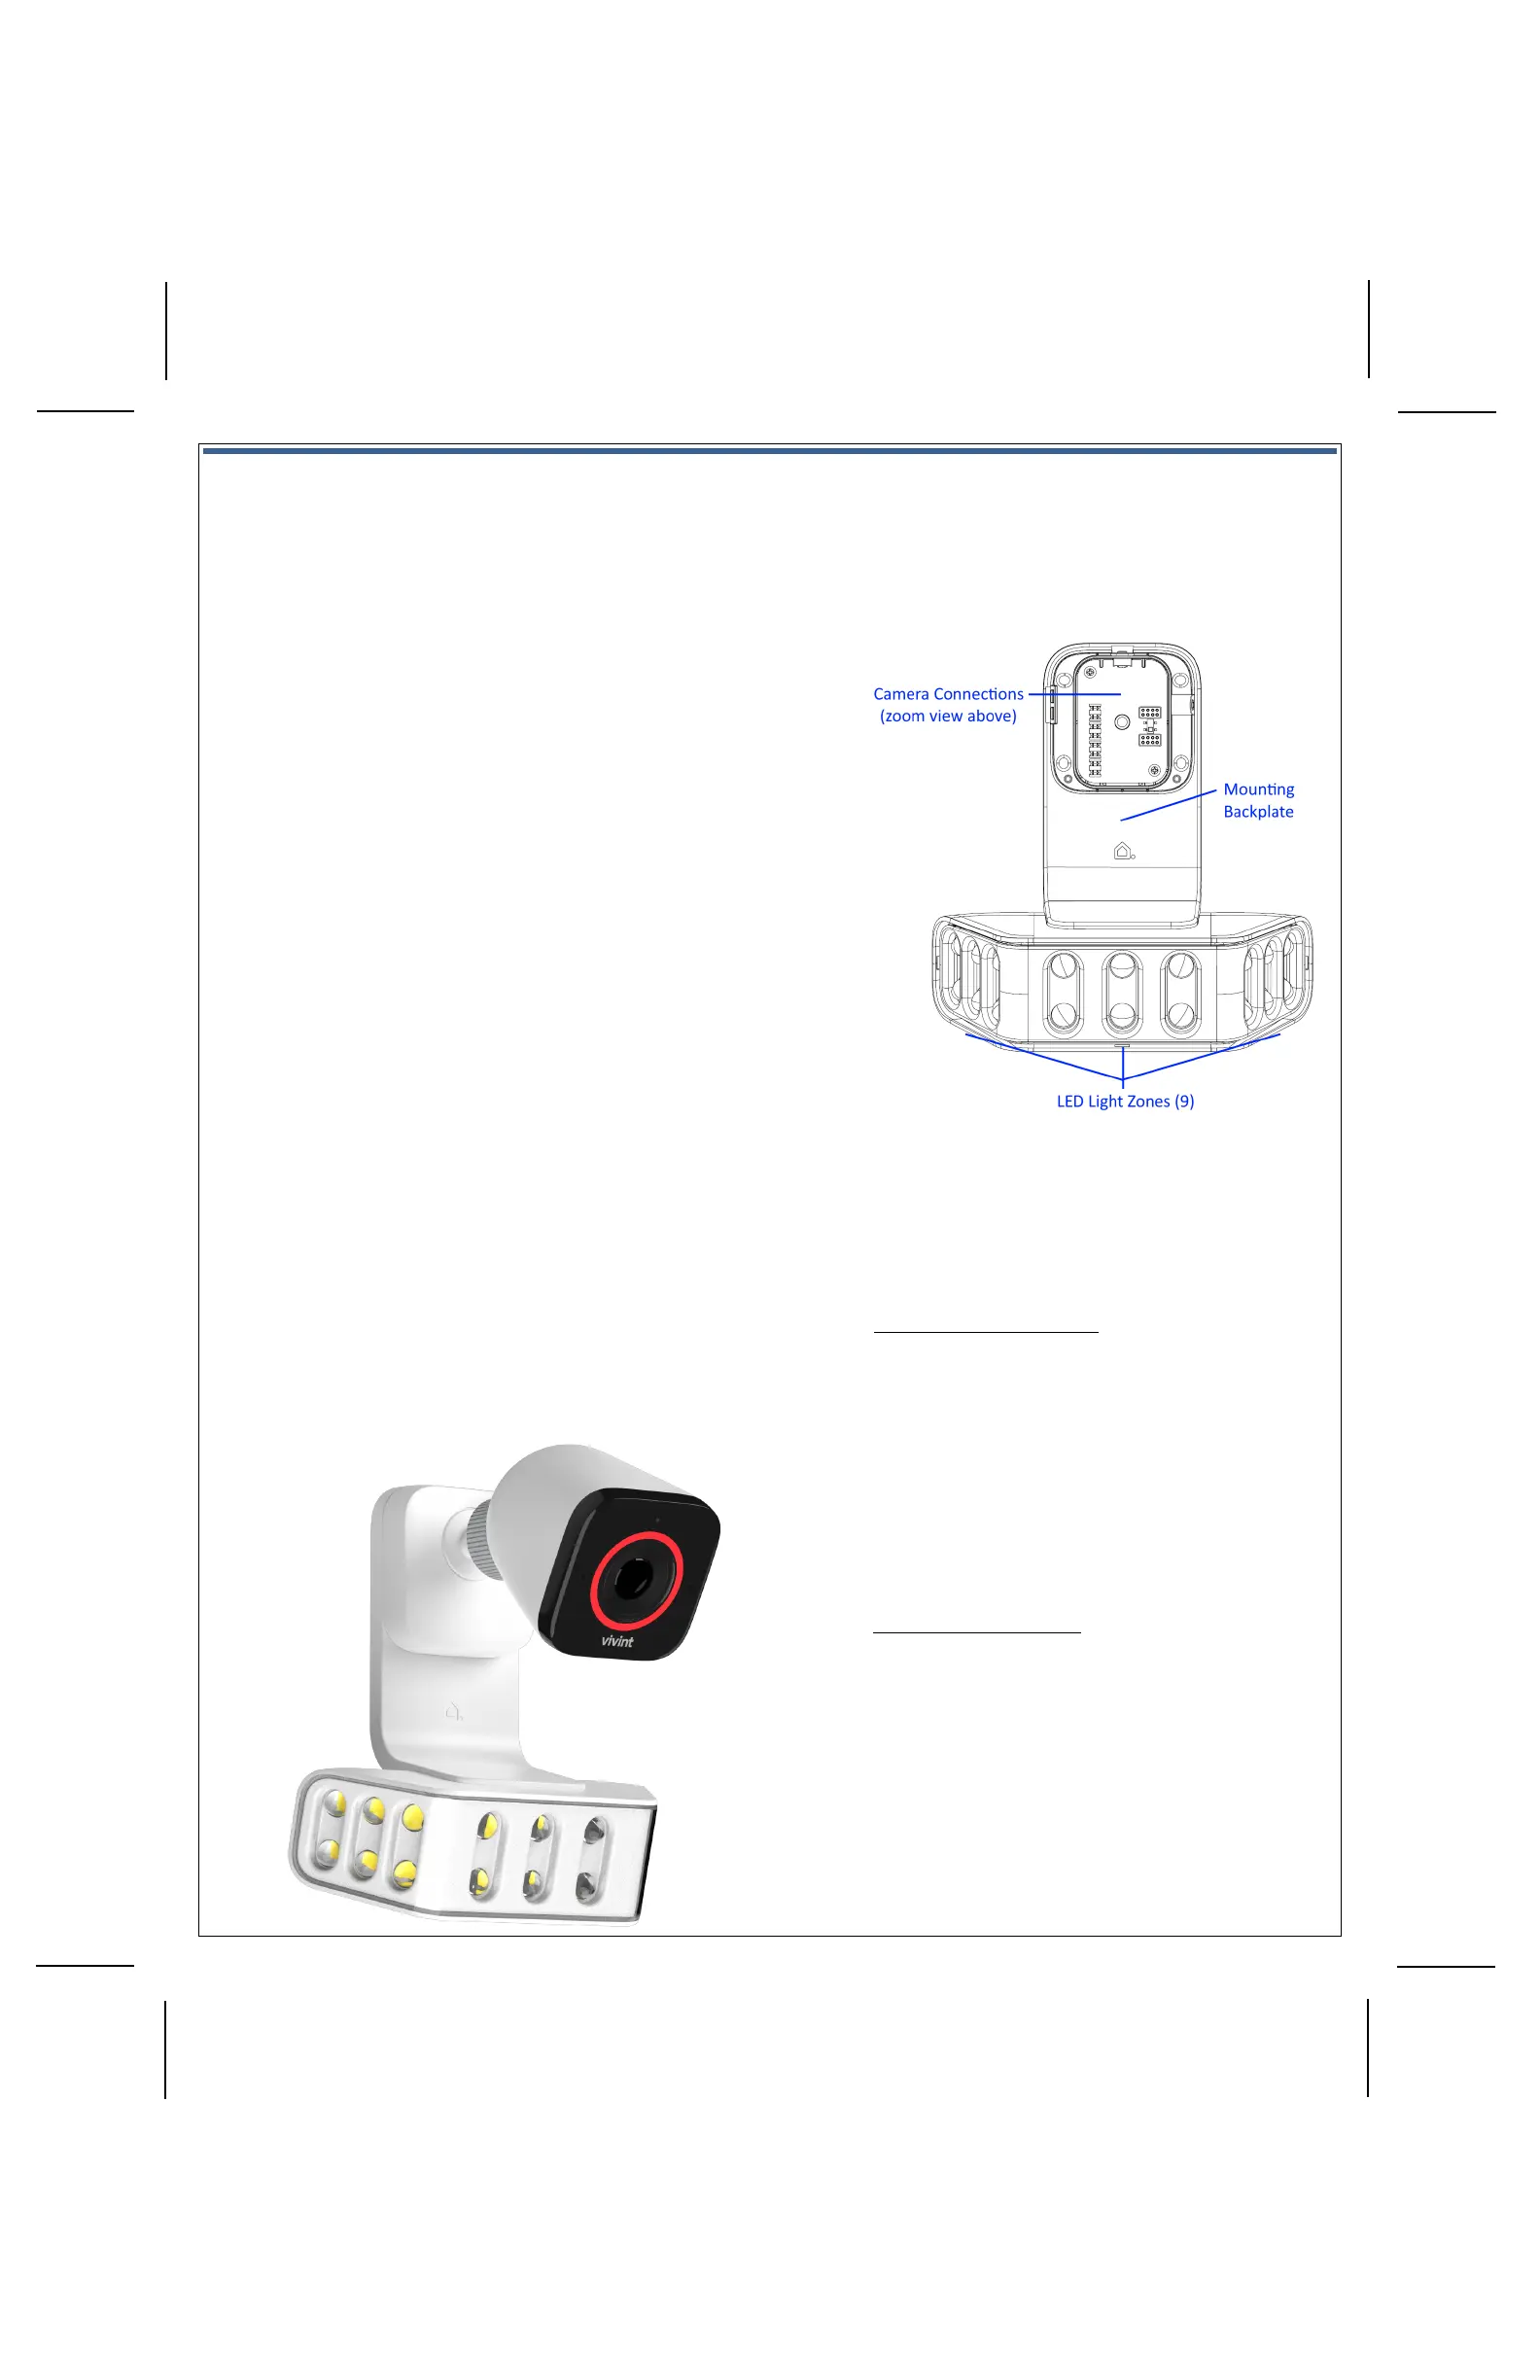
Spotlight Pro (front view) —
Operation Overview / User Functionality
Once the
spotlight camera is up and running, the customer can use the
app for onboarding and initial configuration, as well as perform
via the app (and the panel for certain features).
step-by-step instructions, refer the customer to the online
Help resources (articles and video tutorials) at the Vivint Support site.
SPOTLIGHT SPECIFIC FEATURES
• Enable, configure, and schedule Deter Mode (detects and
tracks intruders using the camera's analytics software; uses
escalated light behaviors such as strobe, wave, full brightness)
• Configure each of the 9 LED light zones independently
• Enable, configure, and schedule Non-Deter Mode (everyday
outdoor ambient lighting behavior when a person is detected)
• Turn the light on and off, dim the light (0% - 100%), manually
trigger escalated Deter Mode at any time during nighttime
hours, integrate light behaviors with custom rules and system
events (door open/close, doorbell ring, etc.)
• Enable neighbor friendly lighting (permanently disable any LED
light zones that may annoy the neighbors)
Additionally, at the panel Devices > Cameras settings page, the user
can
also perform these management and configuration tasks:
• Adjust person detection and video settings
• Rename the spotlight camera
• Reboot and/or delete the spotlight camera device
Adding the Spotlight and Camera to the System —
Now that the Ethernet wiring is
prepared (to supply both power and network connectivity through the Wi-Fi bridge), and the spotlight and camera are installed,
power up the spotlight camera and add it to the Vivint system via the Installer Toolbox, at the control panel, by using the method below.
To add the spotlight and camera to the system, follow these steps:
1. If the Vivint control panel is not already up and running, apply 100-240 VAC power to the
panel and wait for it to boot up completely.
2. Verify the panel is connected to the local network. To do this, at the panel tap on the menu
icon (…) on the touchscreen > tap Software version > enter the PIN code 2203 to access the
Installer Toolbox > tap Networking > Panel connection to the local network > Wired > and
then tap Back to return to the Networking page and verify the status is "Connected".
3. Now you can apply power to the spotlight camera by first plugging the Wi-Fi bridge into the
outlet, and then plugging the Ethernet RJ45 jack coming from the camera into the Wi-Fi
bridge. (NOTE: The Wi-Fi bridge adapter must be "UL Listed".)
4. Add the spotlight camera to the system. To do this, at the panel access the Installer Toolbox >
tap Smart Home devices > Cameras > and then tap Add camera. (NOTE: This procedure
describes how to add the camera via the Wi-Fi bridge using the WPS Pro option; the panel
also provides two other methods: Wi-Fi Connect and NFC. Refer to the FSP site for details.)
5. Tap WPS Pro > and then tap Add. When the panel shows "Listening for device" go to the Wi-
Fi bridge and press and hold the WPS button for 3-5 seconds. The Internet LED will begin
blinking red.
6. The panel will show that the device is "Found" and being its configuration. You can tap
Camera details to monitor configuration progress. Wait until the camera status shows
"Online" before finishing the camera setup. IMPORTANT: This process should NOT be
interrupted and could take several minutes to load firmware and configure settings.
7. Once the spotlight camera is successfully connected and online, you can enter a descriptive
name to uniquely identify the device.
8. At the panel Home screen, tap the camera icon in the navigation bar at the bottom of the
touchscreen, and then tap the thumbnail view for the camera you just added to verify that
you can view live video at the panel screen.
9. The customer can now use their Vivint app (and the panel for certain features) to view live
video, and to access, control, and configure settings for the spotlight camera. See "Operation
Overview" for an introduction to specific features and direction to additional Help resources.
• View a live video feed
• View recorded video clips (enable recording options)
• Enable 24/7 DVR recording
• Receive person-triggered (event) notifications
• Enable Smart Deter detection (with the LED light ring and
selected chime tone)
• Engage in two-way talk with someone at the camera
•
 Loading...