Do you have a question about the VIVOHOME HZB-12/A and is the answer not in the manual?
Explains the safety alert symbol and the meaning of hazard level words like DANGER and WARNING.
Safety guidelines for power cords, outlets, and extension cords to prevent electrical shock and fire hazards.
Instructions on safe handling, placement, and servicing to prevent hazards like fire, explosion, and improper operation.
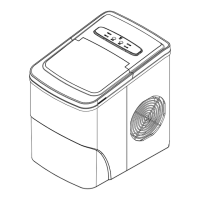
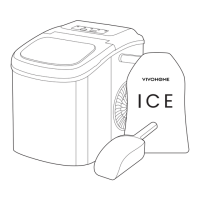
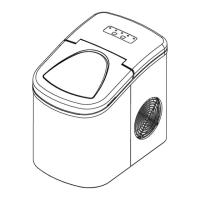
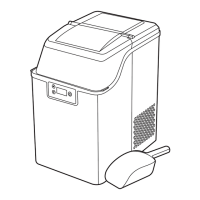
Identifies key components of the ice maker unit, including scoop, sensors, basket, and water level mark.
Details the functions of the ice maker's control panel, including power, ice size selection, and indicator lights.
Instructions for unpacking the ice maker, checking components, and initial placement before operation.
Guidance on safely connecting the ice maker to a grounded power outlet, emphasizing electrical safety.
Procedures for cleaning the interior and exterior of the ice maker, including draining and drying for storage.
Step-by-step guide on operating the ice maker, including adding water, selecting size, and managing indicators.
Addresses common issues like 'Add Water' indicator, full ice basket, and ice formation problems with their solutions.
Lists the technical specifications of the ice maker, including model, power, and refrigerant details.
Provides the electrical schematic diagram for the ice maker's main and operation control boards.
Detailed breakdown of all ice maker components with numerical references for easy identification.
This document provides instructions for the Portable Automatic Ice Maker, a household appliance designed to produce ice cubes. It emphasizes safety, proper usage, and maintenance to ensure optimal performance and longevity of the unit.
The primary function of this device is to automatically make ice cubes. Users can select between small and large ice cube sizes, catering to different preferences and needs. The ice maker is designed for indoor use and is not suitable for outdoor environments. It operates by filling a water tank, initiating an ice-making cycle, and then storing the produced ice in a removable basket. The unit features indicators to inform the user about its status, such as when the ice basket is full or when more water is needed.
To begin using the ice maker, users must first unpack it and ensure all components, including the ice basket and scoop, are present and undamaged. The unit should be placed on a level, flat surface, away from direct sunlight and heat sources, with at least 4 inches of clearance from walls on all sides to allow for proper ventilation. Before plugging in, it's crucial to let the refrigerant fluid settle for at least one hour, especially if the unit has been transported from a colder environment.
The ice maker is designed for easy operation with a touch display control panel. After opening the cover and removing the ice basket, water is poured into the tank, ensuring the water level remains below the maximum mark. The "Power" button initiates the ice-making cycle, and the "Select" button allows users to choose between small and large ice cube sizes. The ice-making process typically takes 6 to 13 minutes, depending on the selected size and room temperature. For room temperatures below 60°F, selecting small ice cubes is recommended to prevent them from sticking together.
The unit includes an "Add Water" indicator that illuminates when the water pump cannot inject water, signaling that the water tank needs refilling. If this occurs, the user should press the "Power" button, fill the water tank to the maximum level, and press "Power" again to restart. It's important to allow the refrigerant liquid in the compressor at least 3 minutes to settle before restarting after a water shortage.
Another key indicator is the "Ice" light, which turns on when the ice basket is full, prompting the user to remove ice. A notable warning is provided regarding direct sunlight or sunlight reflection, which can interfere with the infrared sensor, potentially causing the unit to continue making ice even when the basket is full. In such cases, relocating the unit away from direct sunlight is advised.
For continuous operation, it is recommended to change the water in the reservoir every 24 hours to maintain hygiene. If the unit is not in use for an extended period, all water should be drained, and the interior should be thoroughly dried.
Regular cleaning and maintenance are essential for the ice maker's performance and hygiene. Before the first use, and periodically thereafter, the unit should be cleaned thoroughly. This involves removing the ice basket and cleaning the interior with a diluted detergent, warm water, and a soft cloth. After cleaning, the interior parts should be rinsed with water, and the water drained by unplugging the drain cap located on the front bottom side of the unit.
The exterior of the ice maker can be cleaned with a mild detergent solution and warm water. Both the interior and exterior should be dried with a clean, soft cloth. When storing the machine for a long time, it is crucial to drain all water completely and ensure the interior is dry to prevent mold or odors.
The manual also provides troubleshooting tips for common issues. For instance, if the "Add Water" indicator is on, the solution is to stop the ice maker, fill water, and restart. If the "Ice" indicator is on, it means the ice basket is full, and ice should be removed. If ice cubes stick together, stopping and restarting the unit after the ice blocks melt, and selecting the small ice cube size, can resolve the issue. Problems related to water temperature (too low or too high) or room temperature can affect ice formation, and adjusting these conditions is recommended. For more complex issues like refrigerant leaks or blocked pipes, professional service by a qualified technician is advised.
Safety is paramount, and the manual highlights several important safety instructions. It warns against operating the appliance with a damaged cord and emphasizes that the supply cord, if damaged, must be replaced by the manufacturer or a qualified service agent. The ice maker must be positioned so that the plug is accessible and connected to properly polarized outlets only. The use of extension cords is generally not recommended due to the risk of overheating and fire, but if one must be used, it should be of a minimum size (No.14AWG) and rated no less than 1875 watts. Unplugging the ice maker before cleaning or repairs, exercising caution around children, and avoiding outdoor use are also stressed. The appliance must be earthed for safety.
| Model | HZB-12/A |
|---|---|
| Product Type | Ice Maker |
| Ice Production Capacity | 26 lbs/24h |
| Ice Storage Capacity | 1.5 lbs |
| Ice Size Options | Small and Large |
| Ice Shape | Bullet |
| Water Reservoir Capacity | 2.2 L |
| Cycle Time | 6-13 minutes |
| Refrigerant | R134a |
| Voltage | 110-120V |
| Frequency | 60 Hz |
| Control Type | Electronic |
| Indicator Lights | Ice Full, Add Water |
| Drainage | Manual |
| Material | ABS plastic |