The Volter Series One is an e-scooter designed for personal transportation, emphasizing safety, ease of use, and maintainability. This manual guides users through setup, operation, and care, while also outlining the manufacturer's warranty and contact information.
Function Description:
The Volter Series One serves as a personal electric scooter for urban and recreational use. It is designed to provide an efficient and enjoyable mode of transport, allowing users to "make your own way." The scooter is operated by standing on the deck, using handlebars for steering and control, and an electronic throttle for acceleration. Braking is managed via a lever on the handlebar, which activates a disc brake on the rear wheel and a KERS brake system. The scooter features different speed modes to accommodate varying comfort levels and environmental conditions. It is foldable for easy storage and transport.
Important Technical Specifications:
Model: Volter Series One
Dimensions:
- Open: L 106cm W 47cm H 119cm
- Closed: L 106cm W 47cm H 44cm
Weight: 15.5kg
Frame Material: Aluminium alloy handlebar & iron chassis
Max Load: 120kg
- Max Speed: 15.5mph / 25kmh
- Brake System: Rear disc brake & front KERS brake
Battery:
- Type: 18650 Lithium battery
- Capacity: 13.2Ah
- Range: 25m / 40km
- Charging Time: 8 hours
Motor:
Wheel:
- Wheel Diameter: 8.5 inches
- Tyre Type: Air filled
Water Resistance: IP55 rating (covers use during light rain, but not immersion or sustained heavy rain).
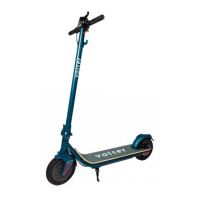
Key Components (Numbered on diagram):
- Hand brake
- Front light
- USB charging port
- Hook
- Folding lever
- Motor
- Reflective panel
- Kick stand
- Battery
- Brake disc
- Rear light
- Folding hook lock
- Mudguard (brake pedal)
- Deck
- Charging port
- Display (shows speedometer, battery level, speed metrics, ODO/TRIP mileage)
- Electronic throttle
- Bell
- Mode button (Press + hold for light on/off; Press + release for speed mode selection)
- Power button (Press + hold for scooter on/off; Press + release for ODO/TRIP mileage switch)
- Speedometer (21): Shows current speed in MPH or KM/H.
- Battery Level (22): Indicates remaining battery charge.
- Front & Rear Lights (23): Icon indicates lights are on.
- Gear / Speed (24): Displays current speed mode (1, 2, or 3).
- Gear 1: 6mph / 10kmh
- Gear 2: 9mph / 15kmh
- Gear 3: 15.5mph / 25kmh
- Bluetooth Icon (25): Indicates Bluetooth connectivity.
- Speed Metrics (26): KM/H can be switched to MPH in the app.
- ODO | TRIP (27): ODO shows total mileage, TRIP shows individual trip distance.
- Mileage (28): ODO/TRIP.
- Power Icon (29): Appears 1-2 seconds after turning on.
Usage Features:
Setting Up the Scooter:
- Unpack and inspect for damage.
- Unfold the kickstand.
- Press down the rear mudguard to unlock the handlebar from the closed position.
- Lift the handlebar frame to the upright position and fasten the fold lock.
- Tighten the two handlebar grips according to the screw thread direction, ensuring they are firmly secure.
Before Your First Ride:
- Assemble the scooter carefully following the manual.
- Choose a flat, open area for the first ride.
- Ensure all screws and fasteners are tight.
- Inflate tyres to 36 Psi.
Before Each Ride:
- Check battery charge.
- Check tyre pressure (36 Psi).
- Test brake functionality.
- Test front and rear light functionality.
- Always wear a helmet and full protective equipment.
Setting Off:
- Turn on the scooter using the On/Off button.
- Select desired Speed Mode based on environment.
- Place one foot on the deck, push off with the other foot to gain initial momentum, then slowly press the throttle lever. The scooter only accelerates after a kick-off.
- Keep both feet firmly on the deck and use the throttle to increase speed.
Slowing Down & Coming to a Stop:
- Release pressure on the throttle.
- Gently lean backwards.
- Apply pressure on the brake lever (left side) to engage the disc brake and cut motor power.
- Before a complete halt, balance by placing one foot on the ground. Brake carefully and gradually.
- Do not turn off the scooter until it has come to a standstill.
Folding Up After Use:
- Hold the handlebar frame with one hand.
- Press the red button and pull down the fold lock.
- Fold handlebars down horizontally onto the deck.
- Press the rear mudguard down and insert the hook into the slot to lock the handlebars.
Charging Instructions:
- Do not leave unattended while charging.
- Do not start the motor while charging.
- Insert charger into the charging port before connecting to power.
- Red light on charger indicates charging; green light indicates full charge.
- Overcharge protection stops charging at 100%.
- Only use a Volter approved charger.
- Replace charger cover before each use to prevent water ingress and warranty voidance.
Battery Care:
- When battery is low, slow down to conserve power.
- For storage of 1 month or longer, fully charge the battery and charge monthly to prevent "self-protection state."
Brave the Elements:
- Operating/charging/storage temperature: 0 - 40° Celsius.
- Not intended for use above 2000m sea level.
- Avoid riding through puddles.
- Store indoors, away from direct sunlight, to prevent damage from UV rays, rain, and extreme temperatures.
Maintenance Features:
General Safety & Maintenance:
- Read the manual carefully for proper use and maintenance.
- Learn to ride in open areas without traffic or obstructions.
- Adhere to local traffic rules and national laws; do not ride on public roads.
- Use Speed Mode 1 when getting comfortable.
- Always wear helmets, knee pads, and back protectors.
- Wear flat, comfortable shoes.
- Ensure all parts are in correct position and sufficient charge for journey.
- Check scooter before use: tighten all screws and fasteners.
- Maintain correct tyre pressure (36 Psi).
- Ensure handlebars are secured and locked.
- Ride with both hands on the handlebar.
- Keep both feet on the deck.
- Do not use for stunts; both tyres must remain in contact with the ground.
- No additional passengers.
- Do not ride in poor visibility.
- Avoid challenging ground conditions (ice, snow, oil, sand) that impact grip.
- Adjust speed to surroundings, especially in busy areas or adverse weather.
- Never ride under the influence of drugs or alcohol.
- Do not use if tired, drowsy, or with a pre-existing condition affecting driving capacity.
- Battery is damaged.
- Abnormal smell or heat from battery.
- Liquid leakage from battery (stop immediately, do not touch, store out of reach of children until repaired).
Servicing and Repairs:
- WARNING: Risk of fire and electric shock. User should not service parts.
- Only use original spare parts from a licensed supplier or shop.
- Non-Volter approved repairs invalidate warranty.
- Warranty Period: 12 months against original defects in material and workmanship from date of delivery.
- Battery Warranty: 6 months.
- Claiming Warranty: Contact help@volter.store with issue description and pictures. If covered, drop off at London service centre or arrange carrier pickup.
Warranty Invalidation (by any of the following):
- Signs of crash/user damage.
- Failure to use, handle, store, and maintain according to User Manual.
- Repairs by non-Volter approved engineers or with non-approved parts.
- Long-term outdoor exposure leading to premature ageing/faults.
- General wear and tear or cosmetic damage.
- Commercial or rental use.
- Damage caused by dangerous behavior or violations of laws/regulations.
Scooter Parts NOT Covered by Warranty:
- Tyres & inner tubes
- Brake pads and cables
- Wooden deck
- Handlebar grips
- Paint
Water Resistance:
- IP55 rating covers light rain.
- Does NOT cover immersion, soaking in water, or sustained heavy rain.
- Phone: +44 (0) 203 092 7471
- Email: help@volterelectric.co.uk
- Social Media: @wearevolter (Instagram), @volterelectric (Facebook)
- Website: WWW.VOLTERELECTRIC.CO.UK