J
Jenna MosleyAug 18, 2025
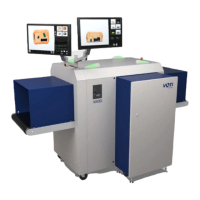
What to do if the VOTI Scanner shows 'Archive directory not found' and disk is almost full?
- JJasmine Scott DVMAug 18, 2025
This alert appears because of the administrator settings in the Archive Management tab. The disk is almost full, prompting either to overwrite files or create a backup. You can either overwrite the archive, which means overwriting the oldest files, or create a backup. To create a backup, each time the software starts, a message appears until the data has been moved to an external device. To copy files to an external archive device, follow the prompts: open a File transfer box, insert an external storage device, and press OK.