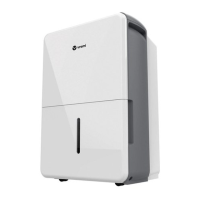
This document is a user manual for the Vremi® Moisture Manager Dehumidifier, available in 50, 35, and 22 pint capacities.
Function Description:
The Vremi® Dehumidifier is designed to remove excess moisture from indoor air, helping to prevent internal damage to the unit. It operates within a working environment between 41°F (5°C) and 90°F (32°C). The unit defaults to "Continuous" mode upon initial power-on, which means it will operate continuously until the bucket is full. This mode disables the "Left" / "Right" buttons for manual humidity control. To regain manual control, the "Continuous" mode must be turned off. The dehumidifier features various smart functions including Auto Shut Off, Power On Delay, Bucket Full Indicator Light, Auto Defrost, and Auto-Restart.
Important Technical Specifications:
The manual specifies that the dehumidifier uses R32 refrigerant (applicable to models VRM012001N, VRM012002N, VRM012003N, VRM010637N, VRM010369N, VRM010184N). R32 is a flammable refrigerant, and specific safety instructions are provided for its handling, servicing, and disposal. The unit's nameplate, located on the rear panel, contains electrical and other technical data. The humidity level can be set within a range of 35% RH (Relative Humidity) to 85% RH in 5% increments. The actual room humidity level is displayed with ±5% accuracy in a range of 30% RH to 90% RH.
Usage Features:
- Placement: To prevent internal damage, the unit must be kept upright for at least 24 hours before plugging it in, especially after shipping. It should be placed on a hard, level surface that can support it when full of water, and kept at least 15.75 inches (40 cm) from walls and 7.9 inches (20 cm) from other obstructions to ensure proper airflow.
- Control Panel: The control panel includes buttons for Power, Filter, Comfort, Continuous, Turbo, and Timer, along with "Left" and "Right" buttons for adjusting settings.
- Power: The "Power" button turns the dehumidifier on and off.
- Filter: The "Filter" button is a reminder to clean the air filter after 250 hours of operation. Pressing it after cleaning resets the timer.
- Comfort Mode: This function offers preset temperature and humidity levels:
- <65°F Ambient Temperature: 55% Relative Humidity
- 65–77°F Ambient Temperature: 50% Relative Humidity
-
77°F Ambient Temperature: 45% Relative Humidity
- In "Comfort" mode, manual humidity control is disabled.
- Continuous Mode: Activates continuous dehumidifying operation, stopping only when the bucket is full. In this mode, the "Left" and "Right" buttons are locked.
- Turbo Mode: Controls fan speed ("High" or "Normal"). "High" speed is for maximum moisture removal, while "Normal" is for quieter operation once humidity is reduced.
- Timer: Allows setting an "Auto On" or "Auto Off Timer" for 0-24 hours. The timer runs for one cycle only. Adjustments are made in 0.5-hour increments up to 10 hours, then 1-hour increments up to 24 hours. Setting the timer value to 0.0 or restarting the appliance cancels the timer.
- Humidity Set Control ("Left" / "Right" buttons): Used to manually set the desired humidity level between 35% RH and 85% RH in 5% increments. The "Left" button decreases the percentage for drier air, and the "Right" button increases it for damper air. These buttons are disabled in "Continuous" mode.
- Timer Set Control: Used in conjunction with the "Left" and "Right" buttons to initiate the "Auto Start" and "Auto Stop" features.
- LED Display: Shows the set % humidity level or auto start/stop time during setting, and then the actual room % humidity level.
- Water Collection: Water can be collected in the internal bucket or drained continuously via a water hose (female threaded end not included on some models) into a floor drain. The drain hose must be sloped downward and kept flat without kinks. Continuous draining should not be used when outdoor temperatures are 32°F (0°C) or less to prevent freezing and damage.
- Error Codes:
- AS: Humidity sensor error
- ES: Temperature sensor error
- P2: Bucket is full or not in the right position.
Maintenance Features:
- Cleaning:
- Always turn off the dehumidifier and unplug it from the wall outlet before cleaning.
- Clean the unit with water and mild detergent; avoid bleach or abrasives.
- Grille and Case: Do not splash water directly onto the main unit. Clean air intake and outlet grilles with a vacuum attachment or brush.
- Bucket: Clean the bucket with water and mild detergent every 2 weeks.
- Air Filter: Clean the filter with potable water at least once every 30 days. Operating the dehumidifier without a filter can clog it with dirt and lint, reducing performance.
- Storage:
- Before storing for a long period, turn off the unit and wait one day for all internal water to drain into the bucket, then empty the bucket.
- Clean the main dehumidifier, bucket, and air filter.
- Wrap and bundle the power cord.
- Cover the unit with a plastic bag.
- Store the dehumidifier upright in a dry, well-ventilated place.
- Troubleshooting: The manual provides a list of common problems, possible causes, and solutions, such as checking the plug, circuit breaker, bucket position, ensuring proper airflow, and verifying humidity settings. If issues persist, users are advised to contact Customer Service.
Safety Instructions:
The manual emphasizes several important safety instructions, especially concerning electrical information and the R32 flammable refrigerant.
- Plug the dehumidifier into a properly grounded wall socket. Do not use extension cords or adapter plugs.
- Do not use flammable fluids or gases near the unit.
- Do not use excessively wet cloths, industrial solvents, or oil-based products for cleaning.
- Unplug the unit during thunderstorms.
- Do not run the power cord under carpeting or furniture, and ensure it is not a tripping hazard.
- Do not tamper with controls or operate by plugging/unplugging from the outlet.
- Do not repair, disassemble, or modify the appliance yourself.
- Ensure the appliance is installed in an area protected from external weather conditions and on a hard, level surface.
- Keep ventilation openings clear of obstruction.
- Do not insert fingers or objects into air intakes/outlets.
- For R32 refrigerant models, servicing must be performed by licensed professionals. Do not modify the power cord or discharge refrigerant directly into the air. Ensure proper ventilation and avoid ignition sources during maintenance.
- In case of malfunction, turn off the unit, check for obstructions, and restart. If the problem persists, unplug the unit and contact Customer Service.