INSTALACIÓN
Desplace hacia abajo la cubierta de la batería, instale la batería respetando la posición de polaridad
correcta y cierre el compartimiento para baterías. El termómetro mostrará todos los segmentos del
visualizador durante 3 segundos y luego mostrará la temperatura del sensor del refrigerador
normalmente. Coloque el frasco con la sonda introducida en estado de prueba, registre su lectura
cuando la lectura se estabilice. Fije la porción del termómetro que tiene el visualizador digital en
el lugar deseado afuera del refrigerador/congelador utilizando la cinta que se suministra o los imanes
de la parte posterior del termómetro. Quite la lámina protectora del visualizador.
FUNCIONAMIENTO
Conversión entre °C y °F:
Presione el botón [°C/°F] para seleccionar la unidad de temperatura.
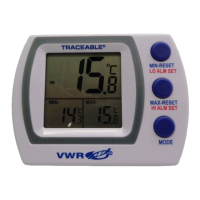
Memoria máxima y mínima:
•Presioneelbotón[MAX/MIN]unavezparaexhibirlalecturamáximayelícono“MAX”destellará.
•Presioneelbotón[MAX/MIN]unavezmásparaexhibirlalecturamínimayelícono“MIN”destellará.
•Presionenuevamenteelbotón[MAX/MIN]paravolveralavisualizaciónnormal.
•Presioneymantengapresionadoelbotón[MAX/MIN]duranteaproximadamente2segundospara
reinicializar la memoria de lectura.
Visualizador de la temperatura ambiente o de la temperatura del refrigerador/congelador:
Presioneelbotón[ROOM/FRIDGE]paramostrarlatemperaturaambienteolatemperatura
del refrigerador/congelador.
Configuración de la alarma de temperatura alta/baja del refrigerador/congelador:
•Presioneymantengapresionadoelbotón[alarm]durante2segundos,losíconosHIyFRIDGE
destellarán.
•Presione[uparrow]paraconfigurarellímitealtoparalaalarma.Asetaestánaparteposteriorda
unidade acima da tampa do compartimento da pilha.
•Presione[alarm]nuevamente,losíconosLOyFRIDGEylavisualizaciónnuméricadestellarán.
•Presione[uparrow]paraconfigurarellímitebajoparalaalarma.
•Presione[alarm]unavezmásparafinalizarlaconfiguración.
*Durantelaconfiguracióndeloslímites,mientrasmantengapresionadoelbotón[uparrow]losvalores
avanzarán automáticamente. Si la lectura del sensor del refrigerador se encuentra fuera del límite
configurado, sonará la alarma.
Activar y desactivar la alarma:
Presione [alarm] para activar y desactivar la alarma.
NOTA:
1. Si el visualizador pierde luminosidad, reemplace la batería con otra batería del mismo tipo.
2.Luegodecadamedición,limpielasondainmediatamenteparaevitarlacontaminacióncruzada.
3.Nocoloqueelvisualizadordigitaldeltermómetrodentrodelcongelador,elrefrigerador,
la incubadora o el horno.
SÍMBOLOS DE ERRORES
Manipulación/embalaje de la batería
•Retirelaspilasdelequipoinmediatamentedespuésdequeyanopuedanhacerfuncionarelequipo.
•Sielequipoutilizadosomáspilas,sustituyasiempreelconjuntocompleto.
•Nointenterecargarlaspilasalcalinas;nosonrecargables.
•Nomanipulepilasqueesténalgocalientesomuycalientes.
•Nocalienteniincinere,aplaste,perforeorompalasbaterías.
•Utiliceequipodeprotecciónpersonalsilaspilastienensignosdefugas,abombamiento,hinchamientoo
deformidad.
Advertencia:Sielelectrolitodehidróxidodepotasiodeunapilaalcalinaentraencontactoconlapiel,
nointenteneutralizarelelectrolitoconvinagreniconcualquierotrasoluciónácida.Laneutralizaciónpuede
atrapar el electrolito en la piel. Enjuague la zona de piel afectada con abundante cantidad de agua. Si el
electrolito de la pila entrara en contacto con sus ojos, puede causar lesiones graves o ceguera.
Eliminación del equipo
Este equipo se halla identificado con el símbolo de un cubo de basura tachado, lo que
significa que no debe eliminarse en los desechos residuales habituales. En lugar de
ello, usted es responsable de eliminar el equipo de forma adecuada al finalizar su vida
útil,llevándoloauncentroautorizadoquelorecojayprocedaasureciclaje.Usted
tambiénesresponsablededescontaminarelequiposicontieneimpurezasbiológicas,
químicas o radiológicas, para evitar riesgos en la salud de las personas encargadas
de la eliminación y el reciclaje. Cualquier información adicional que necesite sobre
el lugar de entrega de su equipo podrá solicitarla al distribuidor donde realizó
originalmente la compra.
Si procede como se describe arriba, ayudará a proteger los recursos naturales y
técnicosdelmedioambienteygarantizaráquesuequiposerecicledemodoquese
proteja la salud de las personas.
Muchasgracias
Servicio técnico
Recursos en Internet
Visite la página de VWR en www.vwr.com para:
•Obtenerloscontactosdelserviciotécnico
•AccederalCatálogoenlíneadeVWRyobtenerinformaciónacercadeaccesorios
y productos relacionados
•Informaciónadicionalsobreproductosyofertasespeciales
ContactoParaobtenermásinformaciónoasistenciatécnicapóngaseencontactoconsurepresentantelocal
de VWR o visite. www.vwr.com
Garantía
VWR garantiza que este producto estará libre de defectos de material y fabricación durante un periodo de
dos(2)añosapartirdelafechadeentrega.Enelcasodequeexistaalgúndefecto,VWRelegirá,asuelec-
ción y corriendo con los gastos, reparar, cambiar o rembolsar el importe de este producto al cliente, siempre
y cuando se devuelva durante el periodo de la garantía. Esta garantía no se aplica si el producto ha sufrido
dañosacausadeunaccidente,abuso,usoindebidooincorrectoodeldesgasteporelusonormal.
Si los servicios de inspección y mantenimiento precisos no se efectúan de acuerdo con las indicaciones de
los manuales o las normativas locales aplicables, la garantía no será válida, salvo si el defecto del producto
no se debe a dicho incumplimiento.
Elclientedebeasegurarlosproductosdevueltoscontraposiblesdañosopérdida.Estagarantíaselimitaa
losrecursosanteriormentemencionados.SEACUERDAEXPRESAMENTEQUEESTAGARANTÍASUSTITUYEA
TODASLASGARANTÍASDEIDONEIDADYCOMERCIALIDAD.
Cumplimiento de leyes y normativas locales
El cliente tiene la responsabilidad de solicitar y conseguir las autorizaciones reglamentarias necesarias
o cualquier otro tipo de autorización necesaria para utilizar el producto en su entorno local. VWR no se
responsabiliza de cualquier omisión relacionada o de la no obtención de la autorización necesaria, a menos
que la desestimación se deba a un defecto del producto.
Symbol Description Action required
X Lowbatteryvoltage Replace the batteries
LLL 1)Sensoropencircuit
2)Thereadingisoutoflowrange(-50°C)
1)Returnthethermometerforrepair
2)Keepthemeasurementabove-50°C
HHH 1)Sensorshortcircuit
2)Thereadingisoutofhighrange(70°C)
1)Returnthethermometerforrepair
2)Keepthemeasurementbelow70°C
Símbolo Descripción Acción requerida
X Voltaje de batería bajo Sustituya las baterías
LLL 1)Circuitodelsensorabierto
2)Lalecturaseencuentrafueradelrango
devalorinferior(-50°C)
1)Devuelvaeltermómetroparasu
reparación
2)Mantengalamediciónporencima
de-50°C
HHH 1)Cortocircuitoenelsensor
2)Lalecturaseencuentrafueradelrango
devalorsuperior(70°)
1)Devuelvaeltermómetroparasu
reparación
2)Mantengalamediciónpordebajo
de70°
ESPANOL PORTUGUES ENGLISH
Instrucciónes Instruções Instructions
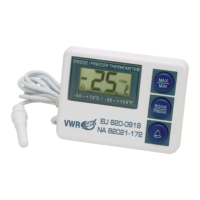
Refrigerator/Freezer Thermometer
EuropeanCatalogueNumber620-0919
NorthAmericanCatalogNumber82021-172
INSTALLATION
Pulldownthebatterycover,installthebatterywithcorrectpolarity,andclosethebatterycompartment.
Thethermometerwillhaveafullsegmentdisplayforabout3secondsandthendisplaythefridge
sensortemperaturenormally.Placeprobeintestcondition,recordyourreadingwhenthereading
becomesstable.Attachthedigitaldisplayportionofthermometerontothedesiredspaceoutsidethe
refrigerator/freezer by using the supplied tape or magnets on the back of thermometer. Peel off the
protective film on the display.
OPERATION
°C/°F Exchange:
Press the [°C/°F] to select temperature unit.
Maximum/Minimum Memory:
•Press[MAX/MIN]oncetodisplaythemaximumreading.
•Press[MAX/MIN]oncemoretoshowtheminimumreading.
•Press[MAX/MIN]againtoreturntonormaldisplay.
•Pressandhold[MAX/MIN]about2secondstoresetmemorytocurrentreading.
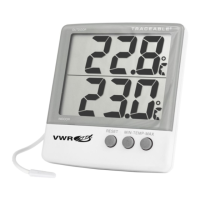
Room or Fridge/Freezer Temperature Display:
Press[ROOM/FRIDGE]buttontodisplayroomorrefrigerator/freezertemperature.
Fridge/Freezer High and Low Temperature Alarm Setting:
•Pressandhold[alarm]forabout2seconds,theHIandFRIDGEiconsandnumericdisplaywillflash.
•Press[uparrow]tosetthealarmhighlimit.Arrowisonthebackoftheunitabovethebatterycover.
•Press[alarm]again,theLOandFRIDGEiconsandnumericdisplaywillflash.
•Press[uparrow]tosetthealarmlowlimit.
•Press[alarm]oncemoretofinishsetting.
*Duringalarmlimitsetting,holdingdown[uparrow]willadvancethevalueautomatically.Ifthefridge
sensorreadingisoutofthesetlimit,thealarmwillsound.
Alarm On/Off:
Press[alarm]toswitchalarmofforon.
NOTE:
1.Ifthedisplaybecomesdim,replacethebatterywithsametypeofbattery.
2.Aftereachmeasurement,cleantheprobeimmediatelytoavoidcrosscontamination.
3. Do not put the digital display thermometer unit inside the freezer, refrigerator, incubator or oven.
ERROR SYMBOLS
Battery Handling/Packaging
•Removebatteriesfromequipmentimmediatelyaftertheyfailtooperatetheequipment.
•Ifequipmentusestwoormorebatteries,alwaysreplacebatteriesincompletesets.
•Donotattempttorechargealkalinebatteries,theyarenotrechargeable.
•Donothandlehotorwarmbatteries.
•Donotheat,incinerate,crush,punctureormutilatebatteries.
•Wearpersonalprotectiveequipmentifbatteriesshowsignsofleakage,bulging,swellingordeformity.
Warning:Ifpotassiumhydroxideelectrolytefromanalkalinebatterycomesincontactwiththeskin,do
nottrytoneutralizetheelectrolytewithvinegaroranyotheracidicsolutions.Neutralizationmaytrapelec-
trolyteontheskin.Flushtheaffectedskinareawithcopiousamountsofwater.Ifthebatteryelectrolyte
gets into your eyes, it can cause severe damage and or blindness.
Equipment disposal
Thisequipmentismarkedwiththecrossedoutwheeledbinsymboltoindicatethat
thisequipmentmustnotbedisposedofwithunsortedwaste.
Insteadit’syourresponsibilitytocorrectlydisposeofyourequipmentatlifecycle-end
by handling it over to an authorized facility for separate collection and recycling.
It’salsoyourresponsibilitytodecontaminatetheequipmentincaseofbiological,
chemical and/or radiological contamination, so as to protect from health hazards the
persons involved in the disposal and recycling of the equipment.
Formoreinformationaboutwhereyoucandropoffyourwasteofequipment,please
contactyourlocaldealerfromwhomyouoriginallypurchasedthisequipment.
Bydoingso,youwillhelptoconservenaturalandenvironmentalresourcesandyou
willensurethatyourequipmentisrecycledinamannerthatprotectshumanhealth.
Thankyou
Technical service
Web Resources
VisittheVWRwebsiteatvwr.com for:
•Completetechnicalservicecontactinformation
•AccesstotheVWROnlineCatalogue,andinformationaboutaccessoriesandrelatedproducts
•Additionalproductinformationandspecialoffers
Contact us For information or technical assistance contact your local VWR representative or visit.vwr.com.
Warranty
VWRwarrantsthatthisproductwillbefreefromdefectsinmaterialandworkmanshipforaperiodoftwo
(2)yearsfromdateofdelivery.Ifadefectispresent,VWRwill,atitsoptionandcost,repair,replace,or
refundthepurchasepriceofthisproducttothecustomer,provideditisreturnedduringthewarrantyperiod.
Thiswarrantydoesnotapplyiftheproducthasbeendamagedbyaccident,abuse,misuse,ormisapplica-
tion,orfromordinarywearandtear.Iftherequiredmaintenanceandinspectionservicesarenotperformed
accordingtothemanualsandanylocalregulations,suchwarrantyturnsinvalid,excepttotheextent,the
defect of the product is not due to such non performance.
Itemsbeingreturnedmustbeinsuredbythecustomeragainstpossibledamageorloss.Thiswarrantyshall
belimitedtotheaforementionedremedies.ITISEXPRESSLYAGREEDTHATTHISWARRANTYWILLBEIN
LIEUOFALLWARRANTIESOFFITNESSANDINLIEUOFTHEWARRANTYOFMERCHANTABILITY.
Compliance with local laws and regulations
Thecustomerisresponsibleforapplyingforandobtainingthenecessaryregulatoryapprovalsorother
authorizationsnecessarytorunorusetheproductinitslocalenvironment.VWRwillnotbeheldliablefor
any related omission or for not obtaining the required approval or authorization, unless any refusal is due to
a defect of the product.
996050062Rev.4
PrintedintheUSA
Manufactured forFabricado paraFabricado para
Europe
VWR International bvba
Researchpark Haasrode
2020
Geldenaaksebaan 464
B-3001 Leuven
+ 32 16 385011
http://www.vwr.com
United States
VWR International
1310 Goshen Parkway
West Chester, PA 19380
800-932-5000
http://www.vwr.com
Europe
VWR International bvba
Researchpark Haasrode
2020
Geldenaaksebaan 464
B-3001 Leuven
+ 32 16 385011
http://www.vwr.com
United States
VWR International
1310 Goshen Parkway
West Chester, PA 19380
800-932-5000
http://www.vwr.com
Europe
VWR International bvba
Researchpark Haasrode
2020
Geldenaaksebaan 464
B-3001 Leuven
+ 32 16 385011
http://www.vwr.com
United States
VWR International
1310 Goshen Parkway
West Chester, PA 19380
800-932-5000
http://www.vwr.com
INSTALAÇÃO
Baixeatampadabateria,instaleabateriacomapolaridadecorrectaefecheatampado
compartimento da bateria. O termómetro apresenta o visor com todos os segmentos, durante
3 segundos, apresentando a seguir a temperatura do sensor de congelação, normalmente.
Coloque o frasco com a sonda introduzida em estado de teste e registe o valor quando a leitura
estabilizar. Prenda a parte do visor digital do termómetro no espaço pretendido fora do congelador/
frigorífico, utilizando a fita ou os ímanes fornecidos na parte de trás do termómetro.
Descole a película protectora do visor.
OPERAÇÃO
Mudança °C/°F:
Prima [°C/°F] para seleccionar a unidade de temperatura.
Memória de Máximo/Mínimo:
•Prima[MAX/MIN]umavezparavisualizaromáximovalorlido;apareceosímboloMAXapiscar.
•Prima[MAX/MIN]maisumavezparavisualizaromínimovalorlido;apareceosímboloMINapiscar.
•Prima[MAX/MIN]outravezpararegressaraovisornormal.
•Primaemantenhapressionadoobotão[MAX/MIN],durantecercade2segundos,
para reiniciar a memória para o actual valor lido.
Visor de Temperatura Ambiente ou de Congelador/Frigorífico:
Primaobotão[ROOM/FRIDGE]paravisualizaratemperaturaambienteoudocongelador/frigorífico.
Definição do Alarme de Temperatura Superior e Inferior do Congelador/Frigorífico:
•Primaemantenhapressionadoobotão[alarm],durante2segundos;ossímbolosHIeFRIDGE
começam a piscar.
•Prima[setaparacima]paradefinirolimitesuperiordoalarme.Laflechaseencuentraenlaparte
posterior de la unidad, encima de la tapa del compartimiento de las pilas.
•Prima[alarm]outravez;ossímbolosLOeFRIDGEcomeçamapiscarylapantalla
numéricaparpadearán.
•Prima[setaparacima]paradefinirolimiteinferiordoalarme.
•Prima[alarm]maisumavezparaconcluiradefinição.
*Se,duranteadefiniçãodoslimitesdoalarme,mantiverpressionadoobotão[uparrow],ovalor
avança automaticamente. Se o valor lido pelo sensor de congelação ficar fora do limite definido, o
alarme toca.
Ligar/Desligar (On/Off) o Alarme:
Prima [alarm] para ligar ou desligar o alarme.
NOTA:
1. Se o visor ficar fraco, substitua a bateria por outra do mesmo tipo.
2.Apóscadamedição,limpeimediatamenteasondaparaevitarcontaminaçãoporcontágio.
3.Nãocoloqueotermómetrodevisordigitaldentrodocongelador,frigorífico,incubadoraouforno.
SÍMBOLOS DE ERRO
Substituição e manuseamento das pilhas
•Nãodeixeficarpilhasdescarregadasdentrodoaparelho.Quandoaspilhasjánãoconseguiremmantero
aparelho em funcionamento, tire imediatamente as pilhas de dentro do aparelho.
•Seoaparelhoutilizarduasoumaispilhas,substituasempretodasaspilhasaomesmotempo.
•Nãotenterecarregarpilhasalcalinas.Aspilhasalcalinasnãosãorecarregáveis.
•Nãomanuseieaspilhasseestiveremquentesoumornasaotoque.
•Nãoaqueça,queime,esmague,furenemtenteabriraspilhas.
•Seaspilhasestiveremvisivelmenteopadas,inchadas,deformadasousetiveremumderramedeelec-
trólito, proteja-se com equipamento de protecção pessoal.
Atenção:Seoelectrólitodehidróxidodepotássiodeumapilhaalcalinaentraremcontactocoma
pele,nãotenteneutralizaroelectrólitocomvinagrenemcomoutrassoluçõesácidas.Aneutralizaçãopode
aprisionaroelectrólitonapele.Oprocedimentocorrectoélavarapeleafectada,comgrandesquantidades
de água corrente. Se o electrólito da pilha entrar em contacto com os olhos, pode causar ferimentos grave
e/ou cegueira.
Eliminação do equipamento
Esteequipamentocontémosímbolodocontentordolixocomumacruzparaindicar
quenãodevesereliminadonolixocomum.
Emvezdisso,édasuaresponsabilidadeeliminaroseuequipamentocorretamente
no fim da vida útil, entregando-o a uma empresa autorizada para a recolha e
reciclagem.Étambémdasuaresponsabilidadedescontaminaroequipamentono
caso de contaminação biológica, química e/ou radiológica, de forma a evitar submeter
as pessoas envolvidas a riscos para a saúde aquando da eliminação e reciclagem do
equipamento.
Para mais informações sobre os locais onde pode entregar os resíduos do equipamen-
to, contacte o seu fornecedor local onde adquiriu originalmente este equipamento.
Aofazê-lo,estaráaajudaraconservarosrecursosnaturaiseambientaiseassegurará
queoseuequipamentoérecicladodeformaaprotegerasaúdehumana.
Obrigado
Assistência técnica
Recursos Web
Visite o site da VWR em www.vwr.com para:
•obtertodaainformaçãodecontactodaassistênciatécnica
•acederaocatálogoonlinedaVWReàinformaçãosobreacessórioseprodutosrelacionados
•obterinformaçãoadicionalsobreprodutoseofertasespeciais
Contacte-nos:Parainformaçõesouassistênciatécnicacontacteoseurepresentante
local da VWR ou visite-nos em www.vwr.com
Garantia
AVWRgarantequeesteprodutoestáisentodedefeitosdematerialedefabricoporumperíododedois(2)
anosapartirdadatadefornecimento.Casosejadetectadoumdefeito,aVWRirá,aseucréditoecustos,
reparar, substituir ou reembolsar o preço de compra deste produto ao cliente, desde que o produto seja
devolvido durante o período de garantia. Esta garantia não se aplica se o produto tiver sido danificado
devido a acidente, uso indevido, se tiver sido aplicado incorrectamente, ou se os danos resultarem do
desgaste normal. Se a manutenção necessária e serviços de inspecção não forem efectuados de acordo com
osmanuaisecomasnormaslocais,arespectivagarantiatorna-seinválida,comaexcepçãodoscasosem
que o defeito do produto não resulta do incumprimento das inspecções e regulamentos.
Osartigosadevolverdevemserprotegidospeloclientecontrapotenciaisdanosouperda.Estagarantiaé
limitadaaosrecursosacimamencionados.FOIEXPRESSAMENTEACORDADOQUEAPRESENTEGARANTIA
SUBSTITUIRÁTODASASGARANTIASDEADEQUAÇÃO,BEMCOMOAGARANTIADECOMERCIALIZAÇÃO.
Conformidade com leis e normas locais
Oclienteéresponsávelpelasolicitaçãoeobtençãodasautorizaçõesregulamentaresnecessáriasououtras
autorizaçõesnecessáriosparaexecutarouusaroProdutonoseulocaldetrabalho.AVWRnãoassume
responsabilidades por omissões relacionadas com este facto ou pela não obtenção da devida aprovação ou
autorização, a não ser que qualquer recusa se deva a um defeito do produto.
Símbolo Descrição Acção necessária
X Tensãobaixadapilha Substitua as pilhas.
LLL 1)Circuitoabertonosensor
2)Aleituraultrapassaolimiteinferior
datemperatura(-50°C)
1)Devolvaotermómetroparareparação.
2)Mantenhaamediçãoacimade-50°C
HHH 1)Curto-circuitonosensor
2)Aleituraultrapassaolimitesuperior
datemperatura(70°C)
1)Devolvaotermómetroparareparação.
2)Mantenhaamediçãoabaixode70°C