2WAC Lighting retains the right to modify the design of our products at any time as part of the company's continuous improvement program. JULY, 2018
waclighting.com
Phone (800) 526.2588
Fax (800) 526.2585
Headquarters/Eastern Distribution Center
44 Harbor Park Drive
Port Washington, NY 11050
Central Distribution Center
1600 Distribution Ct
Lithia Springs, GA 30122
Western Distribution Center
1750 Archibald Avenue
Ontario, CA 91760
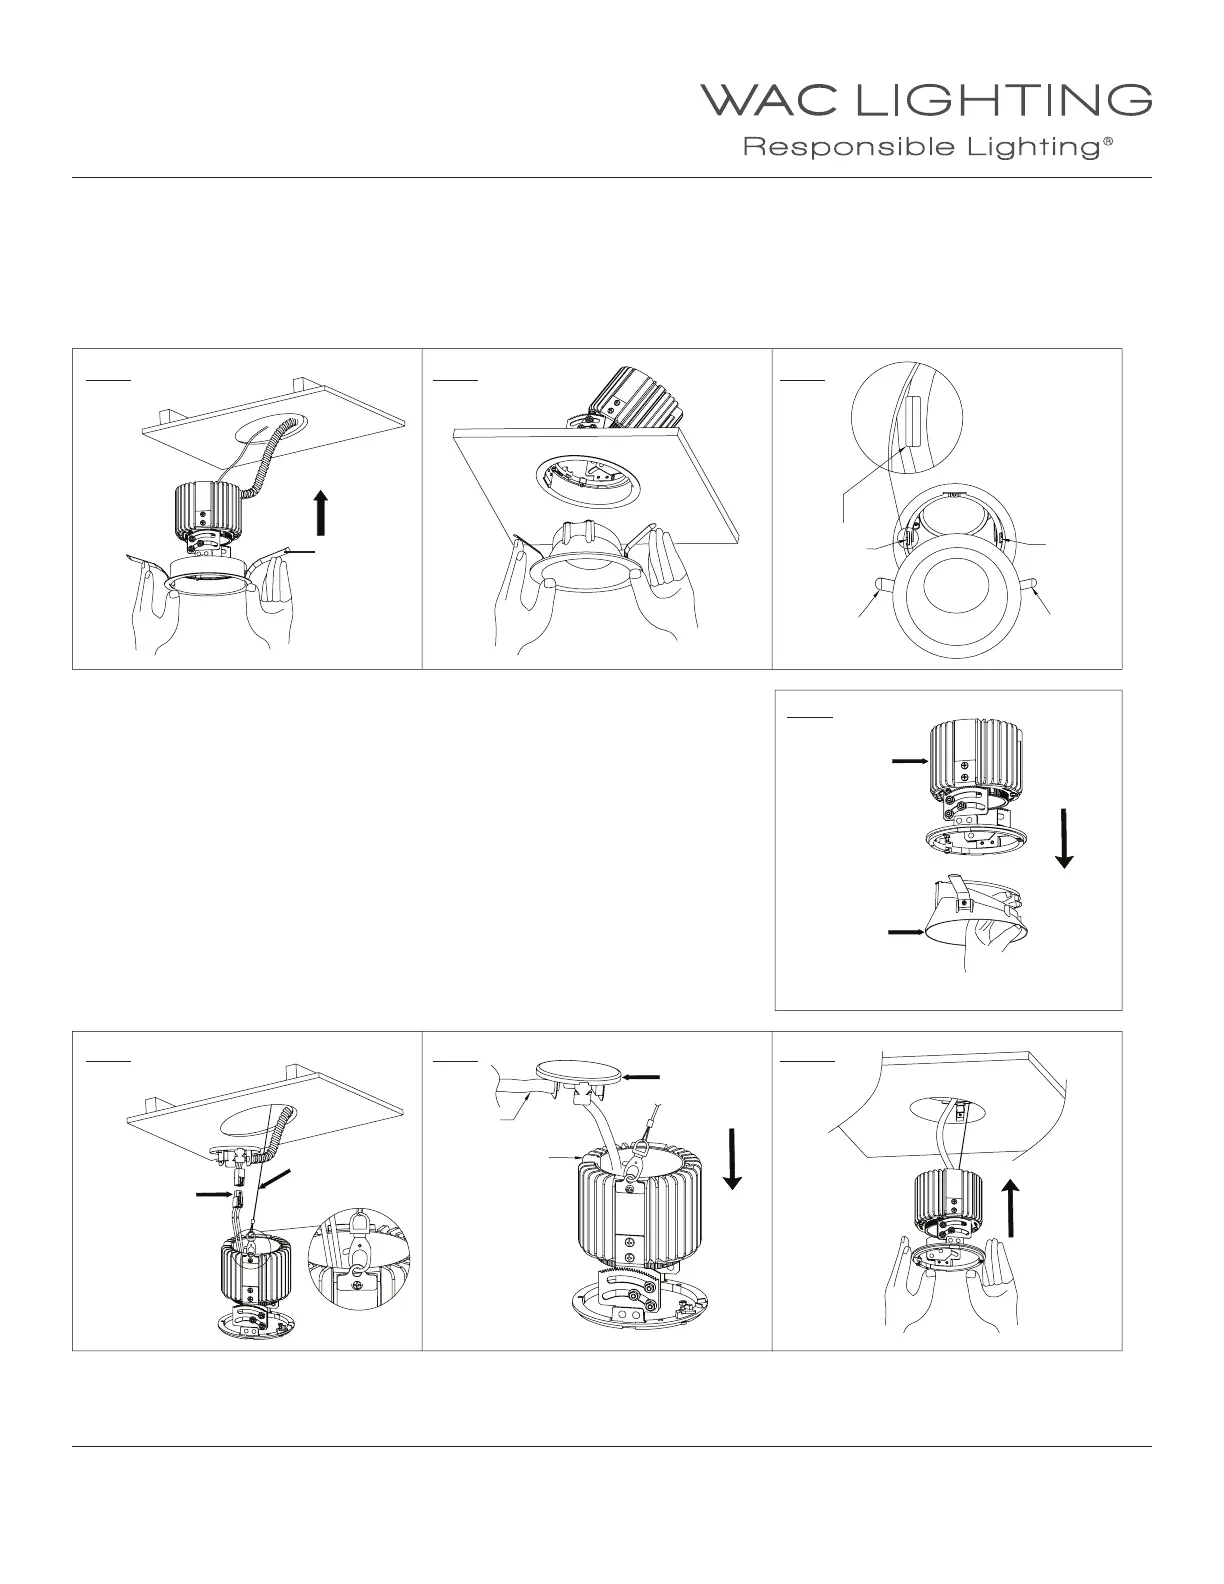
4. Fold trim assembly mounting springs inward and insert trim assembly into ceiling cutout.
Be sure once installed, trim assembly is ush and secure (See FIG.4).
5. Before insert trim inside the trim assembly, the trim assembly need to be adjusted to the desired position horizontally and vertically.
See the following section of optional adjustment features for the details.
6. After nishing the adjustment, raise trim up to the trim assembly until the trim is ush with ceiling surface.
Be sure trim springs go into appropriate slots in the trim assembly (See FIG.5 & 6 ).
Trimless INSTALLATION (R4RAL)
Note: Before installation, make sure the trim assembly is in vertical straight position.
1. Remove trim from trim assembly (See FIG.7).
2. Raise trim assembly to ceiling cutout and connect power connector and safety
cable (See FIG.8).
3. Install connector cap onto top of trim assembly, careful not to pinch power wiring.
Make sure the cap wire cable aligns with the notch on the top of heat-sink
(See FIG.9).
4. After power and safety chain connections, insert trim assembly into spackle frame
(See FIG.10).
INSTALLATION INSTRUCTION
Volta 4.5” LED - Adjustable Round Trim
R4RAT, R4RAL
Wide Slot
Wide
Spring
Spring Tab
Trim
Assembly
Wire
Cable
Notch
Cap
Power
Connector
Trim
Safety Cable
Narrow
Slot
Narrow
Spring
FIG. 4
FIG. 8
FIG. 5
FIG. 9
FIG. 6
FIG. 10
FIG. 7
 Loading...