WAC Lighting
www.waclighting.com
Phone (800) 526.2588 • Fax (800) 526.2585
Headquarters/Eastern Distribution Center
44 Harbor Park Drive • Port Washington, NY 11050
Phone (516) 515.5000 • Fax (516) 515.5050
Western Distribution Center
1750 Archibald Ave • Ontario, CA 91761
Phone (800) 526.2588 • Fax (800) 526.2585
WAC Lighting retains the right to modify the design of our products at any time as part of the company's continuous improvement program. JUNE, 2014
INSTALLATION INSTRUCTION
Tube - LED Wall Mount
WS-W2604
PREPARATION
1. Shut o the power at the circuit breaker and remove
existing xture, including the crossbar.
2. Carefully unpack your new xture and lay out all the
parts on a clear area. Be careful not tolose any small parts
necessary for installation.
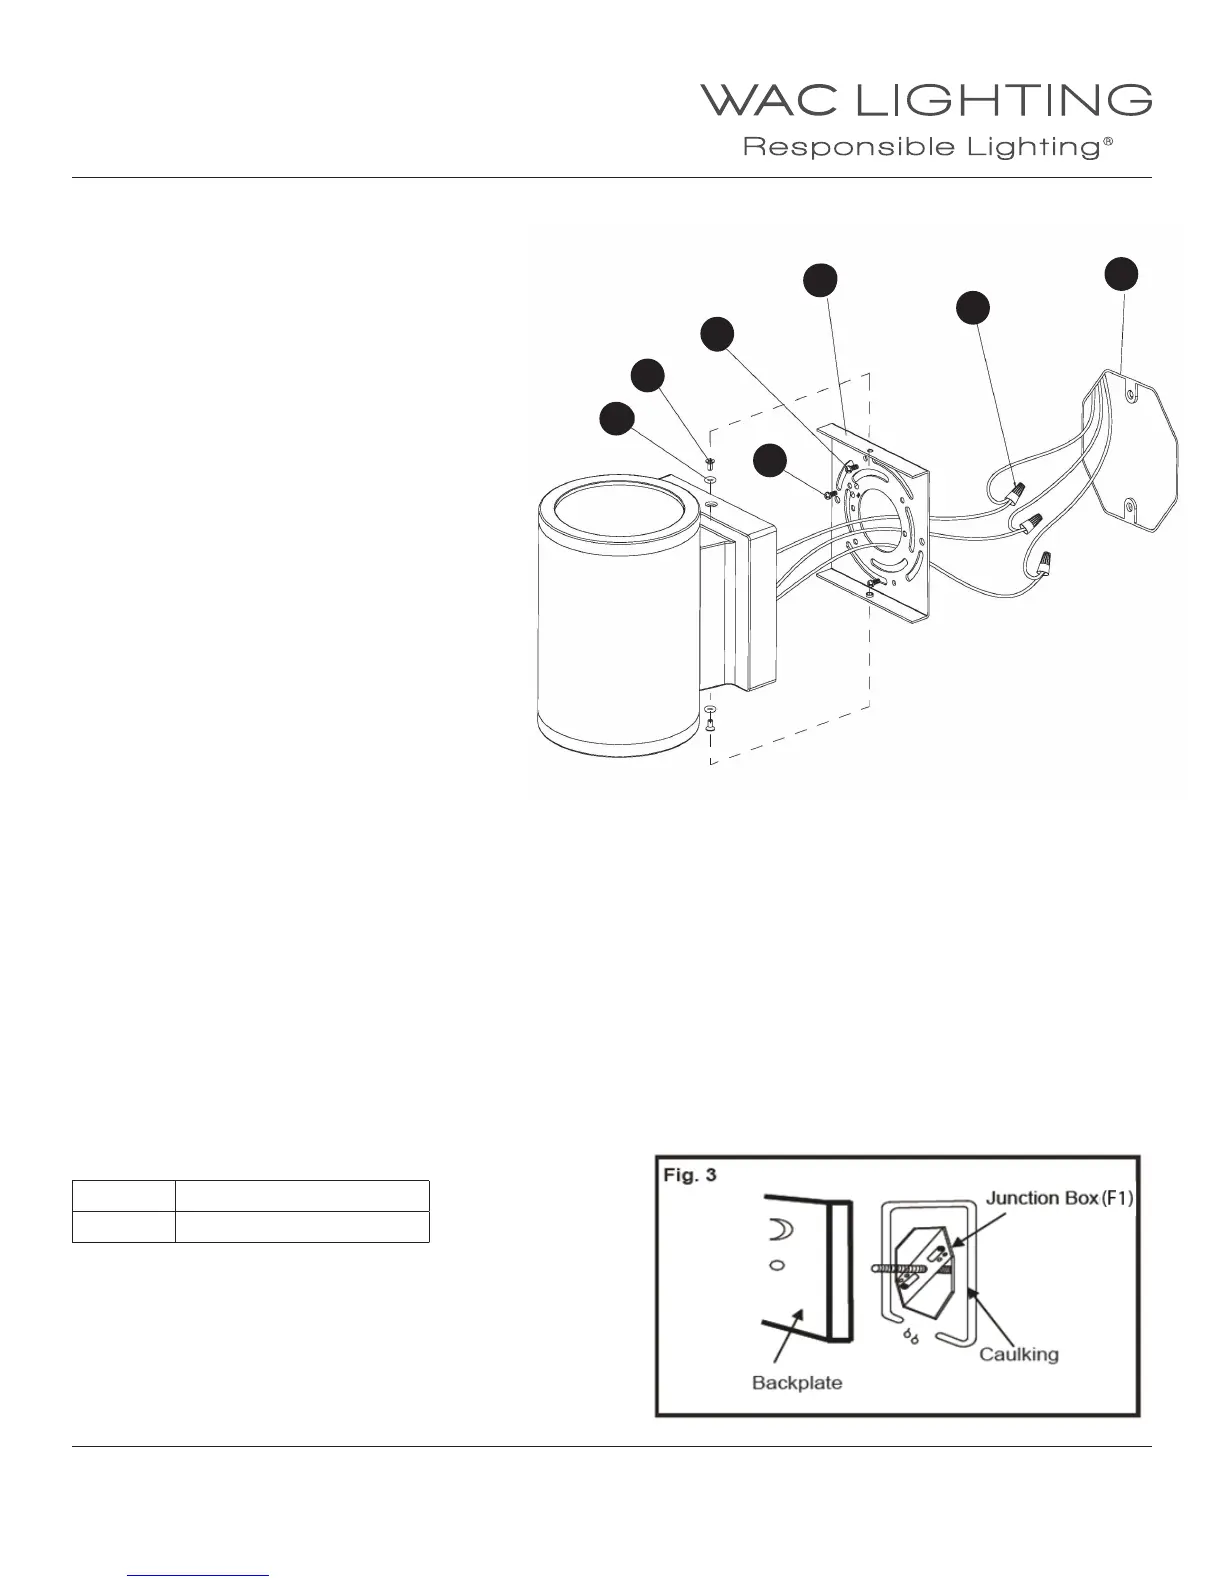
MOUNTING THE FIXTURE (Fig. 1)
3. Secure the mounting plate(C1) to the junction box
(A1) using junction Box screws (D1).The side of the
mounting plate marked “GND”(C1) must face out.
CONNECTING THE WIRES (Fig. 2)
4. Connect the electrical wires as shown in Fig. 2,
making sure that all wire connectors (B1) are
secured. If your outlet box has a green or bare
copper ground wire, connect the xture’s ground
wire to it. Otherwise, connect the xture’s ground
wire directly to the mounting plate (C1) using the
green screw (E1) provided. After wires are connected,
tuck them carefully inside the junction box.
5. This xture may be dimmed with an electronic
low voltage dimmer switch or a 0-10V dimmer switch,
if necessary, connect the brown (BR or +) / blue (BL or -)
wires of driver to the 0-10V dimmer switch (not provided).
6. Place the xture over the mounting plate (C1) and
secure with screws (F1) and gasket (G1).
COMPLETING THE INSTALLATION (Fig. 3)
7. To prevent moisture from entering the outlet box and
causing a short, use clear caulking (i.e. indoor/outdoor
silicone sealant) to outline the outside of xture back plate
where it meets the wall leaving a space at bottom to allow
moisture a means to escape (Fig.3).
100%10% DIMMING
COMPATIBLE WITH THE FOLLOWING ELECTRONIC
LOW VOLTAGE ELV DIMMERS
Lutron DVELV-300P, SELV-300P
Leviton VPE04, IPE04
B1
A1
C1
D1
F1
G1
E1


 To Next Page
 Loading...