48
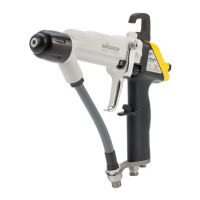
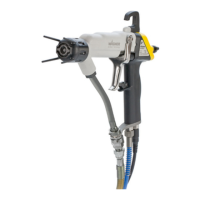
GM 4700AC
5
2
3
4
18
19
10
10
11
12
34
50
51
53
52
20
21
B
A
22
B_02388
OPERATING MANUAL
VERSION 06/2014 ORDER NUMBER DOC2311730
10.4 REPLACING PARTS ON THE VALVE ROD
1. Relieve pressure from the gun and from the device in accordance with
Chapter 7.3.3.
2. Clean and decommission in accordance with Chapter 8.1.3.
3. Secure the gun with the locking device.
4. Unscrew the spring cap (5) using a size 15 mm; 0.59 inch socket wrench and
remove the pressure springs (2) and (3).
5. Loosen the screw (22) and remove together with the nut (20).
6. Remove the trigger guard (21).
7. Loosen the sealing screw (10) using a size 7 mm; 0.28 inch single open-end wrench.
8. Carefully pull the valve rod unit (B), together with sealing screw (10), rearwards out
of the gun housing (A).
9. Hold the clamping sleeve (4) with a size 6 mm; 0.24 inch open-end wrench and
loosen collet chuck (18) with a size 5 mm; 0.20 inch open-end wrench.
10. Carefully pull valve rod (34) out forwards. Replace relevant parts.
10.4.1 DISASSEMBLING
NOTICE
Unsuitable tool!
Damage to seals and sealing surfaces
Do not hold the valve rod with pliers or a similar tool.

 Loading...