2. After blade is aligned, tighten screws.
3. Turn clipper switch ON and OFF a couple of times, and then
recheck alignment of blades.
LITHIUM-ION BATTERY REPLACEMENT,
CLIPPER DISPOSAL AND RECYCLING
• This unit uses a Lithium-Ion battery. For battery replacement
send the entire, intact unit to:
Wahl Service Center
3001 North Locust Street
Sterling, IL 61081
• Do not attempt to remove the battery. Lithium-Ion batteries can
explode, catch fire, and/or cause burns if disassembled,
damaged, or exposed to water or high temperatures.
• If you choose not to send the appliance in for battery
replacement, the entire intact unit must be disposed. Do not
attempt to remove the battery for disposal. Lithium-Ion batteries
may be subject to local disposal regulations. Many locations
prohibit disposal in standard waste receptacles. Check your local
laws and regulations.
• For recycling contact a government recycling agency, waste
disposal service, retailer, or visit online recycling sources, such as
www.batteryrecycling.com or www.rbrc.org.
Para Productos Marcados
con Aprobación de la FCC:
1. Este dispositivo cumple con la parte 15 de las Reglas de la FCC. Su
operación está sujeta a las dos condiciones siguientes: (1) Este
dispositivo no puede causar interferencia nociva, y (2) este
dispositivo debe aceptar cualquier interferencia recibida, incluyendo
la interferencia que pueda causar una operación indeseada.
2. Los cambios y modificaciones que no sean aprobados
explícitamente por la parte responsable del cumplimiento podrían
anular la autorización del usuario para usar este dispositivo.
3. NOTA: Este equipo ha sido probado y se ha determinado que
cumple con los límites de un dispositivo digital de Clase B, en los
términos de la parte 15 de las Reglas de la FCC. Estos límites están
diseñados para brindar una protección razonable contra la
interferencia nociva en una instalación residencial. Este equipo
genera, utiliza y puede emitir energía de radiofrecuencia y, de no
instalarse y usarse de acuerdo con las instrucciones, puede causar
interferencia nociva a las radiocomunicaciones. Sin embargo, no
hay garantía de que no ocurrirá interferencia en una instalación en
particular. Si este equipo causa interferencia nociva a la recepción
de radio o televisión, lo que puede determinarse al encender y
apagar el equipo, se invita al usuario a tratar de corregir la
interferencia tomando una o más de las siguientes medidas:
– Reorientar o reubicar la antena de recepción.
– Aumentar la separación entre el equipo y el receptor.
– Conectar el equipo a un tomacorriente que esté en un circuito
diferente a aquel en el que está conectado el receptor.
– Consultar a su distribuidor o a un técnico experimentado de
radio y televisión.
For Products Marked
with an FCC Approval:
1. This device complies with part 15 of the FCC Rules. Operation is
subject to the following two conditions: (1) This device may not
cause harmful interference, and (2) this device must accept any
interference received, including interference that may cause
undesired operation.
2. Changes or modifications not expressly approved by the party
responsible for compliance could void the user’s authority to
operate this device.
3. NOTE: This equipment has been tested and found to comply with
the limits for a Class B digital device, pursuant to part 15 of the FCC
Rules. These limits are designed to provide reasonable protection
against harmful interference in a residential installation. This
equipment generates, uses, and can radiate radio frequency energy
and, if not installed and used in accordance with the instructions,
may cause harmful interference to radio communications.
However, there is no guarantee that interference will not occur in a
particular installation. If this equipment does cause harmful
interference to radio or television reception, which can be
determined by turning the equipment off and on, the user is
encouraged to try to correct the interference by one or more of the
following measures:
– Reorient or relocate the receiving antenna.
– Increase the separation between the equipment and receiver.
– Connect the equipment into an outlet on a circuit different
from that to which the receiver is connected.
– Consult the dealer or an experienced radio/TV technician for help.
TROUBLESHOOTING
If your cord/cordless clipper does not seem to be operating or
charging properly, please check the following:
• Check the outlet’s current by plugging another appliance (one
you know is in proper working condition) into the outlet.
• Make sure the unit is not connected to a power source that turns
itself off when lights are turned off.
• Make sure the unit and power cord contacts are clean and free of
hair or other contaminants.
• Verify that the blade assembly moves freely and is mounted properly.
• Unit’s LED will flash quickly 5 times when excessive blade load
has been detected. If this is detected, the unit will lock out and
not power on. Switch off the unit. Inspect the blade set for any
foreign objects or debris. Clean unit if anything is detected, oil
the blades, and plug power cord into the unit to reset the lock
out state. Switch on the unit. If the unit continues to flash 5
times and won’t reset after following these instructions, contact
Wahl Service Center. If flashing stops after resetting the clipper,
disconnect cord to resume cordless operation.
If you still encounter problems with your unit, send your unit and
recharging transformer to Wahl Clipper Corporation with a note
explaining the problem.
Wahl Clipper Corporation offers a limited warranty on this product.
Please visit our website for full warranty terms.
For servicing, please ship your product prepaid to:
Wahl Service Center
3001 North Locust Street
Sterling, IL 61081
TECHNICAL SUPPORT AND QUESTIONS
Phone: 1-800-776-9245
Email: techsupport@wahlclipper.com
Website: www.wahlpro.com
Wahl Clipper Corporation offers a limited warranty on this product.
Please visit our website for full warranty terms.
© WAHL CLIPPER CORPORATION
Sterling, IL USA
FORM #92566-402 Printed in USA
For servicing, please ship your product prepaid to:
Wahl Service Center
3001 North Locust Street
Sterling, IL 61081
FIND US ON SOCIAL MEDIA
CORD CARE
The cord should never be used to pull the clipper. Freedom of
movement needs to be maintained. Care should be used to keep the
cord untwisted, and undamaged. When stored, the cord should be
coiled and placed neatly in a dry place.
ALIGNING 2 HOLE BLADES
Slightly loosen both blade screws at
base of stationary blade,
just enough to be able to shift the
blade. Move blade adjustment lever
to the full forward position. With
the blade screws loosened, the
bottom blade can be aligned with
the top blade.
1. Points of the top blade teeth should be 1/32” to 1/16”
(.79mm to 1.59mm) back and parallel to the points of the
bottom blade teeth. This is important so the clipper doesn’t cut
too close or allow the moving top blade to touch the skin.
2. After blade is aligned, tighten screws.
3. Turn clipper switch ON and OFF a couple of times, and then
recheck alignment of blades.
ALIGNING 3 HOLE BLADES
Slightly loosen the three blade
screws of the stationary blade,
just enough to be able to shift the
blade. Move blade adjustment lever
to the full forward position. With
the blade screws loosened, the
bottom blade can be aligned with
the top blade.
1. Points of the top blade teeth should be 1/32” to 1/16”
(.79mm to 1.59mm) back and parallel to the points of bottom
blade teeth. This is important so the clipper doesn’t cut too close
or allow the moving top blade to touch the skin.
CLIPPER USE
USING CORD/CORDLESS CLIPPERS
If battery power is low, the power cord can attach directly to the unit
for continued use as a corded unit.
CORDED OPERATION
• Attach power cord plug into
clipper first, then to outlet. If
your battery is completely run
down, allow the unit to charge
for 1 minute (switched OFF)
before using as a corded unit.
(Figure 1)
• If the cord is left attached to the
clipper when not in use, the
cord will automatically charge
the clipper when left in the
OFF position.
RECHARGING OPTIONS
• For units without a recharge
stand, attach power cord plug
into clipper first, then to outlet.
Be sure clipper is switched OFF
when charging. (Figure 1)
• For units with a recharge
stand, place clipper in recharge
stand so nameplate faces
forward. (Figure 2) Attach
power cord plug into recharge
stand first, then to outlet.
(Figure 3) (Not all units have a
recharge stand.)
CLIPPER CARE
BLADE CARE AND OILING
In order to ensure that you get the most life and performance out of
the clipper, we recommend oiling daily. To oil it properly, the clipper
should be held so the blades are in a downward position as shown.
Place one drop of Wahl oil in the center of the movable top blade
and one drop of oil on each end of the top blade. Turn clipper switch
ON and run to distribute the oil. When oil is evenly distributed, turn
clipper OFF and wipe off excess oil with a soft cloth. Periodically oil
heel of blade (shown in image) to reduce blade friction.
(USE WAHL OIL ONLY)
WIPE OFF EXCESS OIL so it does not run into the motor compartment.
Oil in the motor compartment will eventually lead to poor motor performance.
Blades should be oiled after using disinfectant or sanitizing solution.
DO NOT DIP OR SOAK the clipper or blades in any type of
cleaning solution, disinfectant or oil. Excess liquid can
deteriorate the unit’s plastic components and seep into the motor
compartment affecting motor life and performance. For proper care,
follow the instructions under Clipper Care.
UNIT CARE
Use a clean cloth (dry or dampened with water).
DO NOT USE bleach, benzene or thinner to clean the unit.
CHARGING THE BATTERY
Before the equipment is used for the first time, it should be charged 2 hours.
For recharging information, refer to Clipper Use Recharging Options.
Recommendation: The batteries should only be recharged when
the performance of the equipment has deteriorated noticeably.
BATTERY OPERATION
Switch ON the unit using the ON/OFF switch and, after use, switch it
OFF again. When the battery is fully charged, the unit can be used for
up to 100 minutes.
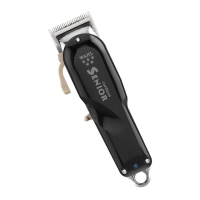
(Exception: Cordless Senior run time is up to 80 minutes.)
LED INDICATOR
• Solid: LED will be fully lit in use or when the battery has reached
full charge.
• Flashing: The battery has approximately 20% charge remaining.
• Pulse: While charging, LED will pulse until battery is fully charged.
The LED will change to solid when the battery has a full charge.
TAPER LEVER
Some clippers are equipped with an
adjustable taper lever that changes
the closeness of your cut. When the
lever is in the uppermost position,
the blades will give the closest cut.
Pushing the lever downward gradually
increases the cutting length.
Cord/Cordless Lithium-Ion Clipper
Model No. 8504L1, 8591L1
Operating Manual
Manual De Operación
Manual D’Utilisation
Includes But Not Limited To:
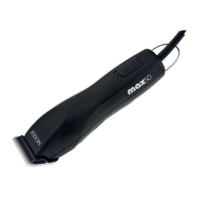
Cord/Cordless Designer
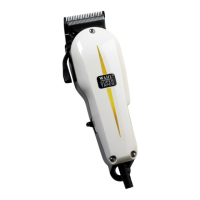
Cord/Cordless Magic Clip
Cord/Cordless Senior
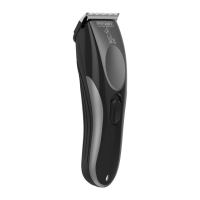
Cord/Cordless Sterling 4
IMPORTANT
SAFEGUARDS
When using your electrical appliance, basic precautions should always
be followed, including the following:
READ ALL INSTRUCTIONS AND SAFEGUARDS
BEFORE USING THIS APPLIANCE.
DANGER
To reduce the risk of death or injury by electric shock:
1. Do not reach for an appliance that has fallen into water. Unplug
immediately from the outlet. Note: Some electrical parts inside the
appliance are electrically live, even with the switch “OFF.”
2. Do not use while bathing or in a shower.
3. Do not place or store appliance where it can fall or be pulled into a
tub or sink. Do not place in or drop into water or other liquid.
4. Always unplug this appliance before cleaning.
5. Except when charging, always unplug this appliance from the
electrical outlet immediately after using.
WARNING
To reduce the risk of burns, electrical shock or injury to persons:
1. This appliance can be used by children aged from 14 years and
above and persons with reduced physical, sensory or mental
capabilities or lack of experience and knowledge if they have been
given supervision or instruction, by a person responsible for their
safety, concerning the use of the appliance in a safe way and
understand the hazards involved. Children should be supervised to
ensure that they do not play with the appliance. Cleaning and user
maintenance shall not be made by children without supervision.
2. Use this appliance only for its intended use as described in this manual.
Do not use attachments not recommended by the manufacturer.
3. Never operate this appliance if it has a damaged cord or plug, if it is
not working properly, if it has been dropped or damaged, or if it
has been dropped into water. Return the appliance to Wahl Clipper
Corporation for examination and repair.
4. Keep the cord away from heated surfaces.
5. Never operate the appliance with the air openings blocked or while
on a soft combustible surface, such as a bed or couch, where air
openings may be blocked. Keep the air openings (if any) free from
lint, hair or the like.
6. Do not use outdoors or operate where aerosol (spray) products are
being used or where oxygen is being administered.
7. Never drop or insert any object into any opening.
8. Do not use this appliance with a damaged or broken comb nor with
teeth missing from the blades, as injury may occur. Before use,
make certain blades are aligned properly. (See Clipper or Trimmer
Care Instructions. May not be applicable for all appliances.)
9. During use, do not place or leave the appliance where it is expected
to be subject to damage by an animal, or exposed to weather.
10. To disconnect, turn all controls to “OFF,” then remove plug or
charger from outlet.
11. Turn all controls to “OFF” before placing on or removing blades or
attachments.
12. An appliance with a permanently attached cord should never be
left unattended when plugged in.
13. Keep this appliance dry.
For an appliance that has a rechargeable battery:
14. Do not crush, disassemble, heat above 100°C (212°F), or incinerate
the appliance, due to risk of fire, explosion, or burns.
15. Use only the charger supplied by the manufacturer to recharge.
16. This charger is intended to be correctly orientated in a vertical or
floor mount position.
17. Always attach plug to appliance first, then to outlet.
18. Use charge stand with Wahl products and power supplies only.
SAVE THESE
INSTRUCTIONS
THIS APPLIANCE IS FOR COMMERCIAL USE ONLY
92566-402.indd 192566-402.indd 1 9/2/20 10:58 AM9/2/20 10:58 AM