Each time clipper is used:
1. Clean the clipper blade set by brushing hair clippings and debris from the blades and carriage with the sti brush provided.
2. Sanitize clipper blade set with Wahl disinfectant. (Follow directions on disinfectant label)3. Oil the clipper blade set: Place
one drop of clipper oil in the center of the movable top blade and one drop of oil on each end of the top blade. Next, add one
drop of oil to the heel of the stationary bottom blade on each side. (See diagram)
Turn clipper on and run to distribute the oil. When oil is evenly distributed, turn clipper o and wipe o excess oil with a soft cloth.
3. Oil the clipper blade set: Place one drop of clipper oil in the center of the movable top blade and one drop of oil on each end of
the top blade. Next, add one drop of oil to the heel of the stationary bottom blade on each side. (See diagram)
Turn clipper on and run to distribute the oil. When oil is evenly distributed, turn clipper o and wipe o excess oil with a soft cloth.
For service or questions about your clipper contact:
Wahl Clipper Corporation
3001 N. Locust Street, Sterling, IL 61081
Attention: Repair Department
email: wahlproservice@wahlclipper.com
Clipper doesn’t start:
1. Check to see if clipper is plugged in.
2. Replace power cord if frayed, cracked, or damaged
3. If clipper is plugged in and cord is in good condition, check
the switch by turning on and o
Motor runs, but blade isn’t moving or sticks:
1. Clean blade set and oil
2. Replace blade set if blade teeth are broken
3. Adjust power screw to retune the clipper
Clipper making loud noise:
1. Adjust power screw to retune the clipper
Clipper pulls hair:
1. Dirty or dry blades, clean blades and oil
2. Blades are dull - replace blades
3. Check blade alignment
Blade nicks or cuts:
1. Check blade alignment
2. Replace blade set if blade teeth are chipped or broken
TROUBLE SHOOTING
Aligning 3-hole blades:
Slightly loosen the three blade screws of the stationary blade, just enough to be able to shift the blade. Move blade
adjustment lever to the full forward position. With the blade screws loosened, the bottom blade can be aligned with the top
blade.
1. Points of the top blade teeth should be 1/32” to 1/16” (.79mm to 1.59mm) back and parallel to the points of bottom blade
teeth. This is important so the clipper doesn’t cut too close or allow the moving top blade to touch the skin. (see blade alignment diagram)
2. Extreme left hand tooth of top blade must be on the rst small tooth of bottom blade. (see blade alignment diagram)
3. After blade is aligned, tighten screws.
4. Plug clipper in, turn switch on and o a couple of times, and then recheck alignment of blades.
Aligning 2-hole blades:
Slightly loosen both blade screws at base of stationary blade, just enough to be able to shift the blade. Move blade
adjustment lever to the full forward position. With the blade screws loosened, the bottom blade can be aligned with
the top blade.
1. Points of the top blade teeth should be 1/32” to 1/16” (.79mm to 1.59mm) back and parallel to the points of the
bottom blade teeth. This is important so the clipper doesn’t cut too close or allow the moving top blade to touch the
skin. (see blade alignment diagram)
2. Extreme left hand tooth of top blade must be on the rst small tooth of bottom blade. (see blade alignment diagram)
3. After blade is aligned, tighten screws.
4. Plug clipper in, turn switch on and o a couple of times, and then recheck alignment of blades.
Replacing 2-hole blades:
On adjustable clippers, move blade adjustment lever to full forward position. Position the small top blade over the clipper drive
nger. Set large bottom blade on top of small top blade and partially tighten blade screws. With the blade screws partially
tightened, the bottom blade can be aligned with the top blade.
1. Points of the top blade teeth should be 1/32” to 1/16” (.79mm to 1.59mm) back and parallel to the points of the bottom blade
teeth. This is important so the clipper doesn’t cut too close or allow the moving top blade to touch the skin.
(see blade alignment diagram)
2. Extreme left hand tooth of top blade must be on the rst small tooth of bottom blade. (see blade alignment diagram)
3. After blade is aligned, tighten screws.
4. Plug clipper in, turn switch on and o a couple of times, and then recheck alignment of blades.
Replacing 3-hole blades:
On adjustable clippers, move blade adjustment lever to full forward position. Loosen and remove the center screw only. Outside screws
hold bushings in place and maintain alignment. Position the small top blade over the clipper drive nger. Place large bottom blade on
top of small top blade, tting down over the bushings on either side. Replace and partially tighten center screw.
1. Points of the top blade teeth should be 1/32” to 1/16” (.79mm to 1.59mm) back and parallel to the points of the bottom blade teeth.
This is important so the clipper doesn’t cut too close or allow the moving top blade to touch the skin. (see blade alignment diagram)
2. Extreme left hand tooth of top blade must be on the rst small tooth of bottom blade. (see blade alignment diagram)
3. After blade is aligned, tighten screws.
4. Plug clipper in, turn switch on and o a couple of times, and then recheck alignment of blades.
diagram a
Maximizing power to the blades:
To adjust power, turn power screw in clockwise direction
until clipper makes a noise caused by the arm hitting the
coil. Then, slowly turn power screw out (counter-clockwise)
just until noise stops then continue turning 1/8 to 1/4 of a
turn more, this is maximum power.
WAHL
PROFESSIONAL
APP
For Iphone, Ipad & Android
devices.
When to replace blades:
The following conditions require immediate replacement of blades:
- dull blades (will pull hair)
- rusty blades (causes sticking)
- broken or bent teeth on either blade (always replace both)
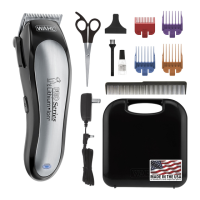
Blades should always be replaced in blade sets. A blade set consists of one movable top blade and one stationary bottom blade. Keep at least one set of blades for
each type of working clipper in your shop.
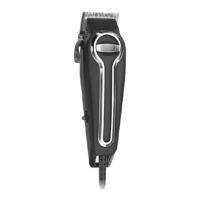
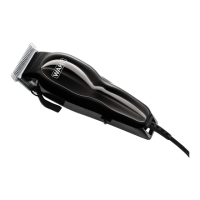
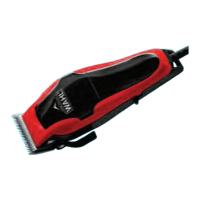
CLIPPER LID
HANGING LOOP
(used for storing)
POWER CORD
ON/OFF SWITCH
BLADE
ADJUSTMENT LEVER
(shown in down position giving
blade longest cutting length)
BLADE SCREWS
STATIONARY
BOTTOM BLADE
MOVABLE TOP
BLADE
CLIPPER BLADE SET
CLIPPER
DRIVE
FINGER
POWER ADJUSTMENT SCREW
(see diagram a)
CLIPPER CASE
Form # 93069